


Galina Kovaleva
Good evening! We want to show you master class on crafts from cotton swabs"Autumn flower". Autumn- it's a great time. Leaf fall, Indian summer. There is probably no such person who would not like all this. The trees stand as if in multi-colored sundresses, and the flower beds are decorated multi-colored chrysanthemums. Summer the flowers have faded, and they only bloom. Chrysanthemum is the queen autumn. People call chrysanthemums oak trees because their leaves look like oak leaves. But autumn doesn't last forever. And we decided for ourselves make these wonderful flowers, and decorate our group with them.
To do our job we will be needed:colored paper, PVA glue, scissors, plasticine, cotton swabs,kebab sticks.

We are making preparations for our future chrysanthemum. Trimming the ends cotton swabs-they will be our petals.

We used a plasticine ball as a base. (you can also use a foam ball). We insert the trimmed ones into the base cotton swabs. We start from the middle and gradually move to the bottom.

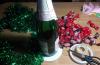
Let's take it kebab stick, it will be a stem for our chrysanthemum. We paint it with green paint and give it time to dry.

We plant our flower for our stem.

But to our flower There are not enough leaves. This is easy to fix. Let's start preparing them. Green stripe color We cut the papers into squares, fold them diagonally in half and cut them in the shape of oak leaves.

We glue the leaves onto our stem. That's all. Our the craft is ready

We will be very glad if you like our chrysanthemum.
Publications on the topic:
Goal: development of artistic and creative abilities in children, fosters patience, perseverance and imagination in children. Develop feeling.
International Women's Day is approaching, March 8th. According to the scenario of our matinee, children should give their mothers a flower. We decided to make one.
Bouquet for your beloved mother. Before starting work, show the children several different types of flowers made from different materials. Suggest making it from cotton wool.
Good evening, dear colleagues! On the eve of the spring holidays, I wanted to do something interesting and spring-like in a group with my children. Group.
Master class "Autumn tree" Chic autumn craft FROM COTTON PADS. For work you will need: cotton pads, yellow, orange, green.
As part of the “Russian Folk Culture” project, our group organizes various games, activities, and conversations in which children learn a lot of new things.
Hello friends and colleagues! Today I want to bring to your attention a master class on making crafts from cotton pads “Funny Chickens”.
One of the beneficial materials for hand made work is cotton pads. They absorb paint well, flowers made from them fit perfectly into bouquets that will adequately decorate any postcard.


Crafts made from cotton pads made by the hands of children are especially valuable. An elementary example is the caterpillar, a cheerful, positive character in cartoons and children's books. This is a simple applique that uses different colored components.

You can create entire flower fields from cosmetic cotton pads. One such composition combines both artistic and applied creativity. In addition to cotton pads, you will need a minimum of materials: an A3 sheet, colored paper, glue and paints.
- First, we draw the background (you can simply paint the sheet with blue or blue paint, or you can depict additional elements on it - the sun, stars, etc.)
- Glue the cotton pad together as shown in Figure 2-4.
- We cut out additional elements from paper (stems, leaves, grass).
- All that remains is to arrange our flowers beautifully on a piece of paper.
Another option for applied creativity is eclectic flowers made from cotton pads. In this case, you don’t even need paper, just paints and glue. The step-by-step process of creating such beauty is depicted in Figure 2-5. To ensure that the paints fall in neat droplets, use a pipette.
Crafts from cotton swabs
If you have faded decorative flowers lying around at home, you can give them a second wind with the help of cotton swabs. Flowers made like this will look much more original than dull fabric inflorescences. We will need:
- a set of cotton swabs;
- gouache;
- stems from old decorative flowers;
- superglue.
Take 10-15 cotton swabs (the more there are, the more voluminous the inflorescence will be) and cut in half. Place all the halves with the cotton sides facing up and fold them into a flower shape. Thoroughly coat the place where the stem is attached to the inflorescence with glue and attach our flower to it. Once the glue has dried, you can paint our crafts made from cotton swabs in any color by simply dipping them into the paint.

Another way to make flowers from cotton swabs is to use polystyrene foam balls, which can be purchased at any craft store. The working mechanism is similar: cut cotton swabs in half, stick them into a polystyrene foam ball to make a flower like a dandelion, and dip the ends of the sticks in paint. Twisted wire can be used as stems.
Using the same principle, you can make other crafts from cotton swabs: hedgehogs, the same snowmen, etc.
Flower arrangement
For an older child, a master class on making a flower arrangement, for example, in the form of a bouquet in a basket or in the form of a topiary (this is the word used today for original small trees made by hand) will be interesting. It is always fashionable to give such a gift to your mother on March 8 or her birthday.

For production you will need:
- cotton pads (the quantity depends on the size of the composition);
- needle;
- beads;
- packaging box for cotton pads;
- polyurethane foam;
- glue;
- a piece of green silk or lining fabric for leaves;
- stapler
We roll up the cotton pads and secure them into buds, as shown. We put the finished flowers aside and make leaves. They will be located around the perimeter of the vase and will serve as a living pillow for delicate and fragile flowers. The folding sequence for the leaf fabric is shown below.
We fill a jar from under discs (you can use any other one, for example, from under ear sticks) with foam and let it dry. Level the surface of the foam with a knife - make it flush with the edge of the can.

The jar itself can be painted in your favorite colors or decorated using decoupage.
We begin gluing flowers from cotton pads and leaves to the surface of the foam.
The work is ready. Flowers can be made in the form of calla lilies. Then the disks do not need to be completely rolled up, but can be fastened using staples and a stapler.
How to make a bouquet of roses - watch the video.
DIY crafts made from cotton pads can also be timed to coincide with such favorite holidays as New Year and Christmas. Cute airy angels, smoothly descending on threads of rain along the entire perimeter of the decorated room - just such an option. You can use them as Christmas tree decorations, garlands, or simply additions to New Year's gifts.
The manufacturing steps are shown below. By following the basic rules of this simple master class, you can quickly and at minimal cost make your living room intriguing, and the atmosphere of the nursery soft and romantic. Making angels begins with the design of the head and its smooth transition to the body - the dress.


At the end of the work, the head can be decorated with a wreath made of yellow-gold braid, wire, or painted with paint.
New Year's wreath
We have already figured out how to make flowers from cotton pads. Next in line is a chic souvenir, similar in manufacturing method to a flower, but a little more complicated - a floral Christmas wreath. These are often hung on entrance or interior doors, placed above the doorway or on the gate. True, such decoration is more homely, since it will not withstand precipitation and fluctuations in air temperature.

Assembling the wreath step by step is not difficult, but it must be done carefully and slowly. The same disks bent into four sectors are used as blanks. The corner at the base is chopped off and attached to the main ring. The parts need to be fastened as close to each other as possible. This will create an effect of softness, fullness, and artistic exoticism.
Regarding the mounting plane, it must be remembered that only the front half of the ring should be filled with artificial flowers. The back should be left flat and smooth, since it needs to be in contact with the wall or other surface on which the wreath will be placed.
Once the wreath is ready, we proceed to the loop for fastening. Its appearance should not spoil the impression of the entire product. Therefore, a silk ribbon, folded into a loop and neatly attached to the back of the ring, is ideal.

The general appearance of the finished product is shown in picture 26, it is very delicate, stylish and soft. An angel will be placed inside a wreath of blooming roses. The similarity of the materials used for crafts will give the souvenir the character of a single composition.
Lamb
When working with a younger child, you can invite him to fantasize, imagine which animal or plant has similar circles in its body. Surely it will be:
- panda;
- owl;
- chicken with chicken after painting the rims yellow;
- monkey;
- sunflower.
An interesting craft for a lamb or ewe. For those who are not lazy, it will not be difficult to make a whole herd, decorating them with multi-colored toy accessories. The step-by-step instructions are as follows:

Let's prepare:
- pieces of felt;
- threads;
- stapler;
- cotton pads;
- scissors;
- glue;
- twine.

If you don't have colored felt, you can use a special fabric dye.
We start by folding the disk in four and securing the resulting shape with staples. We sew each received element and put them tightly on a silk cord.
To complete the work, we give the lace with strung disks the appearance of a ball. The first stage of work is completed.


All that's left to do is a simple design of the face. For this, the same pieces of felt are used, cut to the shape and size of the intended animal. Here you can play with colors and use materials of the most unexpected colors, the result will be more fun.

If the idea was to make a lamb step by step, we supplement its head with horns made of wire; if it was a sheep, there is no need for them.

Having attached the horns to the head, for example, with plasticine, and also embroidered the eyes and nose with threads or beads, we finish the work. The result is a skillfully executed, handmade toy that will look original on a branch of a Christmas tree, for example.


The figure of a chicken from yellow disks will be obtained by gluing two circles (one slightly larger than the other), depicting the head and torso. The eyes are black beads, the beak is a red triangle.
Christmas card
A holiday card featuring a cheerful snowman is super easy to make! All you need is a sheet of colored paper (preferably blue), cotton pads, glue and markers. Take the largest diameter discs, as they will have to be shortened.
- Cut out the “body” of the snowman. We only need three discs, two of which need to be shortened to make the snowman look more natural.
- Glue the disks to the paper (Figure 2).
- We “revive” the snowman by drawing his face, arms, headdress, etc. It is more convenient to draw on cotton pads with felt-tip pens, although you can also use watercolors or gouache.

You can add some zest to the craft with the help of additional details - nail polish, ribbons, etc. Let your child use his imagination. There is no doubt: the “Snowman” leaflet that the kid created is much nicer to receive than the most expensive New Year’s cards.
Snowman made from paper plates
We offer you a simple and interesting type of home decor for the New Year holidays. The materials are the same cotton balls and paper picnic plates of different sizes. This decor can be used to decorate walls, the front door, or make a separate panel.
- Lay out a snowman from three paper plates, securing them with thin strips of tape (if you are making the composition in the form of a panel, you can use glue).
- Glue cotton balls to the plates, giving the snowman volume.
- From paper or other available materials, make eyes, a nose, and a headdress for the New Year's hero.

Cheerful little penguin
Another idea that even a child can implement. To simplify the work, we have prepared a template that needs to be printed on paper. However, you can use any other penguin drawing you like, or draw it yourself. The principle of making crafts is the same in any case.
We need:
- printed template;
- cosmetic cotton balls;
- PVA glue;
- scissors;
- scraps of black and orange cardboard.
To get started, download and print the drawing template. Then cover the entire white area with glue and gently place the cotton balls on it, being careful not to go too far beyond the borders. Then cut out the penguin's eyes and beak from cardboard and complete the craft.
Any New Year's characters (snowman, Santa Claus, Snow Maiden) are created in a similar way. The main thing is to find a quality template.
Whether it is souvenirs made only from cotton pads, or crafts from cotton swabs, they carry a charge of positive energy, develop thinking, and contribute to the development of a child’s horizons. Let there be more of them. Let them unite children and make their inner world wider, brighter, more fun.
For most people, cotton pads and ear buds are just hygiene items for cosmetic care. But not everyone realizes that if you use your imagination, you can use these improvised creative materials to create original crafts that you can use to decorate your interior or give as a gift to loved ones. Let's see what you can make from cotton swabs and disks with your own hands.
Original ideas
DIY crafts made from cotton pads are so easy to make that even kindergarten-aged children can make them. These can be applications, panels, flowers, animals or New Year's toys.
Creating flowers
To create a rose, you need to do the following:

That's all, the rose is ready.
To make a voluminous dandelion You need to stock up on the following materials:

First of all, you need to cut all the sticks with cotton into two parts. Then each piece needs to be inserted into a foam ball so that the area with the cotton wool is on the outside. Do similar actions with all ear sticks. Then dilute the paint in a small amount of water and immerse a dandelion made from cotton swabs in it.
To protect your hands from paint, you can use rubber gloves. The stem can be made from a wooden stick or skewer, pre-painted green, or from wire wrapped with green floral tape. Such crafts made from cotton swabs can be used to decorate your home interior or brought to children's craft competitions.
The floral ball can be replaced with a round piece of plasticine. But then the halves of the ear sticks must be painted in advance, and only then stuck into a plasticine ball.
Paintings and postcards
Using cotton swabs, you can bring ideas for paintings to life.
Required for work:

First you need to glue green paper to a sheet of cardboard, and to depict the sky on blue, then cut it out and glue it to the top of the picture. Then cut out a house from brown paper. To make the building look like logs, use hygienic ear sticks. At the location of the walls, glue them horizontally, and at the top repeat the outline of the roof. All that remains is to glue the windows - and the original house painting is ready.
But the work is not over yet. Place two cotton swabs together, two more need to be cut in half - they will be used as the man’s hands. Now you need to attach the parts to each other using yarn, while simultaneously decorating the upper part of the body in the form of a sweater, and the lower part in the form of a skirt. Wrap a little cotton wool around the tops of two sticks to add volume to the face. Use brown yarn for hair. Shape the glued strands of thread in the shape of a tree, and use yellow ones for the sun. All that remains is to glue the men from cotton swabs and decorate the work with beads. The three-dimensional painting is ready.
To create an applique of swans with your own hands you need to prepare:
- Blue cardboard;
- White, green, brown, blue, yellow paper;
- Red and black paint;
- Cosmetic discs.
 You also need scissors. They are used to cut out the swan's head and neck and wings from the disks at the same time. If you only have white cardboard, then you need to stick a sheet of blue paper on it and dry it. The result will be colored cardboard.
Cut out the lake from paper in a contrasting color so that it stands out against the blue background. Glue it onto the cardboard, and fix the swan's body from a cotton pad on top. Glue the wings and head along with the neck to it. Cut out reeds from brown paper, and leaves and stems from green paper. Attach them to the picture and the sun to the sky. The waves can be made from blue paper or painted with paint of the same color. Paint the eyes with black paint and the beak with red paint. That's all. The work is completed.
 You can make a wonderful card from simple cardboard and cosmetic discs, for example, to express sincere feelings for a loved one - in the shape of a heart with roses. Required materials:
- Red cardboard;
- Paper;
- Cotton pads;
- Pencil;
- Scissors;
- PVA glue.
Work progress:
Fold the paper sheet in half. Draw half a heart and cut it out. Take cardboard and trace the heart template with a pencil - on the wrong side. Divide the cotton pads into two parts. Using scissors, cut the disks in a spiral. Then twist the blanks into the shape of a rose. The number of flowers can be absolutely any. To complete the work, you need to glue the roses with glue along the edge of the heart.
Various animals
Crafts from cotton pads and sticks can be made in the shape of animals. It could be a cat, a hedgehog or a monkey. For the monkey In addition to the standard set of materials you will need:
- Plastic eyes for crafts;
- Any black pen.
Course of action.
 Paint one cotton pad with brown paint and let it dry. Then cut out the following parts: body, head, tail, muzzle, two ears and four legs. Glue all the parts onto a colored cardboard base. Then attach the eyes and draw the mouth and nose.
Thus, using ordinary cosmetic discs and cotton swabs, you can easily make original crafts in the form of panels, postcards or animals - to decorate any room. You just need to show a little imagination.
Attention, TODAY only!
From cotton swabs. They are very convenient to use for a variety of jobs.
The simplest version of crafts made from cotton swabs, which even a small child can make with their own hands, is this. To create an applique from cotton swabs, use polymer glue or PVA.
It is enough to secure the sticks on a sheet of paper in a certain way to get a beautiful picture:
simple volumetric snowflakes;

snowflakes with a glass pebble center;


or voluminous snowflakes;

a flower, the core of which is made of a ball of cotton wool, and the stem and leaf are made of chenille wire;

you can make a composition from these flowers;

or festive fireworks;

You can also turn sticks into Christmas reindeer antlers.

If you cut out a base for a snowflake from cardboard and glue cotton swabs to it, you will get a beautiful one.

It’s easy to make such a craft even more voluminous - just fix the sticks in a lump of white modeling mass or plasticine.
Using plasticine or a hardening mass for modeling, you can make others:
funny pig;


To do this, we paint the sticks in the desired color in advance. And if you want to make a snowman, then you don’t need to paint the sticks. Sprinkle this snowman with artificial snow and your craft will become even more interesting.

You can draw a bright rainbow using sticks.

Or make a cute one by gluing the heads of the sticks to cardboard blanks. Its legs will be old wooden clothespins.

And if you have two small foam balls for creativity, you can turn them into an adorable bunny. We decorate its head and body with halves of cotton swabs, and use chenille wire to create ears and paws. A pom-pom nose will add a special charm to the bunny.

Three larger foam balls make a very beautiful one. We lay out his eyes, nose and mouth with halves of sticks painted in the appropriate color.


This is how much fun you can have if you have a small package of the simplest cotton swabs at your disposal!
Volumetric applique "Winter's Tale"
Volumetric applique "Christmas tree and snowman".
For making crafts will be needed: cotton pads, blue cardboard, green gouache, PVA glue, self-adhesive beads, snowflakes, blue self-adhesive paper.
First you need to paint cotton pads with green gouache, then roll it up and secure it with glue.


From the whites cotton pads cut out snowdrifts and clouds.
We assemble a Christmas tree from green blanks.
We glue a snowman next to the tree, make a face using beads, and decorate the bucket with blue self-adhesive.
We take it for the sun disk painted with yellow gouache.
We decorate the Christmas tree with beads.
Glue snowflakes.
Craft "Volume Christmas tree made of cotton pads."
The most common type of volumetric New Year's crafts made from cotton pads is the Christmas tree. As a rule, to make them, they take a sheet of whatman paper or thick cardboard and give it the shape of a cone, securely fixing the resulting figure with glue. To make this frame more durable, you can glue a strip of tape or cardboard to its inside.
After this, each cotton pad is folded in a certain way - first in half, and then in half again, after which the resulting sector of the circle in the lower part is secured with a stapler. Such blanks are glued to the frame in a circle, moving from bottom to top and filling all existing voids with cotton pads.
This New Year tree can be decorated in various ways - using beads, bugles or beads, fir or pine cones, satin ribbons and other decorative elements. In addition, it can be covered with multi-colored sparkles and decorated with a bright iridescent star on top.


Crafts in the form of a Christmas tree made from cotton pads can also be flat. They are created using a technique that is very common among boys and girls of preschool and school age. To do this, draw the outline of the future tree on cardboard or colored paper, then fill it with quarter-fold cotton pads and securely fix them with glue.
This craft can be designed for your favorite teachers, close relatives or friends. To do this, it must be supplemented with the original text of congratulations, and, if desired, with such elements as a lock, lacing, and so on.
Unusual ideas for New Year's crafts from cotton pads.
Crafts made from cotton pads for the New Year can be very diverse. Garlands and air curtains made from this material have become quite widespread. Making them is extremely simple - all you need to do is string cotton pads onto a thread or fishing line and secure them the way you want. Such garlands look especially good on windows, as they create an imitation of snowflakes.
You can also make greeting cards from cotton pads for family and friends. In this case, they are glued onto sheets of cardboard, creating various figures, for example, a snowman. The resulting postcard is supplemented with congratulations and handed to the addressee.
"Winter City" made of cotton pads.
You will need:
- Blue cardboard - 1 sheet
- Cotton pads - about 15 pcs.
- Sequins (snowflakes) - 5-7 pcs.
- Scissors
What to do:
- Draw a tree trunk with branches on the right side of the sheet.
- Cut out windows from colored paper. Glue them.
- “Fill” the houses with snow - glue cotton pads at the bottom to make snowdrifts.
- Don't forget to glue the snow caps to the tree branches as well.
- The final touch is falling snow in the form of sequins. If you don't have them on hand, cut them out of colored paper or foil.
"Snowman in the forest" made from cotton pads.
You will need:
- Blue cardboard - 1 sheet
- Cotton pads - about 15 pcs.
- Colored paper - yellow, red, orange, blue
- Sequins (snowflakes) - 5-7 pcs.
- Scissors
What to do:
- Draw a branching tree on the right side of our base sheet.
- Glue cotton pads at the bottom of the work to create snowdrifts.
- Don't forget to glue the snow ones to the tree branches.
- Cut out the snowman's details from colored paper: scarf, hat, eyes, nose, mouth, stick hands. The mouth and hands can simply be drawn with a felt-tip pen.
- Make a snowman from two cotton wool circles. Glue body parts and clothes to it.
- Glue sequins in the shape of snowflakes - and then you will have real snow: bright and sparkling!


"Christmas toys" made from cotton pads.
Cotton pads can also be used to create unique Christmas tree decorations. To do this, they are also folded in a certain way and secured with a stapler, and then glued to a pre-prepared frame. In addition, you need to attach a ribbon or string to this decoration, with which you can hang it on the New Year tree. In this case, the frame can be made independently or you can use a suitable object for this purpose. In particular, a ping pong ball looks very original, the surface of which is filled with folded cotton pads and covered with glitter.


"Christmas wreath" made of cotton pads.
This New Year's gift wreath can also be made from cotton pads. First you need to prepare the base. This can be a large ring made of foam or rubber. If you do not have such parts available, then roll up several newspapers, gluing them to each other, and give them the desired shape. When the workpiece is dry, glue the elements from cotton pads. To make the first one, roll the disk into a ball and wrap the second and third around it. Thus, you will get a rose twisted by yourself. You can glue or sew a bead into the center of some flowers. Glue the roses to the wreath base, placing them close to each other. Fill the gaps with large beads, decorate the New Year's wreath with a large satin bow.


"GIFT TOYS" made from cotton pads.
You will need:
Cotton pads
Thread or ribbon.
1. Fold all the necessary cotton pads into quarters and add glue to the tip of the resulting figure.

2. Glue 4 folded cotton pads together. Glue only the ends, not the entire shapes. Let the glue dry.
3. Bend the glued parts to form half a ball.

4. Repeat steps 1-3 to make the other half of the ball and glue both halves together.
5. Connect the resulting cotton balls to each other, gluing the toys to the frame.


"Cockerel" made of cotton pads.
You will need:
- Plastic spoon - 1 pc.
- Cotton pads - 2 pcs.
- Colored and white paper
- Scissors
What to do:
- Cut out cockerel wings from white paper and glue them onto the disk.
- Place a spoon on top and glue another one on it so that it matches the “back”.
- Cut out a beak and a comb from red paper and glue them onto the bird.
- Use a black marker to draw on the eyes and plumage.
"Unusual Christmas tree" made from cotton swabs.
For the New Year's holiday, you can decorate any corner of the apartment with a variety of themes. For example, a panel with an elegant Christmas tree, which will be a highlight-decoration.
To make the craft beautiful, you need to stock up all components: cotton swabs, the exact quantity cannot be determined, so it is better to stock up on several packages; cotton pads; a sheet of cardboard of the selected size; wire cutters; paints and glitters; sparkles of silver and golden shades and thin ribbons of green and white; white plasticine and PVA glue; pencil and brush; ruler, compass; paper clips, stapler and scissors.
Christmas tree, appear!
On a piece of paper you need to mark the boundaries of the tree - draw a triangle.
Glue the plasticine piece by piece onto the cardboard, and the thickness of the first should be approximately 2 mm so that the sticks can hold securely in it.
Cotton swabs should be prepared for work by cutting off the parts with cotton wool with pliers and leaving about 5 mm.
Now the latter should go into the plasticine with the part up where the cotton is.
There should be practically no gaps between the elements. Now the tree made of cotton swabs should look voluminous, a green ribbon will help with this. The border of the fluffy beauty should be covered, preferably several times, by securing the ends of the ribbon at the top with a beautiful bow or leaving the ends long and twisting with scissors.
Using a brush and paint, it's time to make colorful bright balls on the Christmas tree.
And it wouldn’t hurt to give the Christmas tree itself a natural green color.
When the paint dries, you need to apply multi-colored glitters to the balls.
If the panel bends, then it is better to add another sheet of cardboard on the other side using a stapler. The top and bottom are connected with paper clips, and so that these parts are not visible, cotton pads are useful, which are divided into 2 pieces and cut, and then glued with an overlap, covered with glue, and glitter on top. Then the entire panel can be covered with glue and sprinkled with small beads to match the color of snow or with coconut flakes or semolina.
New Year's crafts from sticks are unique snowflakes, decorations made from serpentine, satin ribbons, foil, pine cones, and Christmas tree decorations. There can be many ideas.

Gift applique "Animals" made from cotton swabs.


"Pando Bear" made from cotton swabs.
For the craft you will need the following:
- cardboard;
- black and white paper;
- cotton swabs;
- white plasticine;
- glue;
- black paint.
From cardboard you need to cut out a panda with a round head and body, two ears and four paws. Attach this blank to black paper, outline, cut out; and from a white sheet - the inner part of the ears.
Glue the black blank onto the cardboard, and the white one for the ears in its place. Cut out claws from paper of the same color and attach them to the paws with glue.
Let your child knead the plasticine and stick it on the panda's face. Now you need to cut the cotton swabs and stick them into the plasticine. Design the work from the outer edge, gradually moving to the inner. The belly of the beast is decorated in the same way. To make a panda look like a real one, you first need to dip a few cotton swabs in black paint and use them to make spots of this color on its body.
Oval eyes are cut out of white paper. Draw pupils and borders on them and glue them in place.

"New Year's snowflakes" made from cotton swabs.
You will need:
- Cotton swabs - 1 pack
- Album or cardboard sheet
- Simple pencil
- Scissors
What to do:
- Take a blue base sheet and draw rays on it.
- For smaller snowflake details, cut the cotton swabs into halves.
- Lubricate the drawn lines with glue and glue the resulting segments to them so that the cotton tips are located from the center.


Psychologist-consultant Statsenko L.V.
You might also be interested in:
Preparation You can be guided by the taste preferences of the recipient of the gift....

His wife's last request before the divorce changed his life forever. "I returned home to...

- one of the main advantages of a man in courting a young lady. It’s no secret that...

Coconut oil is gaining more and more popularity among women every year. This is quite...

Is your wedding ceremony planned for the cooler months of the year? Then important...

