


Many people are interested in how to make balls from common PVA glue and thread winding. But from idea to implementation there can be a long journey filled with searching for solutions, trial and error. Let's study a master class on decor together to create hand-made masterpieces from scrap materials. There is no shame in hanging these at home or presenting them for a holiday.
This is the case when a minimum of things and objects are required to implement a plan. Most likely, you already have them at home. All that remains is to select the required quantity from the list, and it’s time to get down to business - start making balls.
Threads or yarn
This is the main decorative element. The choice of color affects the appearance of the finished ball, whether it be bright scarlet or a ripe orange shade. Both acrylic and cotton threads are suitable. Yarn will also work. The main thing is that there is enough thread.
Glue
Polyvinyl acetate glue, used for applications and working with paper, serves to securely fix the structure. In other words, without PVA the ball will fall apart. It is recommended to take a modification for furniture, PVA-M.

Inflatable balloons
An inflatable rubber ball is the temporary frame of the model. Allows reusable use, so 3-4 balls will be enough if urgent, continuous production is not planned. In extreme cases, at the end of the process the rubber ball is pierced. It is much more convenient to blow it off and reuse it.
Polyethylene film
Cling film is needed to protect the “frame”, the rubber ball, from the action of glue. When everything is dry, the hardened thread cocoon is easily removed from the film.

Container for dipping yarn into glue
It is more convenient to use a bowl or small basin, a wide, low vessel to dip the finished ball.
A cutting tool in home crafts is a conscious necessity. It is convenient to use scissors to trim off excess material and pierce the rubber ball with a sharp tip.
Needle
Stationery blade
Some people find it more convenient to work with a stationery knife than with scissors. It's a matter of habit.

Bowl
A bowl or wide plate will be needed for dipping in glue. It is advisable to choose ones that you don’t mind throwing away later (or for household purposes). This method is good because in a matter of moments the winding is saturated with glue, and you can move on to making the next product.
How to do it step by step with your own hands
For ease of understanding, the entire process is divided into steps. These include:
- Preparing the threads, inflating the ball.
- Winding impregnated with glue.
- Drying.
- Recess of the rubber base.

Preparing the threads
All preparation comes down to choosing a color and a ball of appropriate size (so that it is enough for crafts). An original device is also offered, consisting of an ordinary plastic bottle (this is where a needle comes in handy).
Two holes are pierced, in the bottom and the lid, so that the thread fits tightly. Then the thread is pulled into a bottle, PVA is poured into it, and you can start working. The essence of the device is that the thread soaked in glue, passing through the holes, is slightly wrung out and is immediately ready for winding.
Ball wrapping
A pre-inflated rubber ball (it is better to take a round one, then the product will be of the correct shape) is tied so that no air escapes from it. Then the frame is covered with a layer of film; one turn is enough. It is also secured to the ball. It is convenient to work together: one person wets the thread, the second winds it on the frame. The winding should not be thick, otherwise the meaning of the decor is lost.

Drying
When winding is completed, the end of the thread is secured and the ball is left to dry. On average, this takes from 6 to 12 hours (faster in summer).
Professionals advise using rubber balloons with a special stopper, this makes them easier to deflate.
The frame and film are removed through the nearest, appropriately sized gap in the finished product.

What can you use a ball of thread for?
There are worthy uses for ready-made openwork thread products:
- snowman;
- New Year's decoration;
- surprise;
- wedding decor;
- ball in ball;
- topiary.
And this is not a complete list. There are no restrictions for imagination, coupled with hard work.
Snowman
The principle of creation is simple: three white thread balls of different sizes are fastened together. All that remains is to decorate the snowman with carrots, draw (glue) his eyes and mouth.

New Year's balls
Decor of different colors and sizes will transform a room, office, or party hall for the New Year. And small balls collected on a thread will replace a Christmas tree garland. The main advantage of such jewelry is that they are not afraid of bumps and falls. How many bitter tears were shed in childhood when a beautiful Christmas tree ball fell to the floor and broke into pieces. And these balls are bright, durable and light. You can also make them at home with your child, inventing new combinations to decorate your home.
A playful wish, keychain, or trinket is placed in a secret ball, which is then presented to the winner of the competition or the birthday person.

For a wedding
An original wedding decoration can be easily made from medium-sized thread balls suspended from the ceiling. This product can even make a lamp if you attach an LED strip to it.
Ball in a ball
To make this craft you will have to work hard. It may not be possible to fit one object into another the first time, but after hard training you will be able to achieve what you want.

Topiary
An original “plant” made of threads with a fancy crown or resembling an evergreen cactus will decorate an office desk and become a unique gift for friends and family. It is convenient to use wire or a bamboo skewer as a trunk, tying balls to it.
Craftsmen make flower buds from all sorts of things: paper, cardboard, old postcards, plastic. Now it's time for the threads. What type of craft to give preference to – rose, chamomile, dandelion – is decided by the creator himself. Rave reviews from fans are guaranteed.

Birds and animals
You can (and should) make compositions from threads, including figurines of birds and animals. First you need to make a sketch, break the finished silhouette into separate fragments. And then, gradually creating balls, forming a shape out of them.
The advantage of this method is that it requires a minimum of investment: threads, PVA glue and rubber balls can always be found in a store or desk drawer. And the field for realizing your ideas and creativity is unlimited.

There is a difference between doing it right and doing it poorly. Therefore, it is important to know the intricacies of the process of making thread balls in order to avoid typical mistakes and mistakes.
Round rubber balls are preferable to others because they allow you to get results the first time. Using a cork reduces the time spent deflating the rubber casing and helps preserve it for reuse.
The “correct” glue saturates the thread well and does not leave noticeable marks on its surface after drying.
To ensure that the finished product lags behind the film, it is recommended to lightly lubricate it. In summer, on the balcony or in the open air, products will dry faster than indoors.
What could be easier than making balls of thread with your own hands! Hello everyone, today we will make balls from threads and PVA glue. Such balls can be used for decoration or as a basis for further crafts.
So, what do we need to make balls of thread?
- Thick threads;
- PVA glue;
- Bowl or cup;
- Balloon (preferably round).
You can make balls with children, I think they will be very interested in making such a simple craft.
And now it’s time to go through the master class in detail and analyze the whole process step by step.
Step 1.
Pour PVA glue into a bowl. If it is too thick, then dilute it with a little warm water. Stir well so that the glue dissolves in the water.


Step 2.
Inflate the balloon to the size you need. Prepare a napkin or towel so as not to stain the table.

Step 3.
Passing the thread through the bowl of glue, begin to wrap the ball. First in one direction, then in different directions. Make sure that the thread is well soaked in the glue.

Wrap several layers so that the ball is almost invisible. When you finish winding, look carefully and if there are dry places left, apply additional glue to them with a brush.


The ball is ready, now it needs to be dried for 5-10 hours, depending on the air temperature in the room and the glue used.

Step 4.
When the glue has dried, you need to remove the ball from the inside. We pierce it with a toothpick or a needle and carefully remove it.


That's it, the ball of thread is ready, now it can be used for decoration.

Balls of thread beautiful, airy and will decorate any interior. Moreover, using this method you can make almost any three-dimensional object, for example, a lampshade, vases, animal figurines, etc.
We will need :
Balloon;
PVA glue;
Thick cotton threads;
Cling film;
Petrolatum;
Plastic cup.
To balls turned out smooth and dense, you need to be very careful about the quality of the PVA glue and threads. I used this glue from Tury - Profi PVA glue - I recommend it. Don't take PVA glue from the office supply department. Many of them do not stick well to paper.
The threads are needed so that their composition is mainly cotton. This is a more porous material and is better saturated with glue. Under no circumstances use completely synthetic threads; they will not be well saturated with glue, and your ball will be soft and will not hold its shape well.
I bought “Peony” knitting threads from the St. Petersburg factory named after. Kirov. Their composition: 70% cotton, 30% viscose. They are dense, but quite voluminous and take a lot of glue (this is good for holding their shape). My second batch was made from floss from the same mill. Balls Of the "Peony" threads, I liked them better.
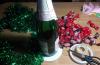
We take a regular rubber ball and inflate it to the size we need. I had a conveyor belt, so I inflated 6-7 pieces at once. Tighten the pimp thoroughly so that the ball does not deflate when drying, otherwise the whole structure will become warped :)
Wrap the inflated ball in cling film. I left the tail uncovered to make it easier to blow off the balloons later. Yes, I didn’t pierce them, but blew them off, because if you do everything carefully, the rubber ball can serve us more than once or twice :)
Then we take Vaseline and smear the ball wrapped in cling film. This will prevent the threads from sticking to the ball and will not damage their shape. Yes, in the photo it’s Vaseline :) I took the photo in the process, so my hands were dirty, the camera in my hands was shaking and jumping :)
Now the important point. How to prepare thread for wrapping. To prevent the thread from getting tangled and not being too wet from the glue, it must be passed through a cup of glue. Creating the first ball of thread, I put the threads in a bowl of glue, that is, I simply dipped them into it. The threads were too wet, constantly tangled and curled into knots. And, of course, there was glue all around :) There was more glue on the hands than on the threads :) So I took a plastic disposable cup, made two holes with an awl on both sides (closer to the bottom, but not quite low) and threaded them through thread. Then I poured PVA glue so that it covered the thread. The photo shows how the thread passes through the glass. This system allows the thread not to get tangled and to absorb as much glue as needed. I placed the ball itself in a large mug so that it wouldn’t jump around the table :)
I simply pulled the thread through the cup of glue, gradually wrapping it around the ball.
This is the design. An important element is a good series or movie :)
The ball is wrapped. Wrap evenly without leaving large holes.
I hung all the blanks in the bathroom to dry. I dried it all night, although you can remove it earlier - after 3-4 hours.
After final drying, I deflated the rubber ball and pulled it out along with the film. These are the thread cocoons we got.

Elizaveta Rumyantseva
Nothing is impossible for diligence and art.
Content
To create something original with your own hands, for example, a lampshade for a lamp or a decoration for a holiday, you don’t need to stock up on expensive materials. This can be ordinary threads and glue, which can be found in any home. Knowing how to make a ball of thread and glue, you can build a variety of original decorative elements that will decorate not only the interior, but also any celebration. If you don’t know about this technique yet, read the instructions below and feel free to start creating.
DIY crafts from threads and glue
It’s good to make such crafts with children, because making them is not difficult. Finished products can act as an independent decoration or be part of more complex compositions, for example, a snowman or a cockerel. In addition, it is not necessary to make a spherical-shaped product - with the help of threads and glue it is easy to build even a heart for Valentine's Day. The decor can even look like feathers, Christmas trees or snowflakes. First you need to stock up on materials:
- Thread. An important condition for selecting this material is that it must have a slightly loose structure so that the glue can easily saturate it.
- A common balloon sold in stationery stores. For large crafts, it is recommended to inflate it no more than 15 cm, and for New Year's decorations it is better to use a fingertip purchased at a pharmacy with a diameter of up to 6-8 cm.
- Glue. The main factor influencing the outcome of the work. PVA has proven itself well for such crafts. Office glue or a mixture based on PVA, water and corn starch in a ratio of 1.5:0.25:0.5 is also used - the main thing is that the mixture has the consistency of sour cream.
In addition to the 3 main elements for crafts, you will need:
- scissors;
- fatty cream or Vaseline;
- bowl;
- "Gypsy" needle.

New Year's balls made of threads
Don’t rush to buy Christmas tree decorations in the store - try to build them yourself. This will be a more original decoration of the Christmas tree, which will only emphasize the family atmosphere of the holiday, especially if you do it together. In addition to the main elements, stock up on all kinds of beads, seed beads, feathers or ribbons for decorating finished crafts. Next, proceed to follow the instructions on how to make balls of thread and glue:
- Inflate the balloon to the desired size and tie the end. Lubricate with fat cream or Vaseline.
- Next, either soak the thread in the adhesive composition, or pierce the container with glue at the very bottom with a needle and push it through the hole.
- Pull it and gradually wrap it around the inflated balloon.
- Secure the end of the thread under the already stretched one.
- Leave to dry for at least 1 day.
- Then gently deflate the balloons.
- Decorate the resulting toys with beads, seed beads, spruce branches or bows. To give the effect of falling snow, soak the product in glue and then roll it in semolina or powdered sugar.

DIY surprise ball
If you wind more threads, the product will be almost opaque, so you can put sweets or other small gifts inside. You will need the same materials, only for larger immersed elements you will need a “surprise loader” - a medium-diameter tube made of thick cardboard. If you manage to find one, then start making crafts:
- Prepare the adhesive and pull the thread through it.
- Pull a balloon onto one end of the tube and inflate it.
- Carefully load your intended surprise. Remove the base of the ball from the tube and tie it.
- Wrap with glue-soaked thread as you wish - whether the gift is transparent or you want to hide the surprise.
- Hang the product and leave to dry.
- Deflate the balloon.
- The surprise is ready - decorate it with any accessories depending on the holiday.

Balls of thread for a wedding
A wedding celebration is also a holiday, the decoration of which can be such thread products. Instructions for making wedding jewelry:
- Inflate all the balloons at once.
- Hang it on some kind of bar.
- Apply Vaseline.
- Take pure PVA or mixed, as indicated above, with starch and water.
- Pierce the bottom of the tube of glue with a needle or soak the thread in a bowl of glue.
- Wrap each ball so that the threads intersect.
- Leave the products to dry.
- After drying, deflate the balloons and decorate the decorations with fresh flowers, rhinestones, ribbons, beads or LED garlands.

You can make many interesting crafts from simple materials such as glue and thread. Making them is quite simple, so even children will enjoy participating in this process.
Moreover, the crafts are inexpensive, because their production requires only threads, inexpensive PVA glue and colored paper. 
- PVA glue,
- balloon,
- "Iris" threads
- scissors,
- big needle.
- To make this original craft, you need PVA glue, an inflatable balloon, threads No. 40-60, colored paper, ribbon, and thick thread.
- The ball needs to be inflated to the size of a regular apple. Thread the tip of the thread into a needle and pierce through the bottle of PVA glue. As the tip hardens, the needle can be removed.
- The thread is carefully wound around the ball, and it is better to make turns in different directions.
- The resulting “cocoon” must be dried for 4-5 hours. It should turn out solid. The rubber base must be pierced and carefully pulled out.
For a cockerel you will need two balls - for the body and the head, which will need to be glued together.
All that remains is to decorate the craft using colored paper by making the bird’s beak, eyes, comb and breast.
VIDEO
You don't need a balloon to create this toy. The feather turns out very natural and looks beautiful both on its own and as a decoration on greeting cards.
- We begin the work by wrapping the wire with floss. All threads must be cut into pieces of equal length.
- One by one, they need to be tied on a wire so that the knots lie on the same line.
- The workpiece must be dipped in glue so that the floss is well saturated.
- Then the feather must be laid out and straightened on the surface and left until completely dry.
- Next, the edges are trimmed to make the feather smooth and beautiful.
 The resulting craft can be glued to the base and made into an original postcard.
Toys and interesting and useful items for the home can be easily made from cocoons cut in half. So, it’s easy to make a candy bowl.
In order for it to stand steadily on the table, you need to press it to the table with a round jar and turn it several times. This will allow the threads to be compacted at the bottom. In order to strengthen the bottom, it is worth cutting out a round base from paper and gluing it to the bottom from the inside and outside. You can decorate the candy bowl with ribbon, rhinestones, and sequins.
You might also be interested in:
Preparation You can be guided by the taste preferences of the recipient of the gift....

His wife's last request before the divorce changed his life forever. "I returned home to...

- one of the main advantages of a man in courting a young lady. It’s no secret that...

Coconut oil is gaining more and more popularity among women every year. This is quite...

Is your wedding ceremony planned for the cooler months of the year? Then important...

