


Cars made from candies will be an excellent gift for boys and men at any age and for any occasion. The subjects of crafts are varied. So, a craft made from Kinder sweets will cause a storm of emotions in children. You can create various themed gifts, such as a candy ambulance, retro models or a fire truck.
From various sweets


To form sweet machines, square crackers or biscuits, round cookies, marshmallows, marshmallows, waffles, marmalade, toothpicks of different sizes, including canape sticks are ideal.
The main thing is to form a stable frame. For wheels, double round chocolate chip cookies or round chocolate candies are suitable. Canapé sticks are inserted between them. You can put biscuits on top of the sticks. The most convenient way to form a cabin is with waffles.
Now you need to decorate the car.
Marmalade can serve as headlights, and marshmallows or a round candy can serve as steering wheels.
For the driver of our car, a sweet in the form of an animal, for example, a gummy bear, may be suitable.
From candies in a wrapper

This craft is much more complicated than the previous one.
Required tools and materials:
- thick cardboard;
- thin cardboard;
- wire;
- gold-colored corrugated paper;
- small Roshen chocolates or any other suitable size;
- toothpicks – 40 pieces;
- two golden round candies for headlights, you can take the Korkunov brand;
- golden decorative cord;
- black braid;
- black fabric;
- ruler;
- compass;
- pencil;
- scissors;
- stationery knife;
- glue gun;
- double-sided tape;
- fine sandpaper;
- two skewers;
- film;
- polystyrene foam or polystyrene foam.
The procedure for creating a retro candy machine:
Cut two rectangles measuring 18x6.1 cm from thick cardboard.

Cut out the back wall of the machine body from thick cardboard, measuring 7.9x6.1 cm.

Using a glue gun, glue the cut parts together.

Cut out the front wall of the machine body from thick cardboard, measuring 6.1 x 9.3 cm.

Cut out a part from polystyrene foam or polystyrene foam that will serve as the nose of the car. Adjust its length to the size of the selected chocolates.

Also cut out the second part for the car hood from foam plastic, as shown in the figure.

Add the length of the chocolate bar to the main size of half the cylinder, outline it with a pencil, this will be the required wall size.

Using a utility knife, cut out the future part of the wall, the nose of the car will be attached to it.

Using sandpaper, thoroughly sand the uneven parts of the finished parts and cover them with corrugated paper.

Assemble all finished and glued machine parts together
Cut out the bottom of the car from thick cardboard, also cover it with corrugated paper and connect it with the already assembled parts.

You need to stick a mesh on the nose of the car and decorate it along the contour with a cord.

Cover the nose and sides of the car with chocolates.

On thick cardboard, draw five circles with a radius of 4 cm with a compass, and inside the circles another circle with a radius of 3 cm.

Cut out circles with a utility knife.
Cut five small circles about 1 cm in diameter from penoplex.

Wrap the prepared rings and small circles in corrugated paper.
Wrap all 40 toothpicks in paper as well.

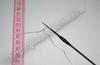
In each ring and circle you need to pierce 8 holes and insert 8 golden toothpicks. Trim the ends of the toothpicks.

Cover the resulting wheel with black tape along the contour.

Glue the wheels to the two ends of skewers wrapped in corrugated paper, and glue the entire structure to the bottom of the car.

You need to cut out the wings for the car from thin cardboard, after fitting it to the entire structure so that it fits well to the sides of the car.

Cover both parts with corrugated paper.
Glue the wings to the car, first giving them the required shape.
Bend 4 loops from wire, also wrapped in paper, and insert into the structure of the machine.

Cut a piece of black fabric to the required size, which will serve as a cabin.

Cut out 4 pieces for car seats from polystyrene foam, measuring them according to the dimensions of the resulting structure.
Place cotton wool pieces and cover the resulting chairs with black fabric.
Insert the seats into the car using glue.

Make the steering wheel and levers from wire wrapped in paper.
Glue the fabric on the cabin with double-sided tape and carefully trim all the edges.
Decorate the car with a cord as you wish.
Make a windshield from film-wrapped wire, as shown in the picture.

Install round candy headlights.
this time I had to make a gift for a man. He worked as a driver all his life, so it was decided to make him a truck! and as always, I took on something that I had never done before. bouquets, trees, ships made of candy - please, and then I went to the Internet for information! In the end, I’m presenting my MK, I’ll try to summarize everything I’ve learned!
for work you will need:
Thick cardboard or unnecessary boxes
Candies: any long flat ones (I have 32 pieces of Mercy in a box, I ate one, but there was an extra one), Roshen is often used. 31 pcs per cabin
A few bags of instant coffee for the bumper, you may still need to cover the gaps
Chocolates, 2 large, 2-3 small, depending on size, per body
4 large chocolate medals
Any candies that need to be put in the back
A couple of candies for the headlights
Neutral or candy-colored wrapping paper
Ribbon or decorative cord
Penoplex or polystyrene foam, or other solid material from which it is easy to cut out a shape
Wooden skewers
Double-sided tape, moment glue, hot glue
PROGRESS:
Let's start by making a drawing of the future foundation. we measure candies, chocolates, calculate what size the cardboard blank should be. We make a blank in the shape of a truck, a cabin and a body. Then we wrap them tightly with wrapping paper.
Now we just cover the blanks with candies. I glued it with double-sided tape. The problem I encountered at this stage: the wrapper on the candies was not fixed, I had to first seal the candies so that they would not unfold under their own weight! so if you choose, look for well-packaged candies.
We mark the windows in the cabin in advance using rectangles of white paper and tape or cord.
and then the question arose of how to connect the cabin and the body sufficiently rigidly and reliably! I glued wooden skewers onto the cardboard, cardboard on top, and wrapped it in paper. if it is possible to use fiberboard, for example, then this would be an ideal option! I glued everything together, all that was left were the wheels.

I thought about the wheels for a long time! This is what happened! We cut out two circles, the size of chocolate medals, from penoplex (this is insulation, sold in construction stores in large sheets, looks like a layer of frozen foam). cut them in half and wrap them in paper. we connect them together with wooden skewers, stick medals on the outside, and this will hold the whole truck together.

glue the wheels to the base using hot glue. All that remains is to make wings from foil, stick on headlights, wipers and fill the body with yummy food!


thank you for your attention! I wish you all inspiration!!!
Today you will learn how to do candy machine, looking at this master class.
Any boy would be pleased to receive such a car as a gift, because the holiday of February 23 is coming soon. So write it off, you still have time to make such a gift. The author of this wonderful work is Nadezhda Dvornikova.

Method of making the machine:
We take foam plastic and cut out a shape for the machine from it and then model it. Pieces of foam can be glued together if you do not have thick foam.

Then we will cover the bottom of the machine with paper. You can use the paper at your discretion, whichever one you like best; in this master class we will use corrugated paper.

Now a little about how to glue and make wheels. We cut a little semicircle in the blank itself and glue our finished wheels there. We also make the wheels from foam plastic, and then cover them with corrugated paper.

Now we take white corrugated paper and use it to imitate glass on a car. You can draw the eyes, or you can find them on the Internet like the author of this master class did. At the end of the article I will give you several options for eyes that you can print or draw exactly the same.

We cover the car with candies, so that the car stands well, you need to glue a foam base at the bottom in the middle and cover it with paper, but this is only if the car does not stand well on its wheels. The gift is almost ready. Let's add a little decor: The spoiler stands on two candies, and is held on top by cardboard with gold corrugation. We attach Rocher chocolates and that’s it!

This is the kind of candy machine we got.
Thanks to the author for the master class on making a candy machine.


Copyright © Attention!. Copying text and photographs can only be used with permission from the site administration and by indicating an active link to the site. 2019 All rights reserved.
Probably no one will dispute that giving and receiving gifts is very pleasant. And if the gift is made with your own hands, then it is doubly pleasant! You can easily learn how to make interesting and unique things for boys and men, for example, cars from candy, because such a gift can please anyone - both a child and an adult. Creating such original products is a simple matter, and anyone can do it themselves.
Passenger car
As an option, you can make a car from candies. For work you will need the following materials:

Creating a composition
First, the body of the future car is made. You need to cut out 2 elements from foam plastic. The size of one is 10 X 20 cm, the second is 10 X 10 cm.
The last element must be trimmed so that there is an even descent. The cut areas must be cleaned with special paper. Connect the blanks together so that the small element is on top of the large one, while moving to one edge.
If you do everything correctly, you will immediately understand how the gift takes the form of a car. After this, cover the product with paper.

A candy car, of course, will not be of high quality without wheels.. They need to be made of cardboard. Draw circles on it that match the proportions of the car (about 5 cm), and cut them out. It is better to use corrugated or standard cardboard in 2 folds, since the wheels must be strong.
Product design
 Attach a round piece of sweetness to the center of each wheel - these will be discs. Place the caramels around them in a circle. Then attach the wheels to the foam piece in the right places. After this, start decorating the car body with rectangular-shaped candies.
Skip the places where there should be windows. Glue the side parts in the same way. If the edges of the product do not fit specific shaped candies, decorate them with small caramel. The end parts of the workpiece must be made from long candy tubes.
The candy machine is almost created, all that remains is to decorate it. Draw or create eyes on the “windshield” using applique (like the characters from the cartoon “Cars”).
If you are creating such a present for an adult, then you can attach his image to the side glass or make a cartoon.
How to make a candy machine with your own hands is now clear in general terms, but there is one nuance. Men also love sweets, so you can choose a variety of models for them: vintage cars made from candies, fire engines made from candies, as well as trucks, BMWs, jeeps and KamAZs.
Truck with Kinders
An interesting truck from Kinder is created from two parts: a cabin and a body. For work you will need the following materials:
- cardboard;
- glue gun;
- special paper;
- sweets;
- scotch.

To create a truck from candies, the master class offers the following option:

Sweet vintage car
The master class on creating a retro car from candy is somewhat more complicated in terms of making a larger number of small parts. To make such a car, you will need the following materials and equipment:

First, make the body parts out of cardboard. Use foam plastic to make the nose of the cabin and the second part for the hood. Try chocolate on them, sand them, cover them with gold paper. After this, connect all the elements of the machine.
Try on and cut out the bottom of the product, cover it with gold paper and connect the parts. Attach the net to the spout of the car and tie it with a cord. Cover the finished part with chocolate.
Then use cardboard to make ring-shaped templates for the wheels. For the sleeve, cut cylinders from foam. Decorate everything with dark fabric. Wrap all the toothpicks in gold paper. Connect the wheel rim and hubs with a toothpick, piercing them. Trim the ends of the toothpicks. After this, all that remains is to decorate the wheel along the contour with black ribbon.
Use skewers to create axes by wrapping them in paper. Attach the axle along with the wheels to the bottom of the product. Make wings with a footrest out of cardboard and put them in place, bending them as necessary.
At the end, use wire decorated with gold paper to bend 4 arches over the booth. Cut a piece from dark fabric for the roof of the workpiece. Carefully stick it on with thick tape. Then cut out 4 elements for the seats and their backs, decorate them with the same fabric and make chairs for the car interior from them.
Create the steering wheel, lever, and main glass from ordinary wire. Glue round headlight candies.
Any beginner can make a sweet car, decorating it like a real model. And if you want to give a gift to a girl who is indifferent to cars, you can make her a sewing machine from sweets.
Attention, TODAY only!
You might also be interested in:

- Lord, how I want chocolate! These were the words the border guard greeted us at the airport...

HOW TO SEW LEATHER BY HAND USING TOOLS AND ON A SEWING MACHINE? Products made from natural...

Good luck to everyone! I think that you’ve already been waiting for me, I promised and I still can’t...
Knitting amigurumi toys is a very exciting activity that both adults enjoy...
Nowadays people have become interested in handicrafts. Many have forgotten what a hook is...

