


Today we will change hair color in Photoshop; this operation does not belong to the category of everyday operations, but the skills of mastering such a technique will not be superfluous. I chose this image as an “experimental picture”.
Before changing anything, highlight what needs to be done; besides, we will work long and hard, therefore, there is no doubt that our corrections will go beyond the area in the picture for which they are intended. Therefore, we will immediately create a mask that separates the hair from everything else.
Highlighting hair before changing color
My picture is quite contrasting; it won’t be too difficult to separate the hair; to create a rough selection I use the Quick Selection Tool, read about the application, which can be small in size with medium-hard edges.

When finished, press OK. Let's save the resulting selection in a separate channel in order to be able to adjust our future hair mask, because the more accurate the mask, the better the quality of the work done. So, we follow the path Main Menu – Selection – Save Selection” (Select – Save Selection) in the dialog that opens, feel free to click OK.

Go to the “Channels” palette and select the just carefully saved “Alfa 1” channel. Let's add contrast to this channel to get a clearer boundary between the hair and the rest of the picture. For this we use correction using curves (key combination Ctrl+M)
In the dialog that opens, let's create an S-shaped curve by increasing the contrast of our mask. There is no need to show fanaticism here, because instead of the smooth natural flow of hair, you can get a plastic helmet on your head. After completing the manipulations, click OK.

The preparatory stage is now complete, let's load a selection based on our channel, hold down the Alt key and click on the channel thumbnail, and move on to the next stage of work. Let's go back to the Layers palette.
Changing hair color
To change the swelling of the hair, use the capabilities of the adjustment layer (Selective Color) “Color Selection”. Let’s create this adjustment layer by clicking on the corresponding icon in the “Correction” palette. Since we created the layer when the selection is loaded, its mask will take the appropriate shape, and the correction will apply only to the area of hair that interests us.
To make the hair color more or less saturated, depending on the situation, use the “Black:” slider, moving it in different directions to achieve the desired saturation.
To change the color tone more radically, use the remaining controls: In this case, the following processes will occur: When Yellow decreases, Blue increases. By decreasing Magenta, we increase Green and vice versa. By decreasing Cyan, we increase Red and vice versa. As a result of manipulating the sliders, I got this picture

Make it a hot brunette
Now let's make our model a brunette. For this purpose, we use a combination of two adjustment layers “Hue/Saturation” (Hue/Saturation) and “Curves” (Curves). First, let's hide the visibility of the Selective Color layer and create a Hue/Saturation layer. Let’s determine in which color range the model’s hair color lies. From the list of ranges, select the closest one (surprisingly, this is Reds).
Let’s clarify the range: take a dropper and click it on the model’s hair, choosing a medium shade for the sample. Let's reduce the value of the Saturation parameter, and the hair will darken and the entire picture will become discolored.

Create an adjustment layer “Curves” on the master (RGB) curve in the parameters palette and lower the center point (midtones) down, thereby making the hair darker.

To remove the effect of correction from areas of the picture for which it is not intended, proceed as follows: Select both adjustment layers, combine them into a group, and drag the mask from the “Selective Color” layer to the group while pressing Ctrl+Alt.

It may happen that in some places the skin “bleached” by the correction will be visible through the hair.
You can correct this drawback as follows: Create a new layer above the adjustment layers with the blending mode “Color”. We take a brush and take a color sample from a “normal” area of skin, pockmarked with the problem area. We set the parameters of opacity and softness of edges based on the situation. Paint the problem area with a brush.

If necessary, you can lower the opacity value for this layer.
To get a more realistic picture, let's add a few highlights to our model's hair: Create a new layer with a normal blending mode with a soft white brush and apply a few strokes where, in our opinion, the highlights should be.

Let's give them more naturalness as follows: Double-click on the layer, a layer style dialog will open, at the bottom of which there is a block (Blend if) “Blend if” with two gradients This layer (This layer) and Underling Layer we are interested in the second one. While holding down the Alt key, we will split the dark tones slider so that the glare affects only the range of tones we need. In my case, the picture after this operation looks like this.

After you get the desired result, click on the OK button. In the same way, you can create not only highlights, but also give your hair a slight color accent: Let's create a new layer with the blending mode Overlay (Overlay), why is it written like that in the post. On this, with a brush of a suitable color, make a few strokes and then split the Underling Layer as described above.

Dye it blonde
Well, the brunette turned out well, let's dye our girl blonde. Let's create a new group and immediately put the mask from the previous one on it so as not to repeat the steps to create it again.
Just as we did when we changed the hair color, let’s create a new corr within this group. The “Color Selection” layer and the “Black” slider will be set to minus, slightly lightening the model’s hair.

Let's add a little platinum tint to the hair: Take a brush with a color sample from a light area on the model's hair, create a new empty layer. Double-click on the main color in the program toolbar to open a dialog for selecting it. Let's make the shade more saturated by dragging the cursor higher in the shades square.

Now let's brush the hair, change the mode for this layer to since this mode is perfect for lightening dark areas.
To make it more believable, apply the “Blend if” setting to this layer, just like in the case of the brunette. Select the parameters for the Underling Layer yourself.

Let's work a little more with color, this time using corr. layer "Levels" Levels. Let's create it within our group. The effect of an adjustment layer with a blending mode of “normal” is the same as overlaying an image on itself. In order to change some color shades, we will limit the effect of this layer on the underlying image, narrowing the range by channel.
In the “Levels” layer parameters palette, we’ll proceed as follows: open each channel sequentially and move the shadow slider closer to the center to achieve the desired shade. In the master channel, you can move the shadow slider on the histogram to the right (a little) in order to add contrast.

If the effect seems excessive, you can solve the problem by reducing the opacity of the layer. At the end of the work, add highlights to the hair. New layer in “Soft Light” mode Soft Light, white soft brush over the hair. Call the layer style - change the Underling Layer in “Blend if” blending mode “Blend Mode” to “Soft Light”.

With these simple manipulations you can change your hair color in Photoshop, this is where I end the post until new articles on the blog.
Results of work on changing hair color
Changed shade of an existing, original color

Repainting a hot brunette

Blonde option

03.03.2015 27.01.2018
Photoshop can work wonders. One of these wonders is the ability to quickly change the hair color in your photo. In just a few steps you can select and replace it with absolutely any hair color in the photo.
There are two types of photographs - those where it’s easy to change hair color and those where it’s difficult. Just change the color where the hairstyle is sleek and the hair does not stick out. What to do if the ends of your hair develop in different directions, for example from the wind?
In this lesson I wrote detailed instructions on how to change hair color in a complex photograph. Those who can cope with such photos, then the rest can be cracked like nuts.
The main tools we will use in Photoshop:
- Quick mask
- Soft brush
- Blend Modes for Layers
- Refine Edge function
First, select the photo you want
Let's get straight to the lesson.
To begin, open the photo in Photoshop (CTRL+O). I took a photo of this beautiful girl as an example. When examining her hair, it becomes noticeable that by simple selection it will be difficult and very long, and most likely impossible, to identify each protruding hair.
Therefore, another method will be used here - a combination of two functions - a quick mask and refine the edges.
With the help of the first we will select the general frame of the hair, and the second function will help us adjust the selection exactly down to the smallest hair.
The first task is to highlight the hair using a Quick Mask
To call the Quick Mask function, press Q on your keyboard. In the contribution in which you are working (photo open in Photoshop), you will see that a Quick Mask has appeared.
You can use a brush to draw a selection on the Quick Mask. Select a brush and set it up like mine. Softness is 29%, and you will constantly change its size. To highlight hard-to-reach areas, you need a small brush size, and vice versa if you need to quickly select a large area.
To quickly change the brush size, use the brackets on your keyboard.. And you won't have to constantly call up the brush options menu to change the size.
.jpg)
Now start painting over the hair with the brush. The mask will display in red the area that you select with the brush. Sketch all the hair like mine. Pay attention to the carelessness of highlighting the ends of the hair. There is nothing to worry about here, you will find out why later. Our task for now is to highlight the general frame of the hair.
.jpg)
Now to turn all this into selections, press Q on your keyboard. A selection will appear, but you need to invert it - to do this, press CTRL+SHIFT+I. Or go to the menu Select - Invert. But using a keyboard is much more profitable - you save your time.
.jpg)
Selecting the smallest hairs, adjusting the selection.
The time has come to adjust this selection so that it is easily even and only on the hair without capturing anything unnecessary, as at the moment.
To do this, click on the selection tool in the toolbar. A Refine Edge button will appear at the top of the panel - click on it.
By the way, this is exactly what I talked about in my video tutorials - I recommend downloading it!
.jpg)
There are many parameters here, but they should be changed only in extreme cases. In 90% of cases you can leave them alone.
We only need to work with the brush of this function. I circled the place where it should be activated.
I used arrows to indicate the places where I went over with the brush, and I had to brush it several times in all places. This should be done naturally without closing the window with the function.
The essence of her working method is that she reconsiders the selected edges, which allows you to highlight small details with particular precision. Hair is exactly what you need.
Careful work with the Refine Edges brush
.jpg)
After working with the brush, my image looked like this. I'm pleased with the result.
Please note that I didn't touch the inside, where the hair meets the face. There it was possible to highlight quite well using a brush on the Quick Mask.
.jpg)
Now click OK in the dialog box and the selection is ready!
.jpg)
Press CTRL+J to create a new layer and automatically place the selected hair on it. Working on a separate layer with hair is much more productive. And I would even recommend making a copy just in case.
.jpg)
Starting to change hair color
You can safely start changing the color.
There are two best ways to change your hair color:
- Using the Hue/Saturation function
- Apply an adjustment layer over the hair.
Let me demonstrate how the Hue/Saturation function works. It can be called up using the keyboard CTRL+U. Be sure to make sure you are working on the layer where the hair is. Immediately check the Colorize option and now you can adjust the Hue and Saturation parameters, which will allow you to select the color you want.
I set the parameters like this: Hue: 0, Saturation: 47 and Brightness -2. This made it possible to create hair with a reddish tint.
.jpg)
It's a matter of taste - it looks interesting. You can customize absolutely any color you want - blonde, brunette, etc. I will show examples at the end of the lesson.
.jpg)
The second method is an adjustment layer.
Let's say you haven't changed your hair color yet. Create a new layer and, while holding CTRL, click on the hair layer icon in the layers panel. A highlight should appear.
If you do not understand how to create a selection, then the same operation can be performed differently. To do this, go to the hair layer and select the menu item Selection - Load Selection. After that, go to a new clean layer.
In this tutorial we will learn how to change hair color using Photoshop tools.
Suppose you decide to dye your hair, but find it difficult to choose the color of the dye.
With this tutorial, you will be able to determine exactly what hair color will suit your face best.
Open your photo where the hair is best visible.
I took a photo of a blonde girl.
Convert the background image into a layer.
Layer - New - Layer From Background

Let's switch to quick mask mode ( Edit Quick Mask Mode) to highlight the hair.
Let's select the Brush tool, set a value convenient for highlighting the hair, I chose 40 px to start with. As you paint, you can change the brush size by pressing square brackets on your keyboard. Left - decrease. Right - increase.
Set the mask opacity to 100%
Set the primary colors to the following position
Remember that black color draws the mask, white color erases it.
While painting, you can use the shortcut keys for changing colors D (primary black), X (change color).
We begin to paint over the hair with a brush in quick mask mode.

It is better to paint over the areas where the hair comes into contact with the skin with a mask of less transparency so that the color transition is more natural.


Go to normal mode
As you can see, the hair and the image frame have become selected.

To concentrate the selection only on the hair, invert the selection Select - Inverse

Now only the hair remains selected.
Our next action is to move the selected area to a new layer. To do this, press Ctrl+J.

In the main picture, the selection has disappeared, but we know that on top there is a transparent piece of glass with a copy of the hair.
Let's get to the fun part - changing the color.
What color do you think will suit her? Ginger? Ashen?
In this lesson we want to talk about how to change hair color in Photoshop simply, clearly and as naturally as possible.
Open the photo in Adobe Photoshop. We will change the hair color of this girl.
First of all, you need to highlight your hair. This can be done in different ways, for example, using Lasso Tool/"Lasso Tool". We will create a selection in quick mask mode - it’s very visual and fast.
Press the Q key to enter quick mask mode.

Next we take the tool Brush Tool / “Brush Tool”. And we begin to paint over the hair with the translucent red color characteristic of the mask. To erase unnecessary painted areas, swap the colors by pressing X.
Use the keys when working [ And ] to quickly change the size of your brush. Don’t forget to change its density so that the selection is natural. There is no point in striving for the perfect selection of each hair; we can correct this during further processing.

After the hair is painted over, exit the quick mask mode by pressing the key again Q. The mask becomes a selection.
Now we need to invert this selection. To do this, go to the menu Select → Inverse / “Selection” → “Inversion” or use a keyboard shortcut Shift+Ctrl+I, after which we get the hair highlighted in dotted lines.

After the selection is made, you can change the hair color in Photoshop in several ways. Let's look at some of them.
A very simple and visual option is to fill the selected area with a new color. To make the effect natural, you need to use the blending mode for the fill layer Soft Light.
Select a menu item Layer → New Fill Layer → Solid color.

And in the dialog box that appears, set a new hair color.

At first the photo will not look very natural, but we will fix that.

Click on the fill layer and make it active. After that, change the blending mode of this layer to Soft Light.

If after dyeing individual strands of hair turn out unnatural, then you can simply click on the layer mask with the fill and use a brush to correct everything. Those areas on the mask where you paint with white will become visible and will be colored with the fill color. Black will hide the fill.

Result.

Another way to change hair color in Photoshop is based on using an adjustment layer and changing the colors on the selected area.
We highlight the hair using a quick mask in the same way as we did before. After that, instead of creating a fill layer, let's create an adjustment layer Hue/Saturation/“Hue/Saturation”.

And in the settings of this adjustment layer we will change the hue, saturation and brightness to our taste and idea.

When the desired color is selected, the mask can be slightly adjusted using white and black brushes, just as we did in the previous example.

Another technique that will help you change hair color in Photoshop does not require creating a selection.
The lesson is designed for beginners who are just getting acquainted with the program. You and I will learn how to turn a blonde into a brunette.
I work in Adobe Photoshop CS6, but absolutely any version will do for us.
Let's get started
Open our image: File-Open (File – Open) or Ctrl + O:

Press F7 to go to the layers palette.
Unlock the “Background” layer by double-clicking on it with the left button.
We create a duplicate layer in order not to affect the original layer by editing, so that if something happens we have something to return to. To do this, right-click on the layer and select “Duplicate layer” from the pop-up menu. We work on the second layer.

Making a selection
Select the Pen Tool (P) from the toolbar.

Zoom in on the image to make it easier to work with (Ctrl +).
Using the Pen Tool we outline our hair. We work as follows: when placing points, hold down the left mouse button and drag out guides for each point, so that later it will be easier to edit the direction of the line depending on the bend of the contour.  Close the loop.

After this, the outline will turn into a moving dotted line.

Making color correction
Next, go to the menu “Image” – “Adjustment” – “Selective color”. (Image – Settings – Selective color correction). 
In the window that appears, change the colors “Red” to “Neurtals” in the “Colors” line.

We set the following settings: Cyan +51, Magenta +18, Yellow -7, Black +70.

The color has become darker, but there is not enough contrast. Go to the menu “Image” - “Adjustment” - “Brightness/Contrast”. We make the following settings: Brightness -86, Contrast +72.

To deselect, press Ctrl+D.

I hope you enjoyed this lesson!
You might also be interested in:
Moreover, there are simply a lot of main components for this activity in any kitchen! What if...

Stylists who make recommendations for creating a basic men's wardrobe, in one...
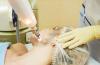
Laser carbon peeling was originally developed in Asia, and has now become one of...
Graphic style tattoos are truly unusual, which is why they are usually separated from others...
When you buy a new sewing machine in a box of tools and accessories, you always...

