


Svetlana Shklyar
I want to show you a short tutorial on how to make chocolate bowls with tea bags, you can do it without tea - stick a congratulation in its place, for example. I make these daughter's teachers.
For this we need:
Whatman paper or watercolor sheet
Corrugated cardboard (or with a picture)
Paper for scrapbooking (nowadays it is easy to find in office supplies or in special departments for needlework)
Decorations for chocolate bowls upon request
Tile chocolate and tea bags, for example Greenfield
We cut out a piece from whatman paper, like in the photo, the dimensions are indicated

We bend " pencil" - where 2 cm in the middle so that it becomes voluminous
We glue cardboard parts on the outside, and glue ribbons under the cardboard for tying. chocolate makers

We make pockets, first for chocolates

Glue it together

Glue it inside chocolate makers paper details for scrapbooking and a pocket for chocolates


I pasted a congratulations on the pocket, if you do it simply chocolate bar without tea, you can stick scrapbooking paper on the pocket, and congratulations on the free side
For tea shops bags you need 3 pockets according to this pattern

Bend and glue


Glue rectangles of scrapbooking paper onto the pockets and glue them in a row

Done, just need to finalize pencil, I haven’t decorated it yet, because I’m making 16 pieces, I haven’t had time yet, I’ll decorate it with inscriptions

Felt cuttings and stationery

Here pencil on the side and my pencils are not yet decorated


I hope it is useful to someone.
Publications on the topic:
“WE ARE TEACHERS” There are people on Earth who have a wonderful profession and this is not said in vain. It’s not in vain that everyone looks with admiration - After all, we are TEACHERS.
April 19 is World Snowdrop Day. This spring holiday has become traditional in many countries around the world. For the first time this holiday was approved.
Summary of an integrated lesson for a teacher-speech therapist, teacher-defectologist with children 6–7 years old with visual impairment “Teremok” Summary of an integrated lesson for a teacher - speech therapist, teacher - defectologist in a preparatory group for children with visual impairments. Fairy tale:.
Master class by a speech therapist for educators on how to conduct games aimed at developing the speech of preschool children. Dear colleagues! One of the 5 areas of the Federal State Educational Standard, in accordance with which we are now building our work, is speech development. Development.
On the eve of such a wonderful women's holiday, my son and I decided to prepare a gift for the teacher with our own hands. Introducing.
Master class for teachers “I am a master of arts and crafts myself”“If you can teach a child in his childhood to feel beauty, to be amazed at the marvelous creations of human hands, the beauty of nature, then grow up.
DIY chocolate maker using scrapbooking technique. Master class with step-by-step photos
Master class "Gift chocolate bowl"
Guseva Ekaterina Andreevna, MAOU DOD Children's and Youth Center "Sputnik", Yekaterinburg, RussiaDescription: The master class is intended for school-age children, preschoolers, teachers and parents.
Purpose of the work: making a gift item - Chocolate makers.
Tasks:
1. Introduce scrapbooking techniques
2. Get acquainted with new materials and tools
3. Create a desire to make gifts with your own hands
Materials used:
1. Sheet of watercolor paper, A4
2. Kraft cardboard sheet (brown), A4
3. Paper for scrapbooking
4. Metal loops + brads
5. Chipboard (cut out of thick cardboard)
6. Decor: Ribbons, artificial flowers, adhesive rhinestones
7. Glue “Moment crystal”
8. Hot glue gun (hot glue)
Step 1. Print and cut out the template for the future chocolate maker. We transfer the shape to watercolor paper and cut out the base of our box.
Figure 1. Watercolor paper base

Step 2. We print and cut out the templates (Figure 2.) for the components of the chocolate bowl. Templates numbered 1.1. and 1.2. transfer to a sheet of kraft cardboard (brown cardboard). Forms numbered 2.1. and 2.2. transfer to a piece of scrapbooking paper, in my case it is paper with a blue floral print. Patterns have different sizes, or rather the length and width of templates 1.1. and 1.2. 6 mm smaller than 2.1 templates. and 2.2., so that after gluing there remains a contour frame 3 mm wide.
Figure 2. Templates for the components of a chocolate bowl

Step 3. We glue the resulting forms from kraft cardboard and scrap paper together using double-sided tape.

Step 4. We cover our watercolor paper base with the components of our chocolate bowl. Let's add thin strips of brown cardboard to the ends and sides of our box.

Step 5. Using an awl, we pierce holes in the box for metal loops and brads (metal nails for fastening).

Step 6. After our chocolate bowl is glued together, we move on to the decorating stage. Using Moment CRYSTAL glue, we place the chipboard (this is a die-cut made from thick beer cardboard) on our box.

Using a heat gun, we glue grosgrain tape along the round contour of our chipboard, creating a wavy effect.

Step 7 Next, we complement our composition with flowers, twigs and stamens using hot melt adhesive.

Step 8 Add rhinestones or glue half-beads to taste and tie our chocolate bowl with a satin ribbon bow. This is what we ended up with:

Thank you for your attention!
A handmade chocolate maker will certainly please the person for whom it is intended. To make it you will need the following tools and materials:
1. As a base: thick cardboard, cardstock or red designer paper.
2. A set of Devoted double-sided paper 15 x 15 cm. However, only a couple of leaves will be enough to work on the chocolate bowl.
3. Wooden decorative element - red heart.
4. White ribbon.
5. Additionally, you can use a figured hole punch in the form of hearts, rhinestones, half beads, etc.
6. Cutter, breadboard knife or scissors.
7. Double-sided tape on foam.
9. Ruler.
10. Layout mat.
11. Regular pencil.
12. Chocolate.

Manufacturing stages:
1. The first step is to measure the chocolate bar, since each manufacturer has different sizes of bars. Write them down on a draft.
2. Measure these dimensions on cardstock or other similar material that was chosen as the basis for the chocolate bowl.
3. Cut and make the workpiece using a cutter or breadboard knife. The result will be the same as in photo No. 3.

4. Now let's start making a pocket for the chocolate bar. To do this, you need to mark the dimensions of the chocolate on the base paper. Cut. Glue as shown in photo No. 5. Check whether the sweetness fits there or not.


5. Attach a ribbon to the outside of the chocolate bowl. Then, using double-sided tape, we glue the decorative paper in the shape of hearts, cut out in advance.


6. Cut out the decorative paper that remains after decorating the front side of the chocolate bowl. Glue it to the pocket.

7. Decorate! We take a new sheet of paper, where the word Love is written many times in a continuous sheet. Cut out a small square.
8. Print out the phrase on a sheet of paper. For example, as in the photo: “I love you.” It should be slightly smaller in size than the decorative paper cut out a little earlier.
9. Glue them on top of each other, and then to the chocolate bowl with double-sided bulk tape. We attach a heart to them.


10. Insert the chocolate bar. We tie a ribbon.


The final look of the craft.
A chocolate bowl for a loved one is ready for gifting!
It's always nice to give gifts to family and friends. You always want to please and surprise them at any celebration. This could be an anniversary, birthday, wedding or anniversary, birth of a baby, christening and others. We often think twice before choosing the right gift, so that it matches and is really needed by this person.
Giving some trinket is very banal and unreasonable, but making an original gift with your own hands is quite sincere and romantic. For example, a postcard in the shape of a box will look very good; such a postcard is also called a chocolate box. We discussed it in one of the previous articles.
This card is not only a greeting card, but you can also put in it your favorite chocolate that the person you want to congratulate loves. The chocolate maker can also be given as an ordinary gift, just to thank someone. The original packaging will remain a long-lasting memory, and the chocolate will decorate your tea party and give you a sweet sensation.

In order to make a chocolate postcard using the scrap technique, we will need the following materials.
- A sheet of cardboard of the desired color;
- Several sheets of scrap paper;
- Figured hole punch;
- Paper napkin;
- Template diagram for making a workpiece;
- Ribbons, half beads, flowers, cutting with stamped text;
- Double-sided tape, pencil, ruler, PVA glue, rubber band.
Master class on creating a chocolate bowl using scrapbooking technique
So let's get started! We make a cardboard template for a postcard: to do this, measure the required dimensions and get a template with a pocket, as shown in the photo below.

All the necessary materials that we need can be seen in the photograph.

We fold our template, bend all the invisible lines, and get something like this on the outside.

And, accordingly, inside.

Using this template, applying it to a clean thick sheet of whatman paper or cardboard, we measure the dimensions and cut out the very base of our chocolate bowl. We make bending lines using a ruler and a special stick, more details can be seen in the photo.

Then we cut two pieces of about 9-10 cm of satin ribbon and glue these pieces approximately in the center on the top and bottom base with double-sided tape. We see more details in the photo.

We cut out the top blanks from scrap paper for the top, back inner parts of the chocolate bowl, as well as for the pocket. We make the edges curly using a hole punch. After we have completely glued our main workpiece with PVA glue, we glue all the pieces of scrap paper onto double-sided tape, as shown in the picture below.

We fix the inside corners of the pocket with double-sided tape, as shown below.

Now we use a glue gun to glue the entire decor to our liking. First, glue a paper napkin with tape or PVA glue approximately in the center to the front of the chocolate bowl, then a die-cut with a congratulatory text, and finally glue half beads and paper flowers. For beauty, you can sew a metal pendant onto one edge of the ribbon. The product is ready, put a chocolate bar in it, tie a beautiful bow and the gift is ready!
Video tutorials for beginners
Now is the time to see how the professionals work. We present video lessons with professional MKs.
Now, for sure, after watching the video lessons, you can do everything! We also recommend it. Give gifts, please your loved ones and be happy!
In the article you will find ideas for creating a unique postcard - “chocolate girl”!
Chocolate is far from a banal, but a very pleasant and tasty gift for any occasion. You can give chocolate to both a friend and your boss, the main thing is to present it correctly. You can choose any chocolate as a gift: black, milk, white, with additives, domestic, foreign, handmade, a bar of 100, 200 and even 500 grams.
A modern way to “decorate” a chocolate bar is to make a chocolate bowl. This is a special wrapper, glued together with your own hands, decorated to taste. The good thing is that this decor for delicacies can be made for any holiday: New Year, Birthday, professional date (teacher’s, educator’s or doctor’s day).
IMPORTANT: You can purchase decorations for a chocolate card at any store that sells creative materials.
There are several types of chocolate bowls:
- Chocolate box-packaging – is intended only to serve as a beautiful packaging for a chocolate bar.
- Chocolate girl with congratulations - Inside each card there are poems or congratulatory words.
- Chocolate bar with tea– you can also put several tea bags in such a card (pockets are made for this) or coffee sticks.
- Chocolate girl with money - on one side there is a special pocket for banknotes
Chocolate maker - a way to decorate chocolate for a giftIMPORTANT: The chocolate bar must be presented solemnly, inserting it into the “chocolate box” packaging and trying not to damage the decor in any way.
Chocolate card with a surprise with pockets for tea: ideas, templates, photos
A postcard with chocolate and tea (or coffee) is a pleasant and very appropriate gift for any occasion. This is a sign of attention that indicates your sympathy or respect. Choosing chocolate and tea should be based on a person’s preferences. The tea should be packaged in a beautiful foil or paper wrapper and placed in special pockets inside the chocolate bowl.
How to do:
- Thick cardboard should be used as the basis for the chocolate postcard.
- It must be cut according to the template (rectangle measuring 22 by 7 cm)
- Looking at the template, bend the cardboard correctly to make a card
- You also need to cut tea pockets from cardboard measuring 8 by 14 cm (look at the template).
- All templates must be glued together (pockets inside the card)
- Then decorate the card to your liking (you can use wrapping or designer paper, lace, ribbons, beads).


Chocolate card scrapbooking: ideas, templates, photos
A chocolate maker is, first of all, a postcard, which means it must contain congratulations and pleasant words. Chocolate in such a card is just an unexpected and tasty addition.
Adviсe:
- Cut out a card template from thick cardboard
- Make a pocket for chocolate (and tea or coffee)
- Between the pockets or on the other side (opposite the chocolate bar) of the postcard, glue poems printed on paper and cut out.
- You can also use clippings from magazines and phrases carved from wood (sold in handicraft stores).
- Decorate the outside of the chocolate bowl with lace, ribbons, pictures and cutouts.


Chocolate card for March 8: ideas, templates, photos
A chocolate card for March 8th can be given to your mother, grandmother, sister, girlfriend, teacher, colleague, classmate. This chocolate bowl should be decorated in a special way.
- Artificial flowers
- Half beads and rhinestones
- Magazine clippings
- Decoupage
- Satin ribbons
- Lace
- Serpentine
- Sequins
- Designer paper
- Wrapping paper

 Chocolate girl on March 8 (option No. 1)
 Chocolate girl on March 8 (option No. 2)
 Chocolate girl on March 8 (option No. 3)
 Chocolate card for the New Year: ideas, templates, photos
For the New Year, you can give such a card instead of the usual card, the main thing is to decorate it thematically. You can make all kinds of three-dimensional decor using what you find in the store (holiday wrapping paper, cut-outs and stickers). Use a large amount of glitter, streamers, foil, broken glass (for example, from old Christmas tree decorations).
IMPORTANT: Decor in the form of cinnamon sticks, dried orange slices, snowflakes, Christmas trees and Santa Claus figures looks very stylish.
Design ideas:


Birthday chocolate card: ideas, templates, photos
You should definitely include an additional banknote in your chocolate maker for your birthday. Thus, the chocolate box will replace the envelope postcard.
Chocolate girls for birthday:


 Chocolate maker with “fragrant” decor
 Chocolate card for Teacher's Day, September 1: ideas, templates, photos
It is simply impossible to congratulate all the teachers at school with luxurious gifts, so a chocolate maker will be very relevant. You can decorate each one according to the subject given by the individual teacher.
Chocolate options:


 On Teacher's Day

Chocolate card for February 14: ideas, templates, photos
If you want to please and surprise your “other half” at the same time, try to make a chocolate bowl for her with your own hands. You can put any surprise in this card: a membership to the gym or a cosmetic procedure, tickets to a movie or circus, money, a declaration of love, a Valentine's card.
IMPORTANT: In this case, chocolate will only be a pleasant addition to the main gift.
Options for chocolate bowls for lovers:


 Stylish chocolate maker for Valentine's Day
 Chocolate card for February 23rd, for a man: ideas, templates, photos
Even men love sweets, and for those with a real “sweet tooth”, a chocolate bowl will be a pleasant surprise. It can be supplemented with any surprises, confessions, notes and congratulations.
Chocolate option:


Chocolate card for a kindergarten teacher: ideas, templates, photos
Some parents and children prefer to congratulate their kindergarten teacher on every holiday. To diversify your gift ideas from the usual box of chocolates and a jar of coffee, you can try making a chocolate maker with your own hands.
Ideas for chocolate makers:


Chocolate card for a wedding: ideas, templates, photos
You can replace the usual gift envelope for newlyweds with a chocolate box. In addition to the fact that this postcard holds money, you can also optionally place congratulations, poems and a nice bonus - a chocolate bar!
Ideas for wedding chocolates: Beautiful chocolate bowl as a gift for the hero of the day 
Chocolate card for a doctor: ideas, templates, photos
For your professional holiday, you can prepare chocolate cards not only for doctors (you can put money or a gift card with a certain amount inside), but also for nurses (put a few bags of tea and coffee inside).
Chocolate option:

Video: “Chocolate girl in scrapbooking style”
You might also be interested in:
Gemma is an example of miniature carving of colored stones and gems - glyptics. This view...
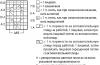
98/104 (110/116) 122/128 You will need Yarn (100% cotton; 125 m / 50 g) - 250 (250) 300...
Periodically replenishes its collection of publications dedicated to various colors and shades in...
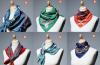
A correctly tied scarf around the neck affects the external image and characterizes the internal...
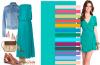
251 03/26/2019 6 min. You can wear high heels and an expensive suit, make...

