


Nadezhda Gadalina
GCD plan for design in the middle group. Theme of the week: “Berries of the garden and forest”
Plan - outline directly-educational activities
By design in the middle group"Droplets".
Topic of the week: « Berries of the garden and forest»
Lesson topic: "Bridge for Mishka"
Integration of educational regions: "Cognitive Development", "Artistic and aesthetic development". "Social and communicative development", "Physical development".
Target: Give children an idea of bridges, their purpose, structure
Tasks:
Practice building strong structures
Practice building bridges
Develop imagination, creativity, the ability to independently perform a sequence of actions, generalize, compare, find commonalities and highlight differences
Materials: building material, Teddy Bear toy, fabric river
Methods and techniques:
1. Verbal (conversation, explanation)
2. Visual (show, illustrations)
3. Practical (Physical minute)
Introductory part:
Good morning guys!
Mishka came to visit us. Let's say hello to him.
Teddy bear: Good morning guys! Today I got ready for berries, I saw a large clearing near the river, and there were many, many raspberries in it. But I couldn’t get across the river. What should I do? How to get to the clearing and collect berries?
IN: Guys, how can I get to the clearing?
Main part:
Guys, can we help Mishka build a bridge?
What types of bridges are there?
What can a bridge be made from?
What parts are needed?
Before we start building we need to warm up a little
Physical exercise for Mishka.
The bears were walking through the forest,
Waddle walking.
Bears looking for berries.
Imitation of movements.
Like this, like this
Bears looking for berries.
Sweet raspberry
Collection berries into an imaginary basket.
Added to cart
Like this, like this.
They put everything in the basket.
How we treated ourselves to raspberries,
Stroking the tummy, sitting on the floor, on chairs.
Everyone was sprawled out on the grass.
Like this, like this
Everyone was sprawled out on the grass.
And then the Bears danced
Imitation of bear cubs dancing.
Paws raised up
Like this, like this
They raised their paws up.
Guys, each take the parts for the bridge and try to build it.
Look what a bridge I made
You made some wonderful bridges. Bear, do you like our bridges?
M: Yes, they are wonderful. Now I’ll try to follow them to the clearing.
The teacher puts a bridge across the river, and Mishka passes behind berry.
M: Thank you guys for helping me! Goodbye kids!
Reflection:
Educator. Tell me children, what did we do today?
Educator: “What have we learned?
What do you remember? What did you like?”
Publications on the topic:
Calendar-thematic planning in the middle group. Topic of the week: “Active leisure” Topic of the week: "Active leisure" Goals and objectives: To promote the development of all components of children's play (enrichment of themes and types of games, games.
Objectives: Continue to enrich the understanding of the objective world accessible to the child and the purpose of objects; Introduce elementary rules.
 DATE OF IMPLEMENTATION December 7-11, 2015 FINAL EVENT “Design of the album “Signs of safe behavior with household appliances” GRID OF CLASSES.
Calendar planning in the middle group topic of the week “Defenders of the Fatherland” Topic of the week: “Defenders of the Fatherland” (from 02/15/16 – 02/19/16) Monday Date 02/15/16 Joint activities with children of SSD (independent.
Calendar plan for work in the first junior group. Topic of the week: “Insects.” Objectives: To form in children an initial understanding of insects. Learn to distinguish a butterfly or a bug by certain characteristics; learn.
Calendar plan for educational work in the sub. group. Topic of the week: My planet Cosmonautics Day Calendar plan for educational work in the preparatory group. Topic of the week: My planet. Cosmonautics Day. Purpose: Formation.
Summary of educational activities on environmental education in the preparatory school group “Children of the Forest: Mushrooms, Berries” INTEGRATION OF EDUCATIONAL AREAS: "Cognitive", "Social-communicative", "Artistic-aesthetic". TASKS: "Cognitive".
Prepared by: Fomina Nadezhda Vasilievna, MADO "Bolshealeksevo combined kindergarten "KALINKA" Stupinsky municipal district
Educational field: artistic and aesthetic development.
Integration of educational areas: cognitive development, socio-communicative development, physical development, speech development.
Tasks:
Educational: to strengthen children’s ability to perform appliqué by rolling napkins.
Educational:
develop fine motor skills of the fingers, tactile perception, sense of color, shape, rhythm, cognitive abilities of children, speech, thinking, paper skills.
Educational: to cultivate feelings of love for native nature, mutual assistance.
Materials, tools, equipment:
Demonstration material: subject pictures depicting: raspberries, blackberries, strawberries, cloudberries; teddy bear with basket; a soft berry made by the teacher from soft white paper and pieces of crumpled paper.
Handouts: soft white paper, crumpled colored paper (napkins), glue in deep lids, fabric napkins, glue brushes, oilcloths, trays.
Progress of the lesson:
Educator: Guys, Mishka came to visit us from the forest. He told me a story about how his mother bear sent him for wild berries, but he didn’t find anything and didn’t want to return home with an empty basket. Children, let's help Mishka fill the basket with wild berries.
Then the teacher shows a homemade berry and asks them to guess what and how this berry is made of. Children express their guesses. The teacher says that now she will reveal the secret and the children themselves will be able to make such bright and juicy berries for Mishutka. She points out that the berries can also be red. (raspberry), purple (blackberry), orange (cloudberry).
Educator: Guys, now let's try to guess the riddles about these berries.
Riddles about wild berries:
Not as a joke, but seriously
The bush is overgrown with thorns.
Pick some dark berries.
What kind of bush? (Blackberry)
These forest berries
Brown bears love it.
Not rowan, not viburnum,
And with thorns... (Raspberry)
She was born in a swamp,
Hidden in the soft grass.
Yellow brooch -
Berry... (Cloudberry)
1) Take soft white paper and very, very tightly crumple it into a tight ball;
2) Coat with paste and roll in your palms to form an even ball; wipe your hands with a damp cloth;
3) We are thinking "outfit" for your berries and select napkins of the desired color, tear them into pieces, crumple and roll into lumps;
4) Glue the base ball (white lump) lumps of paper napkins - as planned, for this we lightly dip each lump into the paste or already apply glue to the white lump.
Physical education minute.
And blueberries grow in the forest,
Strawberries, blueberries.
To pick a berry,
You need to squat deeper. (Squats.)
I took a walk in the forest.
I'm carrying a basket of berries. (Walk in place.)
Finger gymnastics "For the Berries"
One, two, three, four, five, The fingers of both hands shake hands.
We're going for a walk in the forest. Both hands "they're coming"
index fingers
For blueberries, for raspberries, and middle fingers on the table.
For lingonberries, for viburnum. Bend your fingers, starting with the thumb.
We'll find strawberries
And we’ll take it to Mishutka.
Children think over their ideas and get to work.
Independent activity of children.
Final part:
The teacher collects the berries in a basket and draws attention to how different and beautiful the berries are.
Educator: Children, let's give this basket of berries to Mishka. He will take them to his mother bear.
- What difficulties did the children have while working? Some children had difficulty rolling the base ball out of white paper, because... There is not enough strength in the palms, as a result there is no proper pressure on the paper wad.
Program content:
- Introduce children to paper of different qualities for different purposes.
- Conduct experiments with different types of paper and find out how the properties of each of them are related to the use of this material.
- Enrich the child's sensory skills.
- Strengthen children's ability to crumple paper.
- Development of attention, memory, logical and abstract thinking, spatial imagination.
- Development of fine motor skills of the hands.
- Development of artistic taste, creativity and imagination of children, curiosity.
- Expand children's life experiences.
- Expand children's communication abilities.
Materials: napkins, writing paper, drawing paper, cardboard, colored squares, containers with water, scissors for each child, drawing of a tree, glue.
Preliminary work:
Pay attention to paper in everyday life.
Progress of the lesson:
Part 1
Guys, today in our kindergarten, a package arrived in our group from a dragon from a paper country. Let's see what's in it. (The teacher opens the parcel; there are different types of paper and a letter there).
Let's read the letter first:
“Dear guys! I couldn't come to visit you, but I sent you different types of paper. I really want you to continue experimenting with paper and learn the properties of different types of paper. And the inhabitants of the paper country ask you to decorate this tree.
Thank you,
Your little dragon."
Children look at different types of paper and touch it.
What do all types of paper have in common? How are they different? Preschoolers themselves suggest ways to test the properties of paper.
Then a series of experiments is carried out:
Children fold different types of paper (napkin paper folds easier and can be folded more times than other types; drawing paper is difficult to fold);
Pieces of paper are crumpled (which one is easier to crumple? Compare what happened);
Pieces of paper are dipped into a bowl of water (which one gets wet faster?);
The task is given to tear apart squares from different papers (in which case do you need to make a big effort?);
The paper is cut with scissors;
You need to throw squares of the same size (which one falls faster and why?);
You should blow on small pieces of different paper (which one is lighter?).
Well done guys. We conducted various experiments with you and learned a lot of interesting things about paper.
The teacher concludes that paper varies in quality, purpose, and properties; paper is a fragile material: it tears easily, wrinkles, and gets wet.
Part 2.
Let's now see what else is in the package?
Children take out colored squares and a drawing of a tree.
Guys, how are we going to decorate the tree for the residents of the paper country? (children offer their options).
You already know how to crumple paper. Let's roll colored balls.
What are they like? (for fruits).
What fruit do your balls resemble?
Children identify the resulting fruits. Someone got a pear, an orange, an apple, etc.
Well done, you are very observant. Now let's glue these fruits onto this tree.
Part 3.
Children glue fruits.
Guys, look at the tree we got (photo 2). Various fruits hang on one tree: “Miracle Tree.” Residents of the paper country will be very happy.
On the topic: methodological developments, presentations and notes
Summary of a lesson on paper construction in the senior group of the Zayushkina Izbushka kindergarten
Summary of a lesson on paper construction in the senior group of kindergarten. Making a hut by twisting a square into a tube....
Summary of a lesson on paper design on the topic PAPER FURNITURE based on folding a rectangle...
Elena Bondareva
Summary of a design lesson in the preparatory school group “Harvest” (design by design)
Educational area: "Cognition", "Communication", "Physical culture".
Educational activities: familiarization with the surroundings, design.
Target: teach children design according to a model.
Tasks:
educational:
To consolidate the signs of autumn,
Expand children's knowledge about vegetables,
Practice solving riddles about vegetables;
developing:
Develop attention, memory, thinking, imagination,
Fine motor skills of fingers,
Ability to work according to a model;
educational:
Cultivate neatness
Develop the ability to finish what you start.
Preliminary work: conversations about fruits and berries, d/i “Whether in the garden or in the vegetable garden”, d/i "The Fourth Wheel".
Equipment: basket with fruits and berries (apple, pear, watermelon, currant, plum, orange, Lego.
Handouts: Lego.
Progress of the lesson:
Educator: Guys! Today is a wonderful day! It's not so hot anymore. Tell me what time of year it is now?
Children: Autumn.
Educator: Why autumn? What signs of autumn do you know?
Children: the leaves have changed their color, it rains often, a cold wind blows, it’s cold outside, the days have become shorter, birds are flying away to warmer climes. Educator: What gifts does autumn give us?
(Children's answers.)
Educator: Guys, in this basket I have something for you and to help you find out what’s there, I’ll tell you riddles?
Riddles about fruits and berries:
Same with a fist, a red barrel,
Touch it - smooth, bite it - sweet... (apple)
Boxers know everything about her
With her they develop their blow.
Even though she's clumsy
But it looks like a fruit (pear)
He looks like a red ball
Only he doesn’t rush at a gallop.
It contains a useful vitamin -
It's ripe (orange)
Balls hang on branches,
Turned blue from the heat (plum).
He sighs very heavily -
So the poor thing got fat,
What green vest
I put it on myself with difficulty (watermelon)
A lush bush of black berries -
They taste good. (black currant).
Educator: Guys, tell me in one word what’s in the basket?
Children: fruits, berries.
Educator: Where do you think fruits and berries grow?
Children: In the garden.
Educator: Here! You guys are so great! What time of year is it collected? harvest in the garden?
Children: In autumn.
Fizminutka « Harvest» :
Let's go to the garden let's reap the harvest(walking).
We'll drag carrots (dragged)
And we'll dig up some potatoes (digging).
We'll cut a head of cabbage (cut off)
Round, juicy, very tasty (draw a circle with hands)
Let's pick a little sorrel (tear)
And let's go back along the path (walking).
Educator: Guys, this year is very good harvest fruits and without your help we cannot cope with the cleaning. I offer you to help collect vegetable harvest. Let's go to the table. (Children sit at tables.)
Educator: each of you can pick the fruits and berries that you love most. I suggest you think carefully and remember what this vegetable looks like (shape, color) and collect it from Lego constructor.
Independent work of children. Help in case of difficulty.
Educator: Well done guys, you did a good job. You got wonderful fruits and berries, just like the real thing.
Publications on the topic:
Summary of an integrated lesson on familiarization with the environment and design in a preparatory group for school with mental retardation Topic: “Vegetables” Purpose: summarizing children’s existing knowledge about vegetables. Objectives: Educational area “Cognitive development” 1. Consolidate.
Abstract of GCD for designing from paper according to the plan “The Fairytale City of King Guidon” Abstract of the GCD for designing from paper (according to the plan) “The Fairytale City of King Guidon” (Making a desktop model of an architectural model.
Goal: To teach children how to construct crafts from natural materials. Objectives: - In the process of work, develop children's attention, creativity.
Abstract of the GCD for constructing the “Temperem for Santa Claus” in the preparatory school group Municipal budgetary preschool educational institution "Kindergarten No. 1" in the city of Kostroma. The topic is directly organized.
Summary of GCD for design in the preparatory school group “Let's build a house” Notes on design in a preparatory school group. Goal: 1. Learn to see the appearance of your street, village. See the peculiarities of buildings.
 Goal: to develop children's imaginative thinking, creative imagination, and emotional responsiveness. Objectives: introduce a new drawing technique.
Design is the process of arranging objects or parts in a certain order to obtain an object necessary to support life. In the process of development of society, children's design emerged from this area of human activity. The child’s actions are easier, the designs are simpler. But children's construction can also have a practical application - the child uses the resulting objects in play activities. You can design with a variety of materials: the actual construction set, natural or waste materials, paper and cardboard. At the same time, creating structures from paper (possibly with the use of additional materials) is the most difficult; preschoolers become familiar with it in the middle group of kindergarten.
Paper construction in the middle group of kindergarten
A child becomes familiar with paper in the first year of life. In the younger groups of kindergarten, he learns to make paper appliqués, decorates cardboard cards, and does paper modeling. Children 3–4 years old master the concept of shape and develop the skill of cutting out paper. Younger preschoolers accumulate knowledge and skills for future work with paper. The teacher should not rush, but should be attentive to the age characteristics of each group. Any activity should bring joy and satisfaction to the child, and the child is most happy when he manages to complete the task. At the age of 4–5 years, preschoolers have an idea of the basics of construction through activities with cubes, plastic construction sets, they built houses from plasticine logs and attached a roof from sticks to them - there it is, a constructive activity. Designing from paper material (sheets of paper, cardboard, boxes, matchboxes, cardboard rolls, etc.) begins in the middle group.
Target
The purpose of classes on paper design in the middle group: to encourage children to design activities using paper materials.
Tasks
- introduce students to the properties of paper that are used in design;
- teach children basic paper construction techniques (creasing, tearing, rolling, twisting);
- fostering perseverance, accuracy, polite communication;
- development of interest in collective activities.
Types of activities
- Full demonstration and sample (used in the first paper design classes, later - when creating complex structures);
- According to the model (in this case, the teacher gives verbal instructions and explanations on how to create the object).
When preparing for a design lesson, it is necessary to remember that the goal of a child’s visual activity is not the creation of crafts, but the development of aesthetic taste, imagination, constructive thinking and the cultivation of moral qualities.
Types of design in the middle group

Materials for construction
- Writing and colored paper in A4 format.
- Colored cardboard.
- Velvet colored paper.
- Wallpaper trims.
- Waste paper material: matchboxes, tubes of paper rolls, paper plates and cups, etc.
- Sheets of paper for scrapbooking are sheets of thick paper with a themed print. Expensive material for children's crafts.
Materials for construction from paper in the photo
The main material for designing from paper The main material for designing from paper An excellent option for simulating various surfaces of objects in the surrounding world  A beautiful and original, but expensive material Example of construction using paper plates Example of construction using cardboard cores Example of construction using matchboxes Example of construction using velvet paper Example of origami with wrapping paper addition Example of construction with disposable cups
Combining paper design with other art techniques
To create objects from paper, you should use such artistic techniques as drawing, coloring, appliqué, and modeling. Preschoolers aged 4–5 years master the basic techniques of these techniques and are happy to supplement paper models with them. When creating images of animals and people, students can add parts of the face or body/muzzle or paws. Applique techniques can be used to imitate the plumage of birds, the crown of a tree, grass on a lawn, etc. Plasticine parts are also often used to complement and/or decorate paper crafts. Coloring should be used in works made of thick cardboard or waste material; work made of paper is deformed when paint is applied.
Examples of synthesis of various techniques in paper construction works
Parts made from paper plates are painted. A mandatory task is to decorate the finished work with a part made of plasticine. Direct applique technique was used to decorate the work. Animal faces are made using a simple drawing technique.
Multi-level tasks in paper design classes
The teacher must always remember about the individual approach to teaching each child. When completing a construction task, the student will lose interest in the creative process if the task turns out to be simple for him. Therefore, when developing each lesson, the teacher must prepare additional tasks for those students who have better mastered simple design skills. For example, during a lesson on creating a cup with a handle, offer to decorate the finished work with paper appliqué. For work on design on a plane, it is a good task to complete the details on the base as a background image. Initially, it is incorrect to give tasks of different levels of complexity; dividing the team may look like separating those who are achieving and those who are lagging behind. In such a situation, students who received a simple task may experience a feeling of anxiety or even aggression towards those who were given a difficult task, but with a more interesting or beautiful result.
Using motivating material in the classroom
At the preparatory stage of each lesson, it is necessary to involve motivating material. This is necessary to activate the pupils’ imagination, broaden their horizons, increase interest in creative activities, and develop aesthetic taste. The material should be varied:
- Visual material (cards with images of objects or objects on the topic, posters, handouts).
- Audio accompaniment (listening to songs on the topic of the lesson or background sound of melodies during a game or physical education session).
- Reading poems, nursery rhymes, proverbs and sayings.
- Riddles.
- Creating a game situation (using toys or objects on the topic).
- Show slides or presentations on the topic of the lesson.
Examples of using a motivating start to classes
| Lesson topic | Motivating start |
| "Tumbler" | At the beginning of the lesson, the teacher asks the children a riddle: Came to visit us, friends, The doll is unusual. Doesn't sit, doesn't lie, Just know for yourself, it’s worth it. Sashka and Natasha know, These dolls... (tumblers). The pupils are shown a tumbler who was in a hurry to visit them. The teacher talks with the children and asks questions: “Why do you think this doll is called a tumbler?”, “How to play with a tumbler?”, “What figures does this toy consist of?” etc. The game “Find where she hid” is played: The teacher says that another tumbler came to visit the children, but she was shy and hid behind one of the toys in the room. Children are asked to find the doll by verbal guessing (said in turn): “The tumbler is hiding behind the car,” “The tumbler is behind the ball,” “The tumbler is behind Katya’s doll,” etc. until the tumbler is found. |
| At the beginning of the lesson, the teacher shows the children pictures of wild animals. The guys name them, the teacher hangs the pictures on the board. Then the teacher says that wild animals are dangerous and their behavior can be unpredictable, and suggests turning the animals from the pictures into toys (a game element). To do this, students must close their eyes and simultaneously clap their hands loudly three times. At this time, the teacher puts animal toys on the table, the images of which the children will design. | |
| "Beauty Snowflake" | The teacher creates a surprise moment: There is a mailbox on the table, the teacher tells the children that the postman delivered it to their group, reads out the address (the real address of the kindergarten is written - city, street, house, kindergarten number, group). A letter is found in the box, the contents of which the teacher reads out loud: animals from distant Africa are addressing the children, they tell them what the climate is like in their native place and are sad that they have never seen snow, but have heard a lot about what an amazing and beautiful phenomenon this is. . The teacher asks how to show the people of Africa snow and, through suggestions and hints, leads them to the idea that they can make snowflakes out of paper and send them by mail to Africa. |
| The guys are given a riddle: We are green like grass Our song: “Kva-kva” (frogs/little frogs). The teacher conducts a conversation with the children: what color are the frogs, where do they usually live, what do they eat. Shows the pupils a picture/poster showing a frog in a swamp. The teacher says that the little frog is sad and invites the children to cheer him up by showing him how to perform the movements at the “Frogs” physical education lesson: There are two girlfriends in the swamp, two green frogs. In the morning we washed ourselves early, rubbed ourselves with a towel, They stomped their feet, clapped their hands, They leaned to the right, to the left and came back. (Perform appropriate movements). But the teacher notices that the frog is still sad because he is all alone in the swamp, and gives the children the idea that they can make frogs out of paper and place them on the poster. |
Examples of work on the specified lesson topics
Designing from paper strips Designing from paper strips Designing from paper strips on a plane Designing from paper using the origami technique
Compiling lesson notes for the middle group on paper design
For each lesson, the teacher must prepare a detailed lesson summary. Goals and objectives must correspond to the age and individual characteristics of children. The use of visual and technical materials by the teacher, as well as those materials and tools that the children will use, is recorded. Then you should describe the course of the lesson. All this is necessary in order to carry out an analysis after the lesson: what moments were successful, what did not work, what pedagogical techniques were effective, what aroused the children’s interest, what was their emotional state at each stage of the lesson.
Lesson time plan
The duration of a design lesson in an average group is 15–20 minutes.
- Organizational moment 1 minute.
- Motivating stage 3-5 minutes.
- The teacher demonstrates working techniques for 2–3 minutes.
- Independent work of pupils 6–8 minutes.
- Demonstration of work, discussion 2 minutes.
- Summing up 1 minute.
Setting goals and objectives
Goals and objectives must be specific; they are set by the teacher in accordance with the skills mastered in class that are necessary when working with certain patterns and performance techniques. Let's look at options for goals and objectives using examples with specific work methods:
| Lesson topic | Target | Tasks | Technique for performing the task |
| "Bridges" | Creating crafts using geometric shapes from paper. | - training in object analysis; - developing the ability to create a building using ready-made forms; - development of spatial thinking and design skills. |
Constructing a building using cardboard figures (cube, brick, block, cylinder). |
| "Spring Miracles" | Making flowers from strips of paper. | - development of spatial and design thinking; - development of the ability to combine; - development of aesthetic taste. |
Gluing strips of paper to create “petals”, connecting them into a flower using the middle. |
Summary of the lesson “Our spring stream.”
Authors: Petrukhina A.V. teacher, Tatarkina Yu. V. teacher, MADOOU No. 96 “Umnichka”, Naberezhnye Chelny
| Types of activities | Playful, productive, educational and research. |
| Goals | Strengthening skills in working with paper, developing attention, responsiveness, instilling a culture of communication in a team. |
| Expected result | Ability to design a paper boat, positive and active interaction with all participants in the creative process. |
| Materials used | Whatman paper with the image of a stream, sheets of paper, glue with tassels, oilcloths and rags for cleaning the workplace. |
| Progress of the lesson | The teacher has a conversation with the children: what time of year is it now (spring), name the spring months, what month it is now, what the weather is like outside today. Using visual material: the teacher hangs a Whatman paper with a picture of a stream on the board and asks them to imagine what they would do on a walk if they saw such a stream. Offers to decorate the picture with paper boats. The teacher conducts a live demonstration of the actions to create a boat. The children independently repeat the actions demonstrated. Physical education minute: The teacher thanks the children for the work done and invites everyone to decorate the stream with their own boat. |
Lesson summary “Dog kennel”.
Creating paper crafts using a new design method - folding paper in half.
Tasks
- training in the analysis of paper crafts (selecting parts of the craft, their location on the plane and relative to each other);
- learning how to fold a sheet of paper;
- learning to create an oval by rounding the corners of a square;
- education of accuracy.
Materials
A sheet of white paper, a strip of brown paper, a square sheet of black paper, glue, a brush, scissors, dog figures, oilcloth, a rag.
Progress of the lesson
Ball game “Who lives in which house”:
Children stand in a circle, the teacher is in the center. The teacher throws the ball to one of the students, naming an animal or bird; the child’s task is to say where this animal lives. Then the child throws the ball to the next student, naming another animal, etc. The teacher shows the children a finished paper booth and teaches them to analyze the paper structure using leading questions.
Direct demonstration of steps to create a paper booth.
Physical education minute.
One - get up, stretch, (Stretch.)
Two - bend over, straighten up, (Bent the backs, hands on the belt.)
Three - three claps, (Clap your hands.)
Three nods of the head. (Head movements.)
Four - arms wider, (Arms to the sides.)
Five - wave your arms, (Wave your arms.)
Six - sit down again. (Sit down.)
Pupils independently perform actions to construct a paper booth.
Demonstration and discussion of finished works.
Time to play with paper crafts and dog figurines.
Summary of the lesson “Funny Snowmen”.
Learn how to make a craft from paper napkins.
Tasks
- consolidating knowledge about winter and its phenomena, expanding the vocabulary of students;
- training in plane orientation;
- strengthening the skill of using scissors and glue;
- development of constructive thinking;
- education of accuracy.
Materials
Frame with a picture of a New Year tree. Pictures depicting Father Frost, Snow Maiden, snowman, bullfinch and Snow Queen. “Ice blocks” made of paper. Images of snowmen in different poses with different facial expressions. Scissors and glue, glue brushes, paper blanks for cutting out snowmen and their decorations.
Progress of the lesson
At the beginning of the lesson, five pictures of covered pieces of ice hang on the board. The teacher invites the children to go on a visit to the snowy kingdom. A conversation is held about winter and the features of this time of year.
The children meet the inhabitants of the snowy kingdom (their images were hidden under pieces of ice): Father Frost, Snow Maiden, Bullfinch, Snow Queen, Snowman. The teacher can first make riddles about these characters.
Surprise moment: Snow Woman comes into the room. She is sad and says that she had a great winter (shows a picture), but all the snowmen left at the beginning of the year when spring came. The teachers decide to create snowmen for the Snow Woman.
Physical education.
The teacher shows how to create a snowman from napkins.
Repeat by pupils.
After completing the work, leave the snowmen to dry.
At this time, children play with the Snow Woman the game “Assemble a Snowman” (they assemble snowmen from individual parts).
The guys hand Snow Baba paper snowmen and say goodbye.
Origami club program for the middle group
- learning how to fold a sheet of paper;
- learning to create an oval by rounding the corners of a square;
- education of accuracy.
Children stand in a circle, the teacher is in the center. The teacher throws the ball to one of the students, naming an animal or bird; the child’s task is to say where this animal lives. Then the child throws the ball to the next student, naming another animal, etc.
The teacher shows the children a finished paper booth and teaches them to analyze the paper structure using leading questions.
Direct demonstration of steps to create a paper booth.
Physical education minute.
One - get up, stretch, (Stretch.)
Two - bend over, straighten up, (Bent the backs, hands on the belt.)
Three - three claps, (Clap your hands.)
Three nods of the head. (Head movements.)
Four - arms wider, (Arms to the sides.)
Five - wave your arms, (Wave your arms.)
Six - sit down again. (Sit down.)
Pupils independently perform actions to construct a paper booth.
Demonstration and discussion of finished works.
Time to play with paper crafts and dog figurines.
- training in plane orientation;
- strengthening the skill of using scissors and glue;
- development of constructive thinking;
- education of accuracy.
The children meet the inhabitants of the snowy kingdom (their images were hidden under pieces of ice): Father Frost, Snow Maiden, Bullfinch, Snow Queen, Snowman. The teacher can first make riddles about these characters.
Surprise moment: Snow Woman comes into the room. She is sad and says that she had a great winter (shows a picture), but all the snowmen left at the beginning of the year when spring came. The teachers decide to create snowmen for the Snow Woman.
Physical education.
The teacher shows how to create a snowman from napkins.
Repeat by pupils.
After completing the work, leave the snowmen to dry.
At this time, children play with the Snow Woman the game “Assemble a Snowman” (they assemble snowmen from individual parts).
The guys hand Snow Baba paper snowmen and say goodbye.
Origami club program for the middle group
The origami club program should have an artistic and aesthetic orientation. Its relevance lies in creating conditions for the comprehensive development of the personality of preschool children, familiarizing them with cultural values, creating motivation for cognitive and creative activities, and implementing positive interaction between teachers, students and their parents.

The creative process of creating origami “Ladybug”
Purpose of the program
Intellectual and aesthetic development of students through mastering the technique of paper construction - origami.
Tasks
- familiarity with the basic concepts of geometry (circle, square, triangle, point, line, angle, side, vertex, etc.) and origami shapes;
- learning how to work with paper;
- composition training;
- learning to follow verbal instructions;
- development of fine motor skills of the hands and eye;
- activation of attention, constructive and spatial thinking;
- memory development;
- development of imagination and creative abilities;
- instilling neatness, respect for materials, maintaining cleanliness and order in the workplace;
- formation of a culture of work and communication in the team.
In the origami circle, students work in subgroups of 8–10 people. The lesson lasts 20–25 minutes and is held once a week. Following the work of the circle, exhibitions of children's works are held.
Card index of topics for an origami mug in the middle group
| Lesson topic | Mastering and/or consolidating paper design skills |
| "Sweetie" | - bending the square diagonally, - finding the middle, - bending the corners of the square towards the middle. |
| "Butterfly" | - creating a triangle from a square, - bending corners in different directions. |
| "Christmas tree decoration" | - bending the circle in half, - finding the middle, - gluing parts of figures. |
| - folding paper in different directions, - working with glue. |
|
| - folding the square in four, - working with scissors. |
|
| "Fish" | - making a triangle from a paper square, - working with scissors. |
| - obtaining a triangle, - bending and everting parts of the triangle. |
|
| "Bookmark" | - folding the basic “candy” shape. |
| - folding the basic “kite” shape. |
Schemes for practicing origami and examples of work in the photo
Memo Technological map for origami Technological map for origami Technological map for origami Technological map for origami Collective work Craft from two origami elements Examples of work Examples of work Folding the “kite” shape, connecting modules Collective work
Interesting ideas and design schemes for the middle group.
To stimulate interest in visual arts, the teacher must introduce an element of play into classes, involve non-traditional materials in the use, and offer to create crafts that will have a practical purpose.
Work templates for classes
Template for cutting and gluing Origami diagram Construction instructions Origami diagram Diagrams Construction instructions Construction instructions Instructions for constructing a house with a surprise Ideas for constructing doll furniture from matchboxes Construction instructions Idea for creating a headdress for a doll Idea for creating a headdress for a doll Origami diagram Instructions for design Instructions for design Instructions for design Instructions for design
Examples of finished works
An example of paper construction using matchboxes. The craft can be used in a game or to create a project based on road safety rules. Example of design from paper Example of design from paper Example of design using cardboard sleeves Example of design from paper. You can use pendants to decorate a room, a window, or a Christmas tree. Example of a design using a milk carton. Example of a design made from paper. The work is designed in the form of a postcard for mom on March 8. An unusual craft in a closed form. In an expanded version. An example of design using a cardboard sleeve. An example of design from paper. Teamwork. A garland of lanterns will decorate the room for the holiday. Example of design made from paper. Birds can be hung on a window. Example of a design using a cardboard core. Example of a design made from paper. The basket can be filled with paper flowers. Example of a design using a matchbox at the base. Example of a design using waste material (matchboxes, ice cream sticks). Example of a design using a cardboard core. Example of a design using paper. Teamwork. A garland of flags is used to decorate a room or a Christmas tree for a New Year's party. An example of design made from paper. Crafts can be used to create group work or play with animal figures. Example of construction from matchboxes. The craft can be used in playing with dolls. An example of construction from matchboxes. The craft can be used in playing with dolls. Example of paper construction. Example of paper construction. Example of paper construction. Crafts can be used to decorate a room for the Spring Festival
You might also be interested in:
Gemma is an example of miniature carving of colored stones and gems - glyptics. This view...
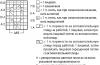
98/104 (110/116) 122/128 You will need Yarn (100% cotton; 125 m / 50 g) - 250 (250) 300...
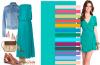
Periodically replenishes its collection of publications dedicated to various colors and shades in...
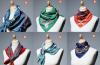
A correctly tied scarf around the neck affects the external image and characterizes the internal...

251 03/26/2019 6 min. You can wear high heels and an expensive suit, make...

