


A charming spring crochet doily with a lily of the valley pattern. Delicate flowers on an openwork mesh are highlighted with voluminous cones, which are obtained by knitting five columns with one vertex, and the stems are made with embossed columns. The napkin turns out to be quite large, about 72 cm in diameter, it will look impressive on a coffee table in the center of the room.
You can crochet a napkin using a high-quality pattern. Knitting a napkin begins from the center. Having cast a chain of 10 air loops, close them into a ring with a connecting post. To start knitting the first row, make 4 air. lifting loops, then from the initial ring knit 23 double crochets. Finish the row with a connecting post in the last lifting loop.

Knit the second row with arches of 7 chain stitches, secure the arches with single crochets, through 2 loops along the row, making 7 chain stitches, for the 8th cast on 2 chain stitches. and work a double crochet stitch from the first stitch of the row. So on the eighth arch the transition to knitting the next row is made.

Next, knit a napkin according to a pattern with 49 circular rows. In the last 49th row, the edge of the napkin is tied with small bumps. At the beginning, make a single crochet, *for the bump, cast on 3 air loops and knit 2 single crochets from the single crochet, secure the bump along the row with a single crochet from the next arch*, repeat from* to*. Having knitted the cones in a circle, make a connecting stitch into the first stitch of the row, fasten and cut the thread.
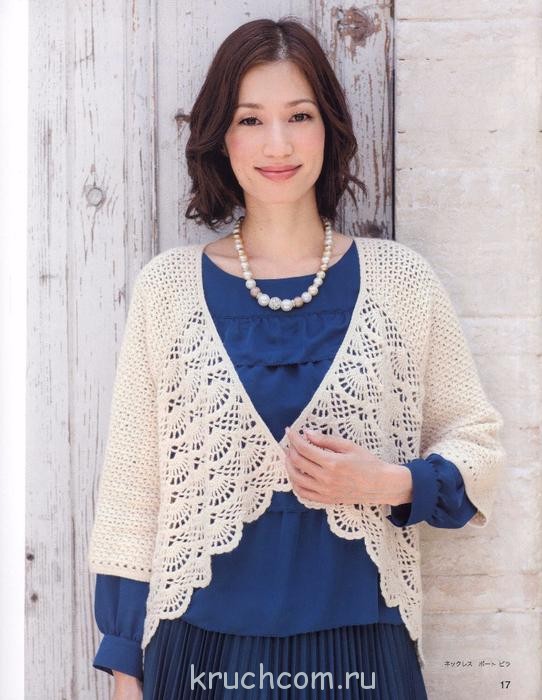
From time immemorial, the border has been considered the element of knitting that gives any product true tenderness and sophistication. It can be used to decorate any crocheted items - from clothing to kitchen accessories (napkins, tablecloths, towels, curtains and much more). Moreover, not only finished knitted items are tied with a decorative border. Openwork lace, knitted along the free edge of the fabric, can breathe new life into an old, long-forgotten item from a women's or children's wardrobe.
Tags:
“Pineapple” is considered one of the most common openwork patterns in crocheted needlework. It's all about not only the relative simplicity of knitting it, but also the final result of the process - a “pineapple” pattern made using any of the many patterns turns out to be truly magnificent! 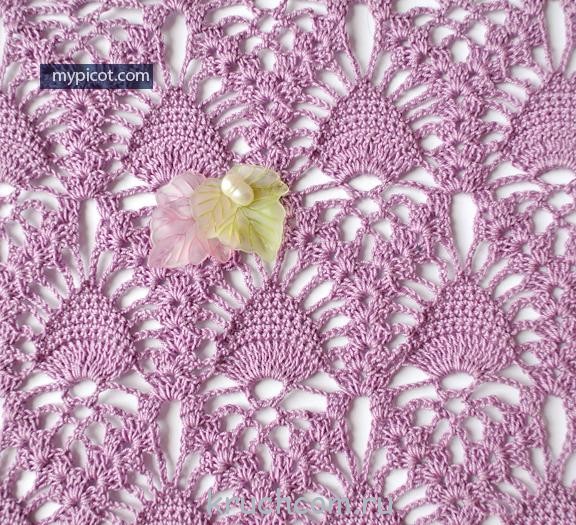
Tags:

A skilled craftswoman of crochet needlework will “dress” any little thing in a case – from your favorite smartphone to a cute vase that serves as decor in the corner of the room. Although, in terms of the degree of complexity of knitting, covers are among those items that can be done even by beginners holding a hook in their hands for the first time.
Tags:
Japanese openwork is an original, but very labor-intensive crochet technique. Today, Japanese knitting is at the peak of popularity - knitters all over the world are actively studying specialized books and magazines from Japan, trying to reproduce exclusive wardrobe and home interior items.
Tags:

Competition work No. 24 - Knitted napkins “Leaves” (Ksenia Shcherbakova)
Hello, needlewomen! My name is Ksenia. I have been crocheting since childhood. I really like to knit all sorts of little things for the home. I present to your attention two small napkins “Leaves”.
Yarn PNK them. Kirov "Iris", hook No. 0.95

Competition work No. 20 - Openwork napkin (Nadezhda Strogalova)
Good afternoon My name is Nadezhda. I was interested in knitting back in school, and with the birth of children it turned into love. I just can't imagine my life without knitting. I love both crochet hook and knitting needles. I present to your attention an openwork napkin. It has 12 petals, which makes it possible to make wall clocks in a rustic style. I think they will be adorable. Someday I will definitely find the time and do it))
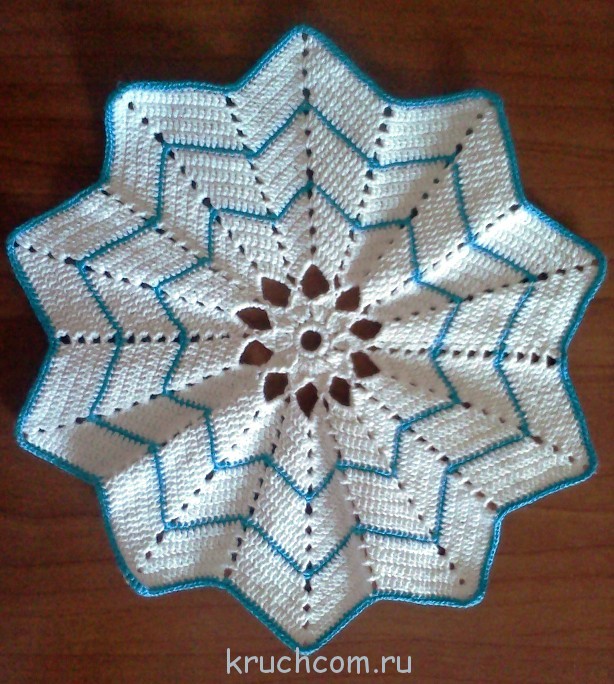
Competition entry No. 19 – Napkin “Lucky Star” (Ksenia Shcherbakova)
Hello, dear needlewomen! My name is Ksenia. I have been crocheting since childhood. I really like to knit all sorts of little things for the home. I present to your attention the “Lucky Star” napkin.
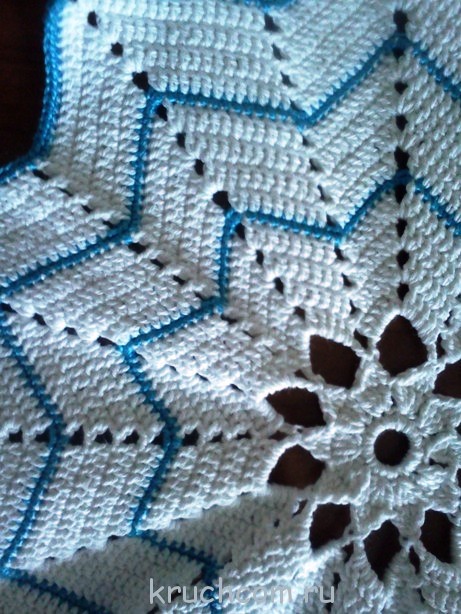
For knitting you will need: threads PNK them. Kirov “Lily” (white), “Iris” (blue), hook No. 1.5

Competition entry No. 14 – Oval crocheted napkin (Anait)
My name is Anait, I have been knitting for quite a long time, and crocheting for the last two years. You are already familiar with some of my works. This time I present for your competition an oval napkin, knitted from gray yarn - 100% cotton, hook No. 2.


Competition entry No. 12 – Knitted napkin for Easter (Alla)
Good afternoon! My name is Alla. I have been crocheting recently. I would like to present to your attention a napkin for your GREAT DAY!!! The holiday of the Holy Resurrection of Christ is approaching soon - the main event of the church calendar, the oldest and most important Christian holiday...
I've been eyeing napkins for a long time and decided to knit them.


Competition entry No. 3 – Knitted napkin “Contrast” (Ksenia Shcherbakova)
Hello! My name is Ksenia. I have been crocheting since childhood. I learned to knit during craft lessons at school.
I would like to present to your attention a knitted napkin “Contrast”.

Good afternoon, dear needlewomen and all blog guests!
I have accumulated ideas for crocheted napkins, patterns for which I usually post in this post. I decided to update it today and show it on the main page.
I know that there are a lot of people who like to knit napkins. Someone may think that knitted napkins have long gone out of fashion. But I believe that this is not so.
The fashion for napkins has never gone away. Crocheting napkins is always relevant. After all, how beautiful they look on small tables, bedside tables, under flower pots and vases. Napkins can be of practical use: if you place various objects, watches, keys and other items on them, this will protect the furniture from possible scratches and stains. You can knit large napkins for the head of chairs and sofas.
You can create original paintings from napkins. You can use them beautifully: pillows, T-shirts, and curtains.
Nowadays, round ones made of thick yarn or cord are very popular in modern interiors.
I made a selection of ideas in a video on how you can use napkins in modern life.
But I myself just love knitting them, I enjoy the process and the result, you could say I’m sick of napkins, I never get tired of knitting them, especially since all the time there are some new interesting models that you can’t pass by. By the way, I’m making a video on my YouTube channel.
Materials for knitting napkins
Delicate openwork napkins It is best to knit from thin cotton threads- ordinary bobbin threads, which are used to sew with number 10 or 20. The hook, accordingly, should also be the thinnest - No. 0.5.
You can also knit napkins from cotton yarn for knitting: iris, violet, lily, phlox, rose, pelican, pekhorka successful and others, in this case a hook No. 0.9-1.25 is suitable.
The diagrams can be opened in a separate tab, printed and saved in a folder on your computer.
I made a description of knitting this napkin for those who find it difficult to understand the pattern. It . I enlarged the diagram and divided it into parts for convenience.


Good afternoon, dear needlewomen!
Crocheting napkins for beginners is not at all difficult, as it might seem at first glance.
Crocheting is an exciting, fascinating activity, especially if you see photographs and patterns of very beautiful openwork napkins in magazines and on the Internet, you just want to knit such beauty with your own hands! Often these ideas are published without a detailed description and it is not always clear how to knit.
Today we will learn how to knit napkins and read patterns using a simple small napkin as an example. I have prepared for you a detailed step-by-step description with photos.
Which yarn to choose for knitting napkins
Crocheting napkins for beginners is better to start with thicker yarn (but not very thick) so as not to get tangled in the threads. For example, half-wool or acrylic.
We select the hook according to the thickness of the thread. This is done by trial method: if you take a very thin hook, then knitting with thick yarn will be difficult, almost impossible. A crochet hook with a very large number will result in a napkin that is too full of holes.
For knitting a thick napkin, a hook with number 2 - 2.5 is suitable. But, again, I repeat, do not strictly follow what is written. Try it, choose the option that you think is more convenient.
It’s better to start by choosing the simplest patterns for crocheting a napkin.
Crocheted small napkins can be used as... White or multi-colored napkins will look good on the table.
Well, in the future, for knitting openwork napkins, it is better to use thin cotton bobbin threads, such as those used for sewing (No. 0-10). The product will be soft and airy.
In this case, the hook should also be taken with the smallest number 0.5 or 1.
You can also knit napkins from thicker cotton yarn such as Iris, Violet and others; a hook size of 1.2-1.5 is suitable.
So, how to crochet a napkin?
Doily crochet tutorial for beginners
This is our napkin pattern. I specifically chose a small and simple scheme for beginners.
On the corresponding page you can always find those used in diagrams and text descriptions.

So let's get started! I will write a description, and you will knit a napkin and ask questions in the comments.
1 . IN the tongue of the round napkin begins always from its center: from a set of chain of air loops. (Conventionally denoted VP). In the diagram, air loops are indicated in the form of a small loop or a small circle (dot).
For this napkin we knit a chain of 12 chain stitches.
Then we connect the first and last loops with a half-column to make a ring.
We knit a napkin in a circle in one direction from right to left.
2 . Knitting each row usually begins with a set of several air loops, this is necessary to lift the row so that it is even and not beveled and crooked . The required number of loops is indicated in the diagram.
In this case, in the first row we knit 3 air loops (VP) for lifting.

The icon following the VP in the diagram indicates a double crochet. But I decided to knit two yarn overs, so my further description will differ slightly from the diagram. But this is not important, you can knit with one or two yarn overs. And the designation C2H means two double crochets.

We tie the ring according to the pattern with 32 double crochets. We insert the hook inside the ring.

We connect the last column with a chain of 3 air loops (VP), cast on at the beginning of the row, with a half-column (PS).

3 . We knit the remaining rows, looking at the diagram.
In the second row: 3 chain stitches (VP), 4 double crochets (C2H) in each stitch of the previous row and so on.
I made a little mistake here and at the beginning of the row I only knitted three stitches.


There is no need to connect the last stitch of the row to the first, as is usually the case when knitting napkins. Starting from the third row to the 6th in this napkin, the air loops at the beginning of the row not only serve as lifting rows, but are also an element of the pattern, i.e. there is a smooth transition from the previous row to the next.

3rd row: alternate 4 air loops (VP) and 6 double crochets (C2H). We see in the diagram that when knitting the middle 4 columns, the hook must be inserted into the base of the columns of the previous row, and we knit the first and sixth column by inserting the hook under the chain of chain loops of the previous row.


4th row: alternate 5 air loops (VP) and 8 double crochets (C2H).
5th row: we alternate 9 air loops (VP) and 10 double crochets (C2H).
6th row: alternate
11 air loops (VP),
4 double crochets (C2H) at the base of the previous row, 11 VP,
skip 2 stitches of the previous row and knit 4 C2H ( remember the designations - four double crochets) at the base of the last four repeat columns of the previous row ( rapport - a repeating part of a pattern),


at the end of row 5 VP, we connect the last one with an arc from VP connected at the beginning of the row, with a single crochet.

7th row:
* 5 VP,
15 double crochets (C2H) under the arch of air loops of the previous row ( those. we insert the hook under the arch from the VP),

single crochet under the arch from the VP of the previous row * .
At the end of the row, knit 6 VPs and connect them to the beginning of the row with a single crochet.

Noticed the sign * on the record? This means that the rapport knitting described between two * , you need to repeat several times (instead of the word “alternate”, which I used in the description of knitting the 3-6th rows).
8th row:
double crochet (C2H) at the base of the first column of the previous row,
picot from 4 VPs (in we knit a chain of four air loops, then we connect the first and last loop together with a single crochet, you get a small ring, or rather not even a ring, but a small lump),
For clarity, watch the video tutorial from

C2H to the base of the third column of the previous row (we skip the second column of the previous row) and so on ( look at the diagram).

There will be 8 columns in total with picots between them.

single crochet under the arch from the VP of the sixth row*.
4 .We break and fasten the thread, carefully hide the end of the thread from the inside, pulling it with a hook under the posts.
Our little napkin is ready! The napkin needs to be starched, straightened and ironed.
I also made a video on crocheting this napkin with a voice analysis of the knitting pattern. Maybe this will make it clearer for someone.
Did you find crocheting napkins for beginners difficult or not very difficult? Write in the comments. I hope my photos, videos and detailed descriptions helped you. If you have any questions, ask, I will definitely answer everyone.
In addition, you can take a look at this video on knitting a hexagon with a very similar pattern.
By the way, the ring is made in a different way at the beginning of knitting.
In this article, I advise everyone interested in assembling patterns for embroidering unusually attractive crochet napkins, and in addition I will describe their techniques. To weave napkins, you need to have certain skills and be truly proficient in using knitting needles. This includes the elegance of the final product and sophistication, which is an indicator of your skill, and learning the knitting technique is not difficult.
Highlights
Knitted napkins turn out to be unusually light and in their appearance resemble material snowflakes - the personification of flight and airiness. Extensive application due to a number of advantages:
Knitted napkins are an important item for an establishment where comfort and warmth must always be present. Similar associations should arise in everyone who agreed to learn how to knit napkins with knitting needles.

In the future, they will be able to create similar decorations themselves, according to these arguments, in a modern, modern manner, using the most unusual methods, and they will also be able to make napkins of one shape or another, unusual configurations with drawings and detailed patterned elements. This can only be done with strict miniature directions and real skill in weaving threads.
Experienced needlewomen have been working on napkins for a long time, but other users can learn this skill in the same way. Knitting patterns will attract absolutely everyone, and the product will always be in demand for ordinary buyers.
Don't forget that knitted napkins are not only beautiful decorations for long-lasting memories.

2 knitting methods:
- thin;
- ring
In elementary crochet knitting there is direct movement first and back with a turn to complete any formation and making canopies. In this case, areas are not formed by fastening the thread to complete any structure. In ring knitting, a product or tubular figure is tied together in the absence of a seam.

When knitting, the thread is guided by the index finger on the left side. The hook is held in the left hand by the huge and index fingers. The thread falls into a hook stretched into an independent loop and is stretched through it.
The main types of canopies in crochet knitting:
- weightless;
- half-column;
- a column without a double crochet or a column with them.
Types of napkins
Beautiful and simple napkin for the table
Surprisingly, this product will be a good platform for training beginners, and is also a pedestal for pros. In the process itself, it will be possible to learn the craft and thus create masterpieces, having already gotten the hang of it. For example, napkins of not very large volume are suitable for beginners for the purpose of training.
Let us also assume that interest in knitting this product makes it possible to attract many inexperienced users. Also, those who want to make their first napkin should focus their interest on the fact that the product also has different configurations. Here it is possible to note the traditional whole napkins with lace around the edges.

The knitting skill is also honed by the fact that various canopies are used in simple napkins - these are:
- half-columns;
- light loops;
- columns with capes.
All this helps to gain good experience in the process of the activity itself. For example, such patterns are used to decorate an openwork napkin.

Tablecloth made from napkins
An elegant square napkin that can be transformed into a fairly large tabletop for setting the table. The superiority of squares in this is undeniable - they can be grouped and ultimately combined into a huge base.

Detailed diagrams and guide for beginners
Let's start exploring alternatives to knitting these lightweight products; the main quality is considered to be the preservation of comfort in the home, and diagrams and detailed displays of the activity will greatly simplify our task.
It is immediately necessary to highlight that beginners do not need to be intimidated by difficult techniques.
Weaving napkins is absolutely open to beginners. In order to learn faster, you need to choose a number of simple knitting alternatives for the basics. Let's start with ordinary knitting patterns, after which we can move on to the most difficult, but no less exciting ones.

For the purpose of the foundation, of course, it is necessary to select an ornament around which further knitting will take place. Of course, at first there is no need to select very difficult shapes, although they look extremely elegant. If suddenly something doesn’t work out, you will quickly lose interest and simply give up weaving at the initial stage. For this reason, the hands still need to be trained, which means it is necessary to select an elementary knitting pattern.
Before you start
The thickness of the hook with which you will weave a napkin depends on the thickness of your preferred threads. The more delicate the hook, the softer the thread used should be.


Advice
When starting to knit a napkin, you must not forget that regardless of the pattern, the initial circle will be formed by the same threads into one pattern.
Thus, it is necessary to combine a number of light awnings. Usually their number varies, depending on your aspirations and the selected pattern. When the napkin pattern is very nice and light, knit approximately 8 light canopies. If the full image is very dense, it will be enough to make gaps from 5 canopies.
Then you need to combine the main and final loops in the column. This must be done with the support of half-columns. With their support in the next row, the base of the structure is combined with its end, and all the components of the napkin that must be connected.


We do everything step by step and slowly:
- The 1st row is attached. In it we follow a sequence of three light loops. Then you need to wrap it in columns without a yarn over the ring, which is best done from simple canopies.
- Let's move on to knitting the second system. We knit 5 light canopies. Then you need gaps from 2 columns with a nth, while doing this from a half-column, which we had in the last formation. Next we attach a column with n, then 2 light loops.
When the prescribed number of canopies have been knitted, we switch to the pattern of the selected napkin. But here there may be problems with the fact that in absolutely all schemes the decryption or source communicates to the scheme. For this reason, you will need to decipher relative marks, which you will learn about later.
Simple
Where should you start knitting cr-m napkins, which means simple weaving of thread loops, which will help you quickly get used to it and switch to the most difficult and exciting patterns.
Preparation: First you will need yarn of the optimal tone of 50 g 160 m and hook 2.
Note: In the text, important phrases have the following abbreviations: StbN - single crochet, StbSN - double crochet, SST - connecting column, VP - weightless eye, StbSN - half double crochet. After preliminary preparation, you can start knitting.

Beautiful and simple napkin for the table
Simple diagram:
We collect a chain with 8P, combine it into a ring and perform it according to the following scheme.
Step by step guide
- We do several: 1 VP, 16 StbN, SST. First, we change the knitting stitches in the proper amount: VP, 1P StbSN, 5 VP x 8.
- We make several weaves around the arch with 5 VP. SST, 5 StbSN, 2 VP x 8, SST; 4 We collect the next 5 sts of the previous formation and arrange them: 2 StbSN, 3 StbSN, 2 StbSN, 2 VP x 8, SST;
- We omit the 2nd and 6th columns, add 5 StbSN, 3 VP, about 2 VP - 1 StbSN, 2 VP, 1 StbSN x 8 SST. Near the arch, to all VPs without exception, we attach 1 StbSN, 2 VP, 1 StbSN, 3 VP SST;
- We start tying SST near the arch and attach 1 StbSN, 3 VP, 1 StbSN, 3 VP, miss 1 arch and repeat the weaving. We finish with several 1 VP, 1 PStbSN. Next, we make a few more 1 StbN near the arch and 5 StbSN near the next one, SST. We cut the thread and do not forget to fix it.
Yarn “Solar Lace”
This napkin is for vases. Its caliber is within 12.5 cm. To knit this napkin we need Jonquil yarn 100g 395m of mercerized fabric and hook 2.

Note: SSN – single crochet stitch, VP – weightless eyelet, SP – mounting eyelet, Pico – 3 VP, combined, SBN – single crochet stitch.
Step by step guide
- In area 3 VP we attach 15 SSN to the third VP. 2 5 VP, 1SSN are combined into SSN formation (PR), 2 VP are combined into the 3rd VP. 3 1SP in the 4th VP, 3 VP and 3SSN are attached with a single top to the PR arch, 4 VP, 4-SSN with the top to the PR arch, 4 VP, VP are combined into the third;
- 1 VP, 1SBN into a single top, 5SSN into the arch of the previous system, 1SBN into a single top, combine into SBN; 5 3 VP, 3 VP, 1SBN in the 3rd SSN of the previous row, 3 VP, 1SSN in the SBN of the previous row, form in the 3rd VP; 6 2SP in 4-5 VP, 1SBN in an arch, 5 VP, combined into an SBN; 7 4SP, 1SBN in the arch, 5 VP, combined in SBN; 8 4SP, 1SBN in arch, 3 VP, 2SSN, pin and 2SSN in arch, 3 VP, combined in SBN.
Oval
Such napkins are always comfortable and warm, like old houses. Previously, there were several round-shaped napkins in everyday life, which were passed down through the family tree to this day. Now the time has come to learn this craft of weaving similar homemade napkins.

A round napkin with diagrams and display will undoubtedly help you create and give a wonderful present to your loved ones, who will nostalgically appreciate your gift.
The size of our napkin is 24 cm. To organize the weaving you will need 50 g 208 m hebesh snow-white yarn and a 1.5 hook.

For the purpose of countersinking, combine the chain with 8 VP and close it with 1 SST into a ring. Then attach ring lines and combine 4 sockets with each other in an extreme formation. Add thread with arrows near the sockets in circular lines.

Traditional way of knitting a figured napkin:
Step by step guide
- To weave this product you will need yarn from threads of red and azure tones, fabric 25 g 150 m and snow-white thread 100 g 400 m, hook 1.15.
- Take 45 light canopies, then make a column with a chain of ten loops and attach the cr-m 5 VP and dc in the 6th loop of the chain.
- Link a connecting column to complete the first formation. In any arch, place a column without a double crochet, a half-column, 3 columns with a double crochet, a half-k and again a column without a double crochet. Mix these components with 2 VP. Having tied the outer side, knit a ring with 8 VP, without ceasing to twist the upper part.
- To complete the SP formation, place 4 VP and a column with 3 double crochets in the VP of the 1st formation. The result should be a shaped ring. 3 In the 3rd formation we knit arches with 5 or 6 VP.
- Then, we make 2 arches and a grid with 3 VP. 5 In the 6th formation, alternate chains with 5 VP and single crochets in the center of the arches of the previous formation. 6 Knit 5 stitches into any arch, separating them VP.
- We weave 4 arches with VP. Rally a few more stations with N, broken by VP. We form 3 formations according to 7 VP. Let's start knitting with red thread. In the diagram, the role of the basis of a given system is marked with a red triangle. We attach an arch with 7 VP, then a double stitch and twist it.
- We will tie 14 double stitches into this arch, in the opposite direction. We twist it again. We attach 3 VP, 2 VP, treble s/n. Repeat steps 1-7 one more time and continue weaving according to the pattern.
If you start attaching a subsequent component instead of 3 VPs, then knit 3 mounting posts, wrap them, and do not stop weaving the napkin according to the pattern. To complete this piece, SPlot 4 VP and connect the column.
Now tie it with azure thread. Increase the number of VP sts with double crochet. In the extreme formation, we form any arch from 3 VP, 3 columns with a nth and a single top, a pin with 5 VP, 3 VP.
Round
This is the most famous type of absolutely all possible napkins produced using a crochet hook. The variety of designs and ornaments surprises both beginners and experienced workers. Let's analyze a number of alternatives and knitting techniques. The caliber of the upcoming convex napkin is 20 cm. We prepare yarn from one hundred percent mercerized fabric 100 g 395 m, hook No. 2.

Note: SP – mounting eye, VP – weightless eye, SSN – single crochet column, SBN – single crochet column, PR – previous several, A – single highest step, i.e. 2 CH are knitted together, Pico - 4 VP and 1SBN in the main VP.
Tablecloth made from napkins
There should be 8 VP in total. We combine 1 5 VP, 1SSN, 2 VP into the 3rd VP, including the 2nd formation and attach them to 3 VP. At the base of the formation we add another 2SSN, 3 VP and 3SSN in 1SSN PR, combining this into the 3rd VP. We make 2SSN from SSN PR, 4 VP, 5СНН and connect them into the last SSN and 1SSN, combine everything into the 3rd VP:

Step by step guide
- Several 6SSN, made according to the scheme: 2SSN from the SSN to the last SSN of the PR and 1SSN in the half, joined with 4 VP, 7SSN. Next, as in the 3rd formation: add 1SSN to any independent SSN in the center, form a connection with three VPs.
- We connect 8SSN with 5 VP and 9SSN, made according to the scheme indicated in the previous step 4, we connect in the 3rd VP 6 10SSN, 6 VP, 11SSN volume in the 3rd VP + 1SP. In conclusion, we make 8SSN, 1SSN PR, 8 VP, 9SSN independent, keeping 1SSN on both edges or create a parallelogram, join 8 6SSN, 13 VP, 7СМ in the 3rd VP + 1SP into the 3rd VP + 1SP.
- We make 4SSN, 6 VP from 1SBN and 6 VP. Add 1SBN, 6 VP, 5SSN to the center of the arch, combine into the 3rd VP + 1SP 10 2SSN, 6VP weave into a small arch. 6SNB, 6VP and 3SSN in the 3rd VP + 1SP 11 1SSN. From 7VP we thread into the 4th SBN PR, made according to the scheme: 2SSN with A, 3VP, 7VP, 2SSN, we supplement them into the 3rd VP.
- 4VP, pin from 3VP, we add into arches with VP PR is 2SSN with A, 2VP, mesh, 2VP, 2SSN with A, 3VP, pin, 4VP, 1SSN, weave them into the 3rd VP.
Napkin “Tenderness”
The most difficult type of convex napkin, but the final result will certainly be very interesting. The finished decoration will be 36 cm in diameter, and you will need 50 g 220 m blue yarn and a No. 2 hook.

Abbreviations for the pattern: StbSN – double crochet, VP – weightless eyelet, Pet – eyelet. We start weaving by forming 8 VPs that need to be braided.
Step by step guide
- We start each subsequent row with 3 VP, which replaces 1 StbSN. We end any of them with a column. 1 2 StbSN, 2 VP - repeat 8 times
- In any StbSN of the previous formation VP we fly 2 StbSN, 2 VP-8 times 3 2StbSN in 1 loop, 1StbSN we thread into the next 2 loops, 2StbSN in 1 loop, 2 VP, we repeat VP until the end of formation 4 2StbSN in 1 loop, 1StbSN we attach in the next 4 loops, 2StbSN in 1 stitch, 2 VP, until the end of the formation.
- 2StbSN in 1 loop, 1StbSN weave to the next 6 canopies, 2StbSN in 1 loop, 2 VP, we do until the end of the line 6 2StbSN in 1 loop, 1StbSN in the next 8 canopies, 2StbSN in 1 loop, 2 VP, repeat until o. Art.
- 2StbSN in 1 loop, 1StbSN in the next 10 canopies, 2StbSN in 1 loop, 2 VP to o. Art.
You might also be interested in:

Experts recommend using a circle while bathing your baby because of its beneficial...
Conspiracies to find out the truth Every person deep down dreams of having sincere...

How can you get rid of a tyrant husband? Unfortunately, husbands can behave...
Goal: to form an idea of work, the role of work in the formation of a child’s personality...

Video: Sandals Sursil Ortho Antivarus, mod. AV09-001* Select size:Var...

