


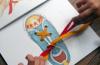
It happens that a family accumulates a great many unnecessary socks. Making toys from socks with your own hands is a unique option for recycling old knitwear. Unusual and bright toys will look good on a shelf in any interior, and children will be absolutely delighted when playing with new friends. Moreover, sewing such toys will be a great hobby for the whole family.
Snowman


Required material:
- white sock;
- filler - padding polyester, holofiber, pieces of fabric, beans, large cereals;
- 2 black beads;
- 2 buttons;
- dense threads;
- orange pompom for nose;
- pompom for a hat;
- satin ribbon;
- glue gun;
- scissors;
- black thread and needle.
Process of creation:
- Fill the sock 3/4 full with filler, cereal or beans. Tie the free edge of the elastic band of the sock with a tight thread into 2 knots.
- Fold the tied free edge of the sock over the filled part and glue it with a glue gun so that the resulting cap does not unwind.
- Bandage the snowman's body with colored knitting threads, ribbon or a knitted scarf. Thus, the snowman will be divided into 2 parts.
- Sew buttons to the snowman's body. Attach a pompom to the hat. Sew beady eyes on the face, sew on a nose and embroider a mouth.
Hare


Required material:
- a pair of long striped socks;
- needle and thread;
- sewing machine;
- 2 buttons;
- 2 beads, buttons or decorative eyes for toys.
Process of creation:
- Place the sock on a flat surface with the heel facing up.
- Cut the sock on both sides. On one side there will be ears, and on the other there will be lower paws.
- Sew the cut, on the one hand, completely, and on the other, not completely. Fill the body with padding polyester and sew up the left hole.
- Cut off the front part of the second sock. Cut the fabric in half and sew each piece separately. These will be the hare's front legs.
- Fill the paws and sew to the body.
- Create a face. Sew on the eyes, embroider the nose and mouth.
- You can sew buttons to the hare's body for beauty.
Cat


Required material:
- 2 identical colored socks with low-rise elastic;
- colored threads;
- needle;
- scissors;
- satin ribbon or elastic from a sock in a contrasting color;
- small decorative bell;
- filler - padding polyester, holofiber, pieces of fabric;
- marker.
Process of creation:
- Fill the first sock tightly with filling more than halfway.
- We trample the filler firmly so that the cat stands and does not fall. The heel of the sock will be the cat's face.
- We form a dense ball from the filler with our hands.
- Fill the void of the sock with the formed ball, so that the elastic from the sock goes to the back of the cat's head. It is necessary to ensure that a transition is formed from the body to the head, and a neck is formed.
- Sew the elastic of the sock with a hidden seam. You need to make sure that the ends on the sides of the seam stick out - these are the cat's ears.
- Draw a face with a marker.
- Embroider with black thread along the drawn lines; you can make the eyes and nose different colors.
- Take the second sock, place it vertically on a flat surface and cut it in half horizontally.
- Fold part of the fabric from the sock vertically in half.
- Cut off part of the double folded fabric with an arc.
- Turn the resulting parts inside out and sew.
- Turn right side out again and stuff the pieces. These are cat paws.
- Sew the resulting paws to the body of the toy.
- Using a contrasting color sock elastic or satin ribbon, make a collar for a kitten with a small bell and put it on it.
Owl


Required material:
- one sock, desired owl color;
- scissors;
- colored felt or pieces of fabric for eyes, wings and paws;
- thread and needle;
- buttons or beads;
- cardboard;
- pencil;
- chalk;
- filler - padding polyester, holofiber, pieces of fabric;
- dense colored knitting threads.
Process of creation:
- Lay the sock out on a flat surface, heel facing you, elastic band facing up.
- Cut 2 pointed ears from the elastic band of the sock. Trim the free edge of the sock.
- Sew owl ears. Turn the product right side out. Fill the body.
- Sew the opening of the owl's lower body with a blind stitch.
- Draw on cardboard and cut out blanks for the bird’s legs, eyes and wings.
- Trace the cardboard templates with chalk onto felt or colored fabric and cut out the pieces.
- Sew the parts together. Decorate them with a decorative contour stitch from colored knitting threads and sew them to the owl.
- Embroider the owl's nose and pupils. The pupils and nose can be made from beads.
Puppy


Required material:
- golf;
- scissors;
- chalk;
- needle and thread;
- filler - padding polyester, holofiber, pieces of fabric;
- decorative ribbons, bows, beads, eyes, noses.
Process of creation:
- Lay the golf course on a flat surface and level it as much as possible according to its natural shape.
- Draw in small pieces on the fabric of the golf shirt, from the elastic and from the sock, all the necessary details of the puppy - tail, 2 ears, 4 legs, body.
- Sew the body on one side, on the wrong side, turn it inside out and fill it. Sew up the opening on the front side with a blind stitch. Level out the filling to shape the puppy's body.
- Sew and stuff all the small parts of the dog. Sew the parts to the body.
- Glue on the puppy's eyes and nose beads or purchased ready-made decorative elements. You can tie a collar or a bow on your puppy.
bear


Required material:
- sock of the desired color;
- white fabric or felt for the muzzle;
- black threads;
- needle;
- scissors;
- black button;
- filler - padding polyester, holofiber, pieces of fabric;
- chalk.
Process of creation:
- Lay the sock out on a flat surface, elastic side up, with the heel facing you.
- Use chalk to mark the parts of the bear and cut them out.
- Arrange the parts in the order they are sewn on; if something doesn’t fit, straighten it out.
- Take the head piece, turn it inside out and sew the piece together using an overcast stitch.
- Turn the head with the ears sewn up onto the face and stuff it with stuffing.
- Sew the bear's legs also using an overcast stitch.
- Fill the bottom part of the bear with filler. It is necessary to form the relief of the tummy and the separation of the legs during the stuffing process.
- Pull the hole in the bear's head piece from the front side with a thread.
- In the same way as the head, tie the hole of the bear’s body with a thread.
- Cut a circle from white felt or fabric to design the bear's face.
- Sew a white muzzle circle to the head.
- Stuff the bear's small front paws with stuffing.
- Sew all the details of the bear.
- Sew on a button nose, embroider the mouth and eyes of the bear.
- Put a white bib cut out of fabric on the teddy bear.
You can make such a cute cat from old children's socks that have become too small for your child. Children always like homemade toys, especially funny animals. I hope our sock cat will not be an exception.
The work is not very difficult, children 10-11 years old can handle it independently. The younger ones, of course, will need help.
Our toy will need both socks. From one we will make a body with legs, and from the second a head and tail.
Straighten one toe and place it with the heel facing up. We outline the cutting lines for the front and rear legs, cut along the marked lines. 
Now we need to sew the legs. Turn the sock inside out and sew the cuts together. We do not sew up the gap between the hind legs, leaving a hole for stuffing. We specifically used contrasting threads to make the seams stand out in the photo. You can choose the threads by color so that they do not show through on the front side. 
We turn the part right side out and stuff the body and paws with filler. For stuffing you can use cotton wool, foam rubber or padding polyester. When finished, we quietly sew the place of the stuffing. 
We also lay out the second sock with the heel up and draw the outline of the kitten’s head. 
Cut it out, sew it on the wrong side and turn it right side out. We also stuff the head tightly, paying attention to the ears.
We also need a ponytail. We cut it out from the remains of the second sock. You can make a tail from a piece of fur or other fluffy material. It's up to you. We sew the tail and stuff it with filler.
Now let’s design the kitten’s face. You could glue on cardboard eyes and a nose, but we found small black buttons and painted them with yellow and black nail polish. The nose was made from a pink piece of a sock.
From the nose down and to the sides we stitched the line of the mouth. You can make antennae from fishing line, but we didn’t have any suitable material on hand. 
When all the parts of the toy are prepared, sew the head and tail to the body. We sew the front legs, indicating the toes. 
Our cheerful cat made from socks is ready to play and delight our children. 
Kittens are perhaps the cutest animals that all children love without exception. From simple cardboard you can make a kitten with movable parts, which many people also like.
If you want to sew a soft kitten or bunny, there are very simple ideas. For example, making a toy from a sock with your own hands is very simple. Try to make one of the cute souvenirs - animals or dolls. This item will be a pleasant gift for a child for any holiday.
What can be made
Making a sock toy with your own hands is quite quick and easy. Children always love to get new toys, and from socks you can easily make many different animals and funny characters. Very often, socks that are either unpaired or have large holes left in the house are impossible to mend. Put them to work. Make cute characters for your baby. These toys will appeal not only to children, but will also delight any adult. You can make the following characters from a sock:
- Kittens.
- Puppies.
- Monkeys.
- Mice.
- Bears.
- Funny dolls.
- Snowman.
If the socks have colorful elastic bands with frills and decorations, they are good to use as clothing for soft friends. Such toys will not only be a pleasant gift for your baby, but also a good souvenir for the holiday.
Basic manufacturing principles
Although socks can be used to make a variety of characters, the actions performed are usually similar. There are two ways to make such a souvenir:
- Create a shape from a whole sock by tying threads around the junction of individual parts of the character’s body.
- By cutting out parts as from ordinary fabric.
The first method is easy to make a snowman or a doll, but most often, both approaches are combined. The next two diagrams show the steps for making a puppy. In fact, any other toy is made exactly the same way. The idea is that a body with a head and hind legs (legs) is formed from one sock.

The second element of the pair is used to make the front paws or arms, as well as small parts such as ears, tail and others.

If you consider that the sock is a seamless product, you can use the folds of the parts to your advantage so that you have to grind the parts down less.
Any figure can be made using only the second method of work, that is, when all the elements are cut out as separate parts. In this case, the heel of the sock is most often taken as a muzzle.

What materials and tools will be required
So, in order for you to get an original sock toy with your own hands, prepare the following:
- At least one sock, or better yet a pair (not necessarily the same ones). The choice depends on what you want to do or what materials you have available.
- Sintepon, cotton wool or other material for filling the toy.
- Scissors.
- Threads with a needle.
- Elements of decoration and face (muzzle).
As you can see, nothing complicated. Every ordinary housewife has all this, and even more so a needlewoman, even a beginner.
What decor can be used
To make the toys you make from socks with your own hands original and effective, use the capabilities of the material itself. Socks with a suitable pattern, texture, and also for girls with all sorts of bows, frills, ruffles, and roses are especially good.
Be sure to pay attention to color combinations: stripes, ornaments, inscriptions. Some socks have rhinestone decorations. For example, the word “Love” will very appropriately decorate the chest of a bunny for Valentine’s Day.
To create the appropriate image of any character you will need eyes, nose, mouth. They are embroidered on a plane or formed into three-dimensional parts using stitches. It is also easy to buy ready-made plastic elements or take buttons and beads. On fabrics that do not have a pronounced texture (not large-knit woolen items), you can paint a face using acrylic paints. To do this, the surface is usually pre-primed. This method is more often used when making the head of a textile doll, but can also be used here.
In addition to all of the above, you can take any other decorative elements: lace, ribbons, bows, flowers, decorating clothes, hairstyles, tails of your animals with them.
DIY sock toy: master class
To make the same or a similar thing, namely a funny monkey, you need to take a pair of identical socks (if the paws and tail are made long, as in the sample). Two different-colored blanks or a pair of them, where the heel and toe differ in color from the base, are also suitable. It's good if they are dark, for example, black. This option is presented in a diagram showing the details and the sewing process. Buy plastic eyes or prepare two buttons or beads.

A do-it-yourself sock toy (photo above) is made following the example of how this was done in the case of a puppy (see the section on manufacturing principles). The sequence of work will be as follows:
- First, fill the tip of the sock with padding polyester to the required volume and tie it or stitch it with thread.
- The upper part of the sock to the elastic band (it is better to cut it off, especially if it is of a different color) is cut into two parts at a distance equal to the length of the legs of the future monkey.
- The half-cut parts of the paws are sewn together, leaving a hole for stuffing between them.
- Fill the torso and legs with padding polyester and sew up the hole.
The remaining details are cut out from the second sock. It is convenient to arrange the elements as shown in the diagram below. The main thing is that the muzzle is made from the heel.

After all the pieces are cut out, sew them on the wrong side in the right places and turn them right side out. Fill the tail and front paws with padding polyester, cotton wool or whatever you have prepared, for example, leftover scraps. The ears can be left flat by connecting two parts along the contour. It is more convenient to stuff the muzzle (heel of the sock) when it is sewn to the head. The filling hole is easy to baste last.

When all the individual parts of the toy are prepared, do the following:
- Sew on the arms (front legs).
- Secure the tail.
- Attach a muzzle.
- You can make a headdress for an animal from a cut elastic band in a contrasting color.

Now you need to “revive” the character a little by adding eyes and embroidering a smile. If you are making a girl monkey, put a skirt on her or decorate her head with a bow or hairstyle using yarn of a matching color.
DIY sock toy: kitten
As you already understand, the principles for creating any characters are similar. Below are photo instructions for making another cute hero.

Such a souvenir is even easier to make, since it does not involve making the hind legs as separate parts. The animal looks like a tumbler or matryoshka. A tightly padded body part serves as the base.
Which characters are still easy to sew?
DIY socks toys can be made in the form of dolls or funny baby dolls. The photo below shows options that are made from a single sock. Only the elastic has been cut off. It is used as a beanie cap. The shape is created by making stitches.

You can make an original souvenir in the shape of a bear, wearing a hat and blouse, using the following illustration.

You can make a beautiful toy from a sock with your own hands if you use one more idea (next photo).

So, you have seen how to make a sock toy with your own hands. The master class and the photos with the manufacturing sequence will help you make such a souvenir yourself.
Surprise your guests by getting alcohol from the original minibar, which will become a doll made from nylon tights. And from socks and signets you can sew soft toys for children.
Toys made from socks and children's tights

Even a very young child can make such a funny caterpillar.
To create such a thing, you can use old tights from which the baby has already outgrown. Cut one pant leg, turn it inside out, sew it on one side, tying it with thread.

Turn the workpiece onto its face, stuff it with padding polyester and pull it in several places with thread to create rounded fragments of the caterpillar’s body.
Finish making this toy from socks by turning the edges inward in the area of the tail and sewing them together. Instead of eyes, we attach two beads, make a mouth out of threads, after which the work is finished. Here's how to make your own stuffed animal out of practically nothing.

You can also make amazing things out of socks, for example, this funny bunny.

To create it you will need:
- two socks;
- threads;
- scissors;
- needle;
- padding polyester
Place the first sock vertically in front of you, cut it as shown in the photo. You will have a head with ears.

Sew this blank on the wrong side, leaving the bottom edge free. Fill your head with padding polyester through it.

For such a toy made from socks, you will also need a second part, which will become both the body and the hind legs. To get it, cut the second sock as shown in the photo below.

Sew this blank on the wrong side, leaving the part near the elastic untouched. Fill it with padding polyester through this hole. Insert the head element into this part and connect the parts of the soft toy with a seam.

You have 2 parts left from the socks, which you will quickly turn into the front legs of a hare. Also sew them in place.
From another small piece that remains from cutting out the parts, make a tail. Sew it on, decorate the eyes, mouth, nose and admire what a wonderful toy you have made from socks with your own hands.

We turn old gloves into useful things

To make such a cat, you only need one glove.
Sometimes one glove gets lost, don't throw away the second one, but use it to create a soft toy.
Cut the glove as shown in the photo. In place of the little finger, place the ring finger and sew it on, it will become the second front paw of the soft toy.

Stuff the glove with synthetic padding, up, in the elastic area, shape it in the form of ears, give them texture using a thread and a needle.

Drag the thread under the cat's head to define the animal's neck. Stuff the cut little finger with padding polyester and sew it on instead of a tail.

Embroider the eyes and nose of the cat, tie a beautiful bow around the neck, and another soft toy from unnecessary things is ready.
How dolls are made from nylon tights

Seeing this dashing Ukrainian with a forelock, not everyone will guess that this is a minibar. A bottle is cleverly hidden inside.
You can give it to a man on February 23 or surprise guests. When you put up such a doll made of nylon tights, remove its head, there will be a bottle of alcohol inside.
For a DIY craft, you need the following:
- plastic bottle or canister;
- scissors;
- 40 denier flesh-colored nylon tights;
- needle and thread;
- scraps of fabric;
- thick wire;
- yarn;
- 2 eyes for toys;
- foam;
- braid;
- rope;
- foam rubber 1-1.5 cm thick;
- padding polyester
Cut off the top of the canister, put the bottle inside to see if it will fit inside so that the neck looks out. If the height is insufficient, place a piece of foam rubber on the bottom of the canister.
Now take a rectangle of foam rubber, wrap it around the bottle, trim off the excess. Sew it end to end at the top and bottom of the plastic bottle, trim off the excess.

Now pull the rope around the toy’s waist.

Twist hand blanks from wire. Wrap them with foam rubber and padding polyester.

Sew the arms in place as shown in the photo.
From white fabric, cut out 2 identical blanks (they will be sleeves) and one that will become a panel for the body. The last part must be long so that one part fits freely inside the plastic bottle.

Now cut out a rectangle from blue fabric. Its width should be such that you can gather the fabric and put it on the bottom of the bottle. These are the doll's wide pants.
Sew them in place, and tie a strip of red ribbon around your waist, which will become a belt.

How to decorate the face of a toy with your own hands

To make the head, cut the neck of a 1.5 liter plastic bottle below the shoulders. Wrap it in foam rubber and sew it.
Wrap your head with padding polyester and sew it. Cut the panel from the tights, pull it over the doll’s head, chipping the top with a pin.

To make the nose wide and the face realistic, it is necessary to make the doll's harnesses from nylon tights. In the photo, the places where the tension marks are marked are marked with numbers so that you can understand where to place the stitches. There is no need to draw them on the face blank itself; pin here.

Make several stitches from point 1 to 2. Remove the needle from 2 and pierce it through 3. Sew several times, tightening the thread, from 3 to 4.
Also, without cutting the thread, we pierce with a needle from point 4 to point number 5, and make several stitches along this path.
We take the needle out from point 4, stick it into point 3, and then from there into the area indicated by number 6. We make several stitches here.
We remove the needle from point 3. We need to make the wings of the nose. To do this, take the needle out of point 3, stick it into point 5, pass the thread through the top, and tighten it. Thus, we designed the wing of one half of the nose. To do the second, we make the same punctures, from 3 to point 4. And then from here we return through 6 to 4, passing the thread through the top and tightening it.

Let's move on to decorating the doll's nostrils using nylon tights. To do this, pin 2 pins as seen in the photo. To create a drawstring, pierce point 3 with a needle, then 5. Pull the thread over the top, return to point 3. From there you need to move to 4, and then to point No. 6.

When tightening, do not cut the thread. If it runs out, you need to first fix it by making a knot, and then use a new thread.
We continue to form the face of the doll from tights, made with our own hands. Place padding polyester through the bottom of the stocking, making your chin, cheeks, and lips more voluminous. Mark the places of the tension marks with pins (No. 7, 8, 9, 10).
Start at point 7, push the needle through it, and then #8, go back to #7 and make a few stitches along that path. Passing the thread through the top, go from 8 to 10, pierce point 9 with a needle. Sew from point 9 to 10 and back several times.
Make an inner fold to separate the upper lip from the lower lip. Sew a few stitches between the center of the upper lip and the middle of the lower lip.
I continue the theme of toys made from socks. I also found a lot of simple and interesting toys and master classes. We will cut and sew toys from socks with our own hands for beginners and more.
Look how cute and funny raccoons are!


What we make from:
- From children's socks;
- Made of fabric or felt in white and gray colors;
- From buttons – 3 pcs. (2 smaller, 1 larger);
- Thread;
- Floss
- Cotton wool, padding polyester.
How to do:

Source
Elephant


What we need:
- High toe or golf;
- Fabric, felt or thin felt;
- Threads for sewing and embroidery;
- Buttons.
Master Class:

Dog

We do it step by step:
- The future Dog is cut out using a stencil.
- The details are sewn and filled.
- How to sew a dog so that it turns out with drooping ears? Any bend area is almost not filled with silicone. Then it will bend freely.
- All parts of the toy are sewn on.
- A nose is embroidered on the muzzle and button eyes are sewn on.
- The toes on the paws are separated. To do this, the thread is threaded through at a distance of several centimeters from the edge; and is pulled tight.
bear
Materials:
- Socks – 2 different ones (from one we will make the Bear itself, from the second we will decorate it);
- Button and 2 beads;
- Seal;
- Threads.

- You need to cut out simple parts: head, torso, paws. From the other sock - the muzzle and breast.
- Sew and fill all parts.
- Connect with each other.
- Sew an oval on the head. Sew buttons above it, and a button on the oval. Under the button, make embroidery - the Bear's mouth.
- On the body, make a semicircular breast from a different material.
Little dragon


Source
- Socks – small (multi-colored) and larger (plain);
- Felt;
- Buttons and beads – 2 pcs.;
- Floss;
- Threads;
- Sintepon.
Instructions:

More master classes
Let me remind you that last time I included master classes, if you like them, click on the picture and follow the link to the master classes:

You might also be interested in:
Modern children receive sneakers or boots with Velcro for their use, without...

Makeup plays a huge role for a person when celebrating Halloween. He's the one...

Probably every woman in the world knows that one of the main secrets of the mysterious and...

How can a girl survive a breakup with dignity? The girl is going through a breakup very hard...

I think that all parents dream of their children fulfilling our requests, of...

