


Construction of the base grid.
I suggest you build your own basic drawing of the base of a children's dress. In fact, finding a description of such a construction is not very easy.
Many courses focus on, somehow forgetting about. There are some nuances here that take into account the characteristics of a child’s figure.
I found several construction options (in my archives). I offer you one of them.
After constructing a drawing according to your measurements, sew a control version of the dress from ordinary (which you don’t mind) fabric to check the pattern, make changes (if necessary), and then use the pattern many times until your daughter grows up.
To start . I use basic measurements - height 80cm. - approximately 1.5 years. You simply insert your values into the required formulas.
Prepare:
- measuring tape,
- a long straight ruler
- square,
- if there are rulers - patterns (for designing the armhole, neckline, hem lines and sleeve edging),
- calculator (or ready-made calculation),
- and it is best to print this page for clarity.
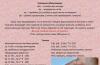
To build you need the following measurements(cm): Neck circumference – 25(12.5); Chest circumference – 50(25); Back length – 21; Front length – 22; Back width – 23(11.5); Front width – 24(12); Dress length – 38.
Base (drawing grid).
In the upper right corner we put point 1, from it down we draw a vertical line 1-2 - the length of the dress (38cm)
On the line from point 1 we put off the length of the back (21cm) - point 3. We divide segment 1-3 in half - point 4. From point 4 we put 1 cm down - point 5.
From point 5 we draw a horizontal auxiliary line. On it we put aside a segment 5-6 = half the width of the back (11.5 cm).
Calculation of the armhole width.
Divide the chest circumference measurement by 2 (25cm) and add a loose fit allowance of 4cm. 25+4=29cm.
The width of the armhole is equal to 1/4 of the measurement of half the chest circumference with an allowance plus 1 cm: 29/4 = 7.2 cm. + 1cm = 8.2cm.
Section 6-7 (armhole) = 8.2 cm. From points 6 and 7 we draw auxiliary lines vertically upward.
 Section 7-8 = half the front width (12cm)
From point 8 draw a vertical line down. From point 2, a horizontal line towards the middle of the front (to the left). From point 3, draw an auxiliary line to the left, place point 9.
From point 9 through point 8 we draw a vertical line indicating the front length = back length +1.5 cm.
Segment 9-10 = 21 +1.5 = 22.5 cm. (in my version)
From point 10 we draw a line until it intersects with the line from point 7. From point 1 we draw a line until it intersects with the line from point 6. These are auxiliary lines.
We change the line of inclination of the middle front, taking into account the structure of the child’s figure.
To do this, on the segment 3-9 we set aside 0.5 cm to the left. – point 9a. From point 9a through point 8 we draw a line upward, the intersection point is 10a.
Divide segment 6-7 in half - point 11.
From point 11 downwards we draw a vertical line.
Back neck.
From point 1 to the left we set aside the width of the back neckline - 1/3 of the measurement of half the neck circumference plus 1 cm (5.2 cm) - point 12.
Section 12-13 = 1/3 section 1-12 (1.7cm)
Front neck.
From point 10a we set aside the width of the front neck = 1/3 of the measurement of half the circumference of the neck, plus 1 cm (5.2 cm) - point 14.
From point 10a we set aside the depth of the front neck = 1/3 of the measurement of half the neck circumference plus 1 cm. (5.2) - point 15.
At the intersection of the lines from points 1 and 6, place point 16.
The base mesh is ready.
This is what happened to me.

On this grid, next time, we will
Prepare this drawing and a good mood. I would be glad if you write about what you ended up with. And I'll make my report.
With best wishes, Elena Krasovskaya:
Dresses for girls of preschool age are made from plain fabrics and fabrics with small patterns. For this age, it is better to sew dresses that are continuous at the waist, loose from the shoulder, with pleats or flared and with yokes.
The shape of the yoke can be straight, round or curly. The yoke skirt should be full, gathered, pleated or flared.
In children's dresses, frills, flounces, folds, embroidery, appliqués, and bindweed can be used as trim. Trims on dresses are most often placed on pockets, along the bottom of the dress, along the edge of the yoke, sometimes also on the sleeves and along the neckline.
Removable collars of various shapes with edge trim with embroidery, frill or lace can be used as decoration.
To draw a drawing of the basis of a dress pattern, you need the following measurements:
Neck semicircle (Ssh) ) 14cm;
Chest semicircle (Cr) 28cm;
Sleeve length (Dr) 36cm;
Back length to waist (Dst) 26cm;
Product length (Di) 48cm.
Construction of the dress mesh. Construct a right angle with vertex at a point A.
Neck line. From point A to the right set aside the measurement of the chest semicircle plus 8cm for a loose fit and place point B (increase 8 cm is not constant, but varies depending on the size and type of product):
AB = Cr+8 = 36cm (28+8 = 36)
Mid-back line. From point A downwards, set aside the measurement of the length of the product and place point H:
Bottom line. From point H to the right, draw a line parallel and equal in length to the neck line, and place point H 1:
Connect points H 1 and B.
Back length to waist. From point A down, set aside the length of the back to the waist and place point T:
AT = Dts = 26cm
Waistline. From point T to the right, draw a line parallel to the neck line, and at the intersection with the front line, place point T 1:
Bust line. From point A downwards, set aside ½ part of the segment AT plus 2cm and place point D:
AG = AT: 2 + 2 = 15cm (26:2 + 2 = 15)
From point G to the right, draw a line parallel to the line of the neck, and at the intersection with the line of the middle front, place point G 1
Back width. From point G to the right along the chest line, set aside 1/3 of the chest semicircle plus 4 cm and place point C:
GS = Cr: 3 + 4 = 13.5 cm (28: 3 + 4 = 13.5)
From point C up, draw a line parallel to the line of the middle of the back, and at the intersection with the neck line, place point C 1
Armhole width. From point C to the right along the chest line, set aside ¼ of the measurement of the chest semicircle plus 2 cm and place point P
SP = Cg: 4 + 2 = 9cm (28:4+2 = 9)
From point P up, draw a line parallel to line BH 1, and at the intersection with the neck line, place point P 1.
Construction of a drawing of the back (Fig. 1, a).
Sprout width. From point A to the right along the neck line, set aside 1/3 of the neck semicircle measurement plus 0.5 cm and place point P
AR=Ssh: 3+0.5=5 cm (14:3+0.5=5)
Sprout height. Draw a straight line from point P up, set aside 1.5 cm on it and place point P 1:
PP 1 = 1.5 cm
Connect points P 1 and A with a smooth concave line.
Back shoulder bevel. From point C 1, put 1.5-2 cm down and place point C 2:
C 1 C 2 = 1.5-2 cm.
Back shoulder width. Connect points P 1 and C 2, extending the line 1 cm, and place point C3:
P 1 C 3 (in this example) = 10 cm.
Auxiliary points for designing the back armhole. Divide the width of the armhole, i.e. the segment SP, in half and place point K. From point C, draw a line dividing the angle in half, set aside 2.5 cm on it and place point K1. Divide line C 2 C in half and put point K 2.
Back armhole line. Connect points Sz, K 2, K 1 and K with a smooth line.
Side cut line position. From point K down, draw a straight line parallel to the line of the middle of the back, and at the intersection with the waist line, place point T 2.
Design of the side cut of the back. From point T 2 to the right along the waist line, set aside 1.5 cm and place point T 3. From point K through point T 3, draw a line until it intersects with the bottom line and place point H 2. The length of the side cut of the back from point K to point H 3 is equal to the length of the middle of the back from point G to point H:
The contour lines of the back pattern pass through the points: A, G, T, N, H 3, T 3, K, K 1, K 2, Sz, P 1 and A.
Construction of the front drawing(Fig. 1, b).
Neck width and middle front. From point B to the left along the neck line, set aside 1 cm. From point 1 through point G 1, draw a line down, extending it 2 cm beyond the bottom line. The mid-front line is a beveled line (when cutting, its direction should coincide with the direction of the grain thread). From point 1 to the left, set aside 1/3 Ssh plus 0.5 cm and place point B 1:
1B 1 = Ssh: 3 + 0.5 = 5 cm (14:3 + 0.5 = 5).
Highest point of the neck. From point B 1 up, set aside 2 cm and place point B 2.
Neck depth. From point 1, put 3 cm down and put point B 3. Connect points B 2 and B 3 with a straight line, divide the line in half, and put 1 cm down from the division point at a right angle. Connect points B 2, 1 and B 3 with a smooth concave line.
Front shoulder bevel. From point P 1, put 2.5 cm down and place point P 2:
P 1 P 2 = 2.5 cm
From point B 2 through point P 2, draw a line, set aside the width of the back shoulder minus 0.5 on it and put point P 3:
B 2 P 3 = P 1 C 3 - 0.5 = 9.5 cm (10-0.5 = 9.5)
Auxiliary points for designing the front armhole. From point P, draw a line dividing the angle in half, set aside 1.5 cm on it and place point P 4:
PP 4 = 1.5cm
From point P up, set aside 1/4 of the segment PP 1 and place point P 5.
Front armhole design. Connect points P 3, P 5, P 4 and K with a smooth line.
Front side cut design. From point T 2 to the left along the waist line, set aside 2 cm and place point T 4:
T 2 T 4 = 2cm
From point K through point T 4, draw a line to the intersection with the bottom line and place point H 4. The side cut of the front is equal to the side cut of the back:
Design of the front bottom line. Connect point 2 on the line of the middle front to point H 5 with a smooth line. The contour lines of the front pattern pass through the points: B 3, G 1, 2, H 5, T 4, K, P 4, P 5, P 3, B 2, 1, and B 3.
Construction of a drawing pukawa (Fig. 2). To draw a sleeve pattern drawing, you need one measurement: Sleeve length (Dr) 36cm.
 Fig.2.
The length of the sleeve. From point A down, set aside the sleeve length measurement and place point H:
Sleeve mesh width. From point A to the right, set aside three armhole widths (from the base drawing) plus 2 cm and place point B:
AB = Shpr x Z + 2 = 29 cm (9 x 3 + 2 = 29).
From point H to the right, draw a line parallel and equal to line AB, and place point H 1:
Connect points B and H 1.
Sleeve hem. From point A downwards, set aside 3/4 lines PP 1 (see drawing of the base of the dress) minus 0.5 cm and place point a:
Aa = PP 1: 4 x 3 - 0.5 = 10.5 cm (15: 4x3-0.5 = 10.5)
From point A to the right, draw a line parallel to line AB until it intersects line BH 1 and put a point V.
Sleeve middle line. Divide segment AB in half and place point O. From point O, draw a vertical line until it intersects with the bottom line and place point O 1.
Front sleeve fold line. Divide the segment VO in half and draw a vertical line down from the division point. At its intersection with the bottom line, place point H 2.
Elbow line. Divide segment AO in half and draw a vertical line down from the division point. At its intersection with the bottom line, place point H 3.
Auxiliary lines for designing the sleeve cap. Connect point O to points a and b. At the intersection of the auxiliary line with the front fold line, place a point at 1. At the intersection of the second auxiliary line with the elbow bend line, place point a 1.
Auxiliary points for designing the sleeve cap. To decorate the back of the sleeve cuff, set aside 2 cm from point a 1 along the auxiliary line and place point a 2. Divide segment aa 2 in half and set aside 1 cm from the division point downwards at right angles to the line. Divide the segment a 2 in half and set aside 2 cm from the division point upward at a right angle to the line a 2 O.
To decorate the front part of the sleeve cap, divide segment Ov 1 in half and set aside 1.5 cm from the division point upward. Divide the segment of 1 in in half and set aside 2 cm down from the division point at a right angle to the line of 1 in.
Sleeve piping line. Connect points b, 2, c 1, 1.5, O, 2, a 2, 1 and a with a smooth line, as shown in the drawing.
Sleeve bottom line design. From point H3, put 1cm down, and from point H2 up, 1cm. Connect points H, 1, O 1, 1 and H 1 with a smooth line.
Construction of a drawing of a turn-down collar (Fig. 3). Construct a right angle with its vertex at point A. 
Collar length. From point A to the right, set aside a measurement equal to the length of the collar stitching line (from the drawing of the base of the dress) and place point B:
AB = 14cm (as an example)
Collar width. From point A downwards, set aside 9cm and place point A 1:
A A 1 = 9 cm. (as an example)
From point A 1 to the right, draw a line parallel and equal to line AB, and place point B1:
Design of the collar part. From point B 1 to the right, set aside 4 cm and place a dot A:
Connect points B, a. From point a up along line B a, set aside 1 cm and put a point a 1:
Connect points a 1 and a 1 with a smooth line. From point A down along line AA 1, set aside 2 cm and place a point d:
Connect points d and b with a smooth line, creating a line for sewing in the collar.
The contour lines of the collar drawing pass through the points: d, B, a 1, A 1, d.
Every girl at least once in her life dreams, just like the heroine of her favorite fairy tale “Cinderella,” to be at a real ball. And not only to appear, but also to look like a fairy-tale princess at this ball: in a beautiful dress, with an intricate hairstyle, elegant shoes, and light makeup. And even if your fashionista can only wear this dress once, still give your child a fairy tale, and your princess will remember such a miracle transformation for a long time. Our dress pattern for girls will help you turn your beauty not only into a princess. By changing the length of the skirt, the color of the fabric and its texture, it can easily be transformed into an airy snowflake, a mysterious flower fairy, and even a Spanish gypsy beauty. Fluffy multi-layered skirts will help you create both an airy tutu and an exquisite ballet Chopin dress. This basic pattern will help you create completely different looks.
Show a little more imagination with ruffles, rhinestones, and bows. Add elbow-length gloves, a miniature clutch bag, and make a tiara.
Patterns replaced (July 2016)
You can download a dress pattern for a girl for free using the following links:
| Russian size (height) | Chest circumference | Waist circumference | Hips | Age appropriate | direct link |
| size 86 | 52-54 | 49-51 | 52-54 | 1.5 years | |
| size 92 | 53-55 | 50-52 | 53-56 | 2 years | |
| size 98 | 54-56 | 51-53 | 55-58 | 3 years | |
| size 104 | 55-57 | 52-54 | 57-60 | 4 years | |
| size 110 | 56-58 | 53-55 | 59-62 | 5 years | |
| size 122 | 58-62 | 55-58 | 63-67 | 7 years | |
| size 134 | 64-68 | 58-61 | 69-73 | 9 years |
| Size (height) | Bust | Waist circumference | Hip girth | Age appropriate | |
| size 80 | 51-53 | 48-50 | 51-53 | 1 year |
Payment for goods Buy |
| size 116 | 57-59 | 54-56 | 61-64 | 6 years |
Payment for goods Buy |
| size 128 | 61-65 | 57-59 | 66-70 | 8 years |
Payment for goods Buy |
| size 140 | 67-71 | 59-62 | 72-76 | 10 years |
Payment for goods Buy |
| size 146 | 70-74 | 62-64 | 75-80 | 11 years |
Payment for goods Buy |
| size 152 | 74-76 | 64-65 | 79-83 | 12 years |
Payment for goods Buy |
* As a result of payment, you will automatically be sent a file with a pattern to the email you specified. If the file has not arrived, you need to check whether you entered the correct postal address when paying. If the postal address is correct, but the file has not arrived, you must immediately contact the address [email protected]
Patterns are given without seam allowances
The composition of the pattern set:
note The skirt consists of several layers. The bottom one is fabric that holds its shape, the top ones are soft organza or chiffon.


A variety of dress fabrics at an affordable price can be purchased in the VITEX online store.

Below is a description of sewing an elegant christening dress from one of our readers.

I originally planned to make a beautiful dress for my niece that she could wear to her christening and a couple of other holidays. I liked this model for its simplicity and the ability to choose a pattern for the desired size. My niece has already slightly outgrown 92, but does not reach 98 cm (the girl is 2.5 years old). I decided to sew a little longer and chose a 98 cm pattern. As it turned out later, I did the right thing, because it fit with difficulty. I printed and cut out the patterns, for sewing I chose white chintz as the main fabric and lace as the additional upper tier of the skirt. I bought 2.5 meters of lace braid, three flower bows and 2 meters of thin braid with rhinestones. Although the pattern came with sleeves and I even cut them out, I did not sew them in. I decided that this dress would look nicer without them. I made double patterns for the body up to the waist so that the chintz would not show through and would look neater. Then I sewed all the details in them, I got patterns up to the waist in two copies. I sewed the necklines, head slits and turned the product right side out. After that, I stitched from the front side of the armhole, first folding the ends and running thin lace along the seams so that they were not noticeable. The top of the product was almost ready. I would like to note that I cut exactly according to the patterns at 98 cm, and did not make additional seam allowances. And then, when the dress was ready, it fit snugly. Therefore, if you are sewing exactly to your size, then add additional allowances so that the girl fits well. You can also slightly enlarge the neckline, sew a zipper at the back or add small buttons. In order for the child’s head to pass through without problems, it is necessary that the two halves of the back are sewn together only at the very bottom and leave a deep cut. I got a little stuck on this and had to embroider it twice, making more.
Afterwards, I started cutting out the bottom, only I decided to make the top lace layer of the skirt more fluffy and therefore did not cut it like the bottom one, but simply gathered it together and stitched it in place. I cut the bottom layer exactly according to the finished pattern. It turned out very elegant and the length was just right. I trimmed the bottom of the top lace layer with rhinestone braid. So that the threads would not be conspicuous, I sharpened them with a very thin fishing line. It was transparent and unnoticeable. I trimmed the bottom layer of the dress with lace. Then I connected the top and bottom of the dress from the inside out and machined all the edges. I wanted the bottom of the dress to somehow sparkle - for this I lightly grabbed it in an accordion and lifted the ends of the skirt in front on both sides. I sewed a white flower into the gripping areas and another one on the left chest. To make the dress look even more elegant, I bought a very wide transparent mesh ribbon with large flowers embroidered with white braid. I sewed it at the waist to the outside of the dress using hand stitches with clear thin fishing line. Due to its large size, it turned out that the top of the braid was under the bust, and the bottom went over the lace skirt. But it looked good. On the back of the slit I sewed a small button and made an air loop from white threads. But since, as I already wrote, the cut had to be lengthened, at least three buttons were needed. I finished them off later. This is where my work with the dress ended - it turned out very airy and beautiful.
You can sew many charming models of children's clothing yourself, spending very little time on their modeling. But first, you will need a basic pattern for a dress for a preschool girl, which you can build using our instructions. In the future, it can be used when modeling various styles of children's clothing - not only dresses, but also blouses, sweatshirts, bomber jackets, etc. In this lesson, we will tell you in detail how to create a pattern for the base of a shoulder product, as well as a sleeve pattern and a turn-down pattern collar to her.
Advice! The basic pattern of a shoulder product, the construction of which is given in the article, can be used to model shoulder products for girls and boys of preschool and primary school age - dresses, blouses, sweatshirts, vests, jackets, etc.
To create a pattern, you need to take the following measurements (in the example, measurements for a height of 122 cm are used):
- Bust 61 cm
- Length to back waist (DTS) 29 cm
- Length to waist front (accident) 31 cm
- Armhole depth 15 cm
- Back width 26 cm
- Armhole width 7.2 cm
- Front width 26 cm
- Shoulder length 9 cm
- Neck circumference 30 cm
- Hip height 12 cm
- Back length 60 cm
Constructing a pattern for the basis of a dress for a girl
From the upper left corner of the sheet, step back 5-6 cm and place point A. From point A, draw a vertical line down, along which you place:
- AG = Armhole depth as measured + approx. = 15 cm + 1.5 cm = 16.5 cm.
- AT = Length to back waist (DTS) = 29 cm.
- TB = 12 cm (Hip height).
- AN = 60 cm (Product length according to measurements).
From points A, D, T, B and H, draw horizontal lines of arbitrary length to the right.
Grid width: from point G, draw a horizontal line of arbitrary length to the right and set aside along the horizontal line:
- GG1 = ½ Back Width by Measurement (ShS) + approx. = 26/2 + 1.5 = 13 cm + 1.5 cm = 14.5 cm.
- G1G2 = Armhole width according to measurement (Shpr) + approx. = 7.2 cm + 2 = 9.2 cm.
- G2G3 = ½ Chest Width according to measurement (SH) + approx. = 13 cm + 1.5 cm = 14.5 cm.
Draw a vertical segment through point G3; at the intersection with the horizontal lines, points B, T1, B1, H1 are obtained.
From point G1, draw a straight line upward until it intersects with line AB - point P is obtained. From point G2, draw an upward perpendicular of arbitrary length.
Side line. Divide the segment G1G2 in half - you get point G4 and from point G4 lower the side line down to line HH1 - you get point H2. Designate the point of intersection with the line TT1 with the letter T2, the point of intersection with the waist line BB1 - B2.
Lifting the shelf. From point T1 up, set aside the Length to the front waist according to the measurement: T1W = 31 cm. From point W, draw a horizontal segment to the left, at the intersection with the perpendicular from point G2, point P1 is obtained.
Building a back pattern
Neckline. From point A to the right, set aside AA1 = 6 cm (1/6 of the neck circumference according to the measurement plus 1 cm for all sizes): 15/3 + 1 = 6 cm. From point A1 up, set aside A1A2 = 1.5 cm (for all sizes) and connect points A and A2 with a slightly concave line along the pattern.
Back shoulder line. From point P down, set aside 1.5 cm. From point A2 through point 1.5 (shoulder slope), draw a back shoulder line A2P2 = 10 cm (shoulder length according to measurement + 1 cm for fit).
Armhole line of the back of the dress. From point G1, dividing the angle in half, set aside 2 cm. Draw the armhole line from point P2 through the dividing point of the segment PG1, point 2 (bisector of the angle) to point G4.
Constructing a front pattern
Neckline. From point Ш, draw a front neckline cutout using a compass: ШШ1 = R = 1/6 Neck circumference according to measurement + 1 cm for all sizes): 30 cm / 6 + 1 cm = 6 cm.
Front shoulder line. From point P1 downwards, set aside 3 cm. Connect point Ш1 and point 3 with a straight line and extend it to the left. Set aside along the line the segment Ш1П3 = 9 cm = Shoulder length according to measurement.
Armhole line. Draw the bisector of the angle G2 and set aside 2 cm along it. Draw the armhole line from point P3 through the midpoint of dividing the segment 3-G2, point 2 (bisector) to point G4.
Modeling flared side seams
To model flared side seams on the base pattern of a dress for a girl, from point H2 to the left and right, set aside the required value (the measurement is not constant and may vary depending on the style of the product and the design decision). Draw the back bottom line H-H3 and the bottom line H1-H4 using smooth lines with a slight rise in the side seams.
Pattern-basis of a dress for a girl with flared side seams
Separately, copy the back and front pattern onto tracing paper and use the basic pattern for further modeling of the products.
You will find even more interesting and bright ideas, useful tips, and patterns for children's clothing on the website. Subscribe to our free lessons and sew children's clothes with us, because it is not only very simple, but also incredibly exciting!
You might also be interested in:
Very cute crocheted monkey. Now it has become a tradition for every new...

A poncho is a versatile piece of clothing that is appropriate in a wide variety of situations. Recently...

Modern children receive sneakers or boots with Velcro for their use, without...

Makeup plays a huge role for a person when celebrating Halloween. He's the one...

Probably every woman in the world knows that one of the main secrets of the mysterious and...

