


Want to sew something super easy without breaking a sweat? Then my today's MK is How to sew a hair tie with your own hands for you! I’ll show you how to sew this stylish accessory that you can use to please yourself and your loved ones, and also how you can decorate a bun on your head.
How to sew a hair tie with your own hands
I’ll start, as always, with a list of what I needed to sew accessories:
- corduroy fabric - 20 cm.
- underwear elastic - 17 cm.
- thread in color - 1 spool
- sewing tools - scissors, measuring tape, tailor's pins, safety pin, sewing machine
01. The pattern of an elastic band with a bow looks like this. Seam allowances are already included. You can build it directly on fabric, or on A4 sheet, and then transfer it.

02. I cut out elastic details from corduroy.

03. I sew the detail of the belt and bow using an overlocker. I did this on an overlocker, but this operation can also be repeated on a sewing machine. At the same time, I leave the hole in the middle unsewn on the bow, and both ends on the elastic band.

04. Turning the elastic waistband inside out using a safety pin

05. I turn the bow detail right side out. I sew the hole by hand with a thread and a needle. I iron it. Corduroy is not afraid of ironing, so feel free to iron it with steam, after which it takes the desired shape.

06. I take a 17 cm long elastic band. I pass it through the belt piece. I fasten the ends of the elastic with tailor's pins to the belt.

07. I sew the elastic overlapping the parts of the belt with the elastic on top of each other.

08. I tie a bow around the place where the seam formed. I sew the bow in several places to the elastic by hand.

My elastic bands are ready, I wasn’t lazy and sewed three of them, which was enough for the leftovers in the fabric.
Sophista twist for hair
Now there is a fashion for the 90s, which fell on the years of my youth. And whoever was around during this time probably remembers that at the peak of our popularity we had such an intricate thing for hair, like a twist sophist. We spun it on our heads as best we could, based on our imagination. Unfortunately, today I can’t boast of so many hairstyles, but on the other hand, I am now a master of bun hair.
All I need for a beautiful bun is my sophistry twist. No matter how much I looked, it was always the same shade in stores. Now I’ll show you how you can quickly and easily change its color and add some “spice.”
01. I cut out a piece from corduroy that completely follows the outline of the sophist. I sew it along the edge. Inside I leave a hole equal in length to the exact same one on the hairpin.

02. I put the cover on the sophist, I sew the inner hole by hand with a thread and a needle.

Those who have been blessed by nature with long hair are often faced with the pressing question of how to decorate it and diversify their everyday hairstyle. You can use a hair tie for this. Of course, you can buy such decoration in a store. But it's not as interesting as if you make such an elastic band yourself. In this case, various materials can be used as improvised material: fabric, ribbons, knitting threads, etc.
How to make kanzashi hair bands with your own hands?
Before sewing a flower-shaped hair band, you need to prepare the following materials:
- cardboard;
- scissors;
- textile;
- needle;
- threads;
- rubber;
- bead.

Hair band - flower: master class
Before making a hair tie, prepare the following:
- thread;
- a needle;
- textile;
- small suede circle;
- scissors;
- rivet;
- elastic band;
- glue.


Fabric hair tie
You can also make a regular elastic band without flowers. This type of decoration is easier to make. Although it requires a lot of time. For this
- required:
- sewing machine;
- scissors;
- rubber;
- fabric measuring 10 by 50 cm.


Creating hair ties is not only fun, but also interesting. Such a homemade decoration will make you stand out from the crowd, since no one else will have such an accessory. After all, this is the author's work. And the ability to use different materials to create hair bands will allow you to diversify your hairstyle.
Using a hair tie, you can not only quickly gather your hair into a bun, but also decorate your hairstyle. You can sew an original accessory from fabric with your own hands, and make several multi-colored elastic bands. Also use different types of material.
.jpg)
This article describes a detailed master class through which you will learn how to sew hair ties from fabric. If you carefully follow each step in the instructions, you can easily make hair accessories.
You will need the following materials:
- a piece of fabric;
- iron, ironing board;
- narrow knitted elastic band;
- needle, thread, sewing machine;
- ruler, marker;
- pin, sewing needles.
Step 1. Iron the fabric well to remove folds and folds. If you are using leftover fabric or not new material, then it must be washed before ironing.
.jpg)
Step 2. Determine the size for the accessory and cut a rectangle from the material. At the same time, the longer the figure, the more magnificent the elastic will be; the height of the workpiece determines the size of the accessory.
.jpg)
.jpg)
Step 3. Fold the workpiece in half lengthwise. Place the right sides of the fabric facing each other. Secure the edges with sewing needles or sew the seam with the needle forward.
.jpg)
Step 4. Using a sewing machine, stitch the edges of the workpiece, while gradually removing the needles from the material. Leave both side edges unstitched for further processing.
.gif)
As a result, you will get this base for the elastic band.
.jpg)
Step 5. Now you need to connect the two side sections of the workpiece. To do this, insert a pin through one edge and close it.
.jpg)
Turn the head of the pin towards the inside of the base.
.jpg)
Pass it inside the sewn part of the material to the end of the next cut, but not all the way. You should end up with a tube rolled up inside. Remove the pin.
.jpg)
Step 6. Bring the edges of the material together and secure them with sewing pins.
.jpg)
Step 7 Stitch the edges together at the top or hand stitch.
.jpg)
Step 8 Turn out the blank for the elastic through the free hole. To do this, gently pull the inside of the fabric upward.
.gif)
Step 9 Cut the elastic to the required length. Pierce one edge with a pin.
.jpg)
Step 10 Thread the elastic band inside the workpiece, pull the edges up and remove the pin.
.jpg)
Step 11 Sew the edges of the elastic together using a sewing machine or by hand. You don’t have to worry about the neatness of the seam; it won’t be visible on the elastic band.
.jpg)
Step 12 Hide the elastic band inside the workpiece. Straighten the free edges.
.jpg)
Step 13 Wrap the sections inward and secure with needles.
.jpg)
Step 14 Hand sew the edges with an invisible seam or sew on a sewing machine.
.gif)
That's it, the hair tie is ready!
To put on the accessory, you need to stretch the elastic band with one hand, gather your hair into a bun with the other hand and thread it inside it. If one turn is not enough, do another one.

It’s very easy to sew such a hair tie, the main thing is to know how!
Every lady, regardless of age, likes beautiful jewelry. And mothers so want their little princesses to be the sweetest and most beautiful. Today we want to help mothers and show how to make children's hair ties. Girls always need accessories, and our task is to make them with our own hands. Our master classes are simple, such elastic bands can be made in just an hour.
Such interesting elastic bands can be made from braid or grosgrain ribbon. We will need 3 types of braid: 15 mm wide, 15 mm wide, and 5 mm wide. For the roses you need small pieces of pink and green satin ribbons. You can take elastic bands from old hairpins, or buy any inexpensive ones.
To work you will need:
- Rubber bands.
- Braid of 3 types.
- Needle and thread to match the color of the product.
- We cut the braid into 2 hairpins, thus:
- Black braid - 60 and 60 cm.
- Pink braid - 60 and 60 cm and 35 and 35 cm.
- Black narrow - 4 and 4 cm.

Let's take a pink ribbon 60 cm and mark it with a pencil into 7 parts, 8.5 cm each. Next, we also divide the second 35 cm ribbon into 7 parts, 5 cm each. We assemble and stitch along the marked points.

We sewed and secured the thread tightly.

Stitch as shown in the photo.

In the same way we sew a 35 cm ribbon.


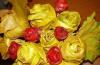
Sew a small rose with a green satin leaf on top.

We make a bow from black braid.


Sew or glue rubber bands. We use Moment glue.

Our master class is now complete.


Which child doesn't like strawberries? A simple and understandable master class will help you make beautiful hair ties.

To work you will need:
- Red satin ribbon (20 cm x 2 elastic bands). Width 5 cm.
- Green ribbon (10 cm). Same width.
- Thin braid to match the color of the elastic bands.
- 2 rubber bands.
- Yellow beads.
- Sintepon or cotton wool.

Cut 2 pieces of red ribbon (10 cm), 2 pieces of green (5 cm), 2 pieces of thin braid (5 cm). Burn the edges with a lighter.

Then we take the red ribbon, bend it in half and fold it facing inward, sew on one side with the seam forward with the needle. We should get a voluminous berry. Turn it onto your face. We tighten the edge with a small stitch.

We stuff the berry with padding polyester and tighten the “leg”.


Then take a hair elastic, sew it on or glue the braid onto it. Set the ends of the braid on fire.

Thread the braid through the green ribbon and sew the braid to the strawberry. Lightly glue the green tape to the berry at the junction to hide the ends of the tape.

We sew beads onto the berry, it is better to start from the seam and sew in a circle.

Back side:

The video shows how to make a hair tie decorated with a butterfly.
Hair ties are a common and everyday item. But even such a little thing can become a bright accent in your image, adding charm, sophistication, unusualness and originality to it. Of course, you can pick them up in a store or order them online, or you can sew and decorate the rubber bands yourself. Such a product will be unique and inimitable.
Master class on making accessories
There are many different types of hair ties. They can be satin, textile, lace and even plastic. Depending on the style and purpose, they can be supplemented with feathers, beads, rhinestones and other interesting details. But first you need to learn how to make the base for an elastic band.
Base for gum
The basis of a hair elastic from a regular elastic band is the first thing you need to learn how to do when creating unusual hair decorations with your own hands.
For this you will need:

To make the base of the scrunchie, you first need to make a fabric “wrapper” for it to make it look aesthetically pleasing.
Take a rectangular piece of fabric. Fold it in half along the long side, right sides facing in, and stitch along the long edge.
If the workpiece turns out to be wide, you can connect the ends of the workpiece and stitch it approximately to the middle, leaving a small hole for turning it inside out.
Now you need to turn the workpiece inside out, insert an elastic band, tie its ends and sew the opposite ends of the product. The finished product can be supplemented and decorated with various decorative elements.
Satin bow
DIY elastic bands made from satin ribbons are perfect for a light and delicate summer dress. To make them you will need the following materials and tools:
- finished product;
- satin ribbons and lace of arbitrary length;
- beads in the color of the lace or contrasting, but combined with them;
- needle;
- threads
Rubber bands can be shaped like a bow or a flower..

For everyday wear, you can make elastic bands from grosgrain ribbons with your own hands. This is almost the same as satin ribbons, but they are matte and denser and can have a variety of colors. In addition, this material is much more docile and does not require processing - the edges of the tape can simply be burned.
- Option 3. Take a wide satin ribbon or a strip of delicate chiffon. Make a tie in the middle of the strip, along its entire length with a “forward needle” stitch and tighten the thread. It should form a nice fluffy bow. Tie the middle with a ribbon.
It is not necessary to make a new base for each elastic band yourself; you can use ready-made elastic bands from the store.
Flower decoration
 To make a flower, you will need a ribbon, as well as a small base. You can take, for example, cardboard.
Cut out a circle the size of the core of a flower, prepare threads, a needle and a button or large bead in the center.
To make a flower, you need to gather the ribbon along one edge so that when you tighten the thread, a circle is formed. Do this twice with two different scraps.
Now they need to be glued to the cardboard base so that it is in the middle. To disguise sloppiness, place a beautiful button or bead in the center. Sew the finished flower to the base.
For a sophisticated outfit and hairstyle, a rosebud in a young lady's hair will look great. It is also made from satin ribbon. You will need ribbon, a needle, and threads in color. The step-by-step manufacturing process is shown in the photo.
Holiday decoration for a little girl
A hairband with a rosebud made of thin translucent fabric is ideal for a delicate summer or lush ball gown. For example, you can use chiffon. To work you will need scissors, thread, a needle and a candle. Cut squares of different sizes from fabric (from 3x3 to 6x6, for example). There are 5-7 pieces of each type at your discretion.
 Now each of them needs to be carefully brought with tweezers to a burning candle so that its edges are slightly scorched and change shape. Do not forget about safety precautions when working with fire.
When all the parts are processed, assemble them onto a thread from largest to smallest. Sew a large bead or a beautiful button into the core. To finish, use ribbons in soft green shades to create an imitation of leaves. This rose looks very impressive and will perfectly complement your outfit.
In this way, you can make not only a children's elastic band or headband, but also a hairpin or even a brooch with a bud for an adult lady.
Original approach
 Very interesting and original DIY rubber bands for girls - ears. They will require a base made in advance and a small piece of bright fabric. The material can be any, for example cotton. You will need to cut out 2 parts from the fabric according to the pattern.
Since the pattern only shows half of the piece, the fabric needs to be folded in half along the fold line before cutting.
Sew both parts, right sides facing in, but not all the way, leaving a small hole in the middle. Through it, the product will need to be turned inside out, and if desired, the ears will need to be filled with a small amount of padding polyester or other filler. Only after this should it also be sewn up.
Tighten the middle of the ears with a small strip of fabric or ribbon. Using it, sew the ears to the base.
Master class on creating a hair tie


Felt accessories
 Another material that is great for creating cute homemade hair decorations is felt. You can use it to make bows, flowers, faces of various animals that will look original and unusual on any hairstyle. The felt does not crumble and holds its shape well, as it is very dense. This allows you to avoid processing the cut parts.
To make a flower, you need to draw 2-4 patterns in the shape of a flower of various sizes and cut them along the contour. And then sew them together in order from largest to smallest. Add a button, rhinestones or bead to the center.
You can make several flowers and attach them all to one elastic band. You can sew them around the perimeter or connect 3 flowers into a small bouquet and then attach them to the base.
To make elastic bands with animals, use the simplest patterns. You can sew several pieces of felt to give the figure thickness, or connect 2 identical pieces and add a little filler inside. For example, you can make a cat. There is no need to make a tail; use only the main part of the pattern.
A set of beautiful and bright hair ties can serve as a wonderful gift or a pleasant bonus to a big gift for your good friend, sister, niece, daughter. A small child will be delighted with the bright product, and adults will appreciate your creativity and attentiveness.
Attention, TODAY only!
You might also be interested in:

When choosing clothes, a man first needs to decide on a style in order to...
You are the most important accountant, the smartest, the most glorious, the best, without a doubt, and for...

The modern rhythm of life dictates its own conditions. Increasingly, personal meetings are being replaced by...
Nowadays there is little that will surprise a modern resident of a big city. At the same time, competition between...
With the onset of autumn, kindergartens and schools hold holidays dedicated to this...

