


0 90 641
Nowadays, DIY gift wrapping is actively becoming fashionable, and I decided to figure out what’s what - let’s find out what trends there are in gift wrapping, what you should focus on, and how in general you can pack a gift for any holiday with your own hands.
Trends
Nowadays, it is no longer enough to wrap a gift in gift paper - gone are the days when half a meter of sparkling paper with a ribbon bow was considered the best packaging. Currently, most attention is paid to three areas:- eco-style (one of its subtypes can be called rustic style);
- minimalism;
- eclecticism and futurism.


Minimalist motifs are always strict and restrained. Here you should be guided by one idea - the simpler the better. A minimal number of decorative elements is welcome here - for example, a gift can be wrapped in plain white paper, and a special small element made from a die-cut or a regular elegant tag can be used as decoration.

Futuristic and eclectic notes will appeal to those who prefer to combine several styles into one - there can be an elaborate, complex bow made of satin ribbons and the simplest craft paper as packaging, or, on the contrary, a complex figured box covered with natural fabric for decoration can be attached with a decorative pin.


So, what should be the design of gifts so that it is fashionable and beautiful? Unusual, stylish and neat.
Original handmade boxes
The simplest and at the same time effective way to pack a gift in an unusual way is to make a cardboard box for it. How to make a gift box in four easy steps?

Another option for a homemade box:

Template:

Or this option:

Templates for her:


Or maybe make a pyramid?

Scheme for the pyramid:

By the way, a DIY gift box can be of any shape - why not a candy box? Especially if the gift is not too large or oblong.

What is required to make this packaging?
- Colored cardboard.
- Ruler and pencil.
- Scissors, stationery cutter.
- Template (can be printed or redrawn).
- Glue.
- Ribbon or stiff thread.

You can also make your own gift box in the shape of a piece of cake. Almost everyone loves sweets, and a piece of cake looks extravagant and cute at the same time.

To make a piece of cardboard cake, you need to prepare:
- thick colored paper or thin cardboard;
- ruler and pencil;
- glue.


The box is made of two fragments, the lower part should be smaller (literally a couple of millimeters in each direction). We cut out the blanks and transfer them to colored cardboard.


We do the creasing (we draw a line along all the folds with a knitting needle until grooves form - this will make the folds smoother).
We glue the blanks according to the allowances and dry them well. Our box is ready, now the only thing left is to decorate it.


For example, you can make a light rose out of paper and tie it with twine.

This option is easier to manufacture. Without removable lid. You just need to print (or draw by hand) this template on a beautiful cardboard, where it is marked - cut, where the dotted lines are - bend, where it says glue - glue, and you're done!

How to make an origami style box? You need to stock up on a ruler and a pencil, pick up two beautiful square sheets of paper (I use scrapbooking paper), and you will also need scissors. By the way, you can also use the box for your own needs - I store paper clips in one of these on my desk.


Packed beautifully
We already know how to make boxes, now we need to understand how to beautifully wrap a gift with our own hands. Of course, you can leave the gift as is (or put the gifts in gift boxes, which is also good), or you can think about how to decorate the gift and come up with something special.Let's look at how to wrap a gift in paper so that it looks truly stylish and does not give the impression of sloppiness. Pay attention to the choice of paper - you can choose regular light or dark paper, you can choose natural packaging paper (Kraft), or you can buy several sheets or rolls of beautiful printed paper from a scrapbooking store.
See how to wrap a gift in an original way. Try a new way that attracts attention - your gift will look very, very unusual!
How to do it right
- Packaging must be neat - cuts of paper or fabric must be even, and there should be no visible traces of glue, tape or paper clips.
- It should completely hide the gift, then you can make a surprise and give the hero of the occasion not only your gift, but also a few exciting minutes of guessing and guessing what is hidden inside.
- Don't forget about the decor and name card - such details always catch the eye.
How classic gift packaging is made:

This was a classic type of packaging, and now there will be an original gift packaging for a man or woman - in the form of a Christmas tree.

We will need:
- packaging - it can be wrapping paper, fabric or film;
- glue (for fabric) or double-sided tape (for paper);
- sharp scissors;
- various decor - ribbons, cutting, feathers, butterflies.
As a practice, try wrapping any small box with a piece of newspaper or plain paper - this way you will understand how to fold the folds, where to lay the tape and practice a little.
 This way you can make packaging for anything - it could be a large box of chocolates and an ordinary book, a set of cosmetics or a plush toy.
Tying bows
Tiffany


Another simple and effective bow
- Fold the bow according to the photo instructions and tie it with thread.
- We tie a ribbon around the box, put our bow on top of the knot and tie another ribbon bow on top of it. See photo master class:

Or this version from paper:

Here is a decor option made from satin ribbon:
The box can also be decorated with flowers made from plain paper or corrugated paper (an ordinary napkin will do), see:


Various packaging options
Have you ever thought about how the packaging for New Year's gifts should be different? How can you make packaging wedding gifts interesting and atypical? How can you make beautiful cardboard bonbonnieres or miniature boxes? If you have kraft paper and twine, then don’t worry - look at the selection of photos.


How to pack a gift in other ways? The main role can be played by gift wrapping paper - for example, the design of New Year's gifts made in red, white and green colors will bring the spirit of Christmas miracles, and the combination of blue and brown is well suited for a gift to a man!

Are you preparing a wedding gift or a birthday gift? Ideas for wrapping gifts for different holidays - for the New Year you can do something multi-colored, and for original wedding gift design it would be useful to stock up on silver or gold dust; it will make a light box with a gift truly magical.


Do you want to pack in an unusual way? Pack it in craft paper and use original stamps (they can be cut from a regular eraser). Just stamp craft paper or a box of craft paper with the stamp you created - white ink looks amazingly stylish on craft paper.

Use the diagrams and templates below to fold your own boxes (by the way, you can make birthday or wedding invitations with your own hands from the same cardboard).
Thirstyfortea.comA great gift for tea lovers. “Tea connoisseurs don’t drink sawdust from tea bags!” - you say. But who’s stopping you from packaging good, expensive tea in envelopes?
You will need:
- a cone made of foam plastic or thick cardboard;
- round cardboard box and rice for stump;
- tea packed in small paper bags (the quantity depends on the height and diameter of the cone);
- glue gun;
- star, bows and other decorations of your choice.
Cover the cone with tea bags, applying glue to the top of them. Move from bottom to top in a checkerboard pattern. It is better to use bags of contrasting colors: the tree will look more elegant.


Glue the lid of the cardboard box to the bottom of the cone. Fill the box itself with rice to make the tree more stable, and then attach it to the lid. If you don’t have a ready-made box of the required diameter at hand, make it yourself. Take a tube from a roll of paper towels as a basis or glue it from cardboard according to this pattern.
Decorate the tree with bows, rhinestones and other decorative elements, and glue a star to the top of the head.
 Tara Aveilhe/Flickr.com
 Girls will highly appreciate such a gift. After all, this is an individual scent; no one in the city will have such a perfume.
Before you create, find out what smells the one you want to please prefers. For example, if a girl likes citrus scents, she will need lemon or orange. To add woody notes, you need sandalwood or cedar oils, powdery ones - roses or vanilla.
Ingredients:
- ½ cup almond butter;
- ½ cup grape oil;
- 100 g beeswax;
- 1 teaspoon vitamin E;
- 60 drops of lemon oil;
- 25 drops of eucalyptus oil;
- 20 drops of lavender oil;
- 20 drops rosemary oil.
Mix almond and grape oils with wax in a separate saucepan and place in a steam bath. When the wax is completely dissolved, let the liquid cool slightly and add essential oils and vitamin E. Pour the future perfume into molds. A bottle of old hygienic lipstick, a jar of Vaseline, etc. will do.


Once the wax has hardened, the perfume is ready to use. All that remains is to package them beautifully.

A great gift for freezing girls. A pair of warm, fairly sturdy socks that you don't wear can be turned into fingerless gloves.
Additional materials:
- needle with thread;
- heart cut out of felt.
Trim and sew the sock as shown in the photos. Be sure to hem the edge to prevent fraying, and make all seams from the inside out.

Sew a felt heart on top. You can use any other decorative means. For example, embroider the inscription “Happy New Year!” or embroider mitts with rhinestones.
Another DIY gift for those who are always cold is. By heating it for 1-3 minutes in the microwave, you will get a great heating pad that also smells nice.
 GA-Kayaker/Flickr.com
 Paracord is a cord made of nylon. Initially used as a material for parachute lines, but then paracord began to be used wherever a lightweight and durable cable might be needed. For example, stylish men's bracelets are woven from it. In ordinary life it is just a decoration, in an extreme situation it is a life-saving rope.
There are various techniques for weaving paracord. Here is one of the most common.
You will need:
- 150 cm of paracord of one color and the same amount of another (it is desirable that the shades be contrasting);
- 75 cm of black paracord;
- scissors;
- ruler;
- needle and thread.
From paracord you can weave not only a bracelet, but also a keychain, or make a braid for a knife or a car steering wheel. You can easily find the diagrams on the Internet. It’s even easier - watch video tutorials on YouTube, there are many of them.
 Witandwhistle.com
 You can not only drink from such a mug. You can leave messages on it for your household or just draw.
Materials:
- white porcelain mug without relief;
- slate paint;
- masking tape;
- brush.
Chalkboard paint is most often used to renew the surfaces of school boards. Now there is a large selection of such paints. You need one that can work on ceramics. For example, like this one.
Choose an area of the mug that is comfortable to write on, but that will not come into contact with your lips when drinking. Cover the rest of the mug with masking tape.
Degrease the untaped area and apply paint to it in a thick layer. Remove the tape and leave the mug in a well-ventilated area for a day.
 Witandwhistle.com
 When the paint is dry, place the mug in an oven preheated to 150°C. After 30 minutes, turn off the stove, but remove the mug when it has cooled.
Now the mug can be washed in the dishwasher and put in the microwave.
 Heygorg.com
 If you are one of those who like to give experiences rather than material things, you will love this idea. After all, it’s not only a delicious warming drink, but also a reason to go or invite you to visit.
Take some pretty glass jars and fill them about a third full with hot chocolate or cocoa powder. Add a few candies or pieces of chocolate. Fill the remaining space with marshmallows.


Decorate the jars to your liking. For example, place a piece of fabric under the lid and attach a heart made from candy canes to the top. The label can serve as a postcard; write your wishes on it.
Another variation of this gift is a set for mulled wine. Take an orange, an apple, a clove and a cinnamon stick. Pack it all beautifully, make a label with your wishes and add a bottle of good red wine.

Candles are a traditional New Year's gift. But glamorous store-bought ones are one thing, a personalized candle or a candle with a phrase understandable only to the giver and recipient, or even with a photograph, is another.
Take:
- white candles with a diameter of 5–7 cm;
- A4 size printing paper;
- parchment paper;
- scissors;
- glue stick;
Trim the parchment paper so that it is 1-2 cm wider than the A4 sheet. Glue the parchment to the printing paper, turning the edges over to the other side. Insert the sheet into the printer with the glossy side, that is, the side where the parchment is. Print out the image you would like to place on the candle.


The drawing will appear on parchment paper. Now you need to transfer it to a candle. Cut out the image, attach it to the candle, wrap it tightly with another layer of parchment on top and direct a stream of hot air onto the resulting structure. If the picture becomes lighter, it means it was imprinted on the candle. Carefully remove the top layer of parchment and let the wax harden.
The gift is ready! If desired, you can decorate it with rhinestones or sparkles.

This cosmetic bag greatly simplifies the search for the necessary items, because any lock can be opened.
You will need:
- 10 zippers 15–20 cm long;
- safety pins;
- needle or sewing machine;
- threads
Sew the zippers to each other from the inside out; for convenience, you can first attach them with pins. Close the resulting fabric into a ring and sew. Also sew the zippers across in front of the dogs, and then turn the cosmetic bag inside out.


This is a gift for a person who cannot part with gadgets. Using the same principle, you can sew a phone case.
Materials:
- a piece of felt suitable for the size of the tablet;
- 2 buttons;
- sewn-in magnets;
- safety pins;
- dense thread in the color of the buttons;
- thread in the color of felt;
- needle;
- scissors.
Fold the fabric so that the bottom part is longer than the top: this is the future cover of the case. Sew along the edges and turn the product inside out.
Cut the lid into a wave or semicircle. Sew a button to the middle. Attach the second one below, to the case. Make a loop between them, as shown in the photo.
 Ohsolovelyvintage.blogspot.ru
 Sew a magnet onto the base and lid of the case on the left and right. The fashionable case is ready!
You can also make a stylish organizer for headphones, flash drives, phones and other gadgets from an old book in a beautiful binding. Here's the detailed one.
 lePhotography/Flickr.com
 A gift that will delight not only children, but also adults with a sweet tooth. Making Santa Claus's sleigh is very simple.
You will need:
- glue gun;
- ribbons and other decor;
- sweets: chocolate, sweets, candy-shaped candies.
Here is a detailed video instruction.

A gift for a bosom friend or colleague. Beer can come in handy on January 1st, and brown bottles can easily be styled to resemble Rudolph and friends. (Rudolph is one of Santa's reindeer, distinguished by his red glowing nose.)
Materials:
- beer in dark glass bottles;
- decorative wire;
- toy eyes;
- red pom-poms;
- ribbon and bows;
- box;
- Super glue.
Remove labels from bottles. Make antlers from wire for future deer.

Glue them to the back of the bottle. Attach the eyes and nose to the front. Tie a ribbon (to prevent it from slipping, you can fix it with glue).
 Craftysisters-nc.blogspot.ru
 Decorate the rest of the bottles in the same way. Put them in a box and decorate it.

A gift for economical women and men who love to cook.
You will need:
- cotton fabric with a New Year's pattern;
- batting for lining;
- threads;
- scissors;
- needle.
If you have a sewing machine, the work will not take much time. Detailed video instructions - from pattern to thread cutting - are included.
Inside such a mitten you can put a spatula, a ladle and other little things useful for the kitchen.
A little more imagination, and your New Year's gift will become even more original. Attach a ring to the spatula and hang favorite family recipes printed on cards and laminated on it.
 Lilluna.com
 Glass snow... wine glass

Balloons with a miniature figure and artificial snow inside are very popular. Life hacker already shows how to make something similar from an ordinary glass jar. Today it's the turn of wine glasses.
Materials:
- transparent wine glass;
- thick cardboard;
- a figurine that can easily fit into a glass;
- artificial snow;
- bows and other decor;
- glue.
Cut a circle out of cardboard with the same diameter as the wine glass. Glue the figure to the cardboard. It could be a Christmas tree, fawns, or, for example, a car with a Christmas tree on the roof.

Place artificial snow, finely chopped white paper or foam plastic on the bottom of the glass. Glue the cardboard base to the edge of the wine glass and turn it over. Decorate the leg with a bow or ribbon.
 belchonock/Depositphotos.com
 Over the past year, very large knitted blankets have been incredibly popular. Finished products are quite expensive, so it is more profitable to make a blanket yourself.
Merino wool is best suited for this, but other thick threads can be used. Video tutorial is attached.
You can also knit a beautiful, warm scarf with your hands, without knitting needles or a hook. Life hacker has already seen how this is done.
 Ourbestbites.com
 This gift will help you remember the best moments of the past year. Just choose the best photos and print them. Get some clear glass jars and vases. Round and cylindrical vessels work best.
Light pill candles inside the jars. The light will fill the house with warmth, and the photographs will seem to glow from within.
 Iheartnaptime.net
 Many people have flaky skin in winter. If there are such people among your friends, prepare them a sugar-lemon scrub as a gift.
According to the Chinese calendar, the symbol of 2017 is the rooster. Therefore, gifts with the image of a rooster or in the shape of roosters and hens will be especially relevant. A universal option for such a gift is a Christmas tree toy.
You will need:
- cardboard blank in the shape of a rooster;
- thick fabric;
- filler for toys;
- twine and lace ribbon;
- white outline;
- scissors;
- needle and thread;
- glue gun
The manufacturing process is shown in the following video.
You can sweeten such a gift with sweet cockerels on a stick. Many people still have their uniform from Soviet times.
Ingredients:
- ½ cup granulated sugar;
- 2-3 tablespoons of water (just to moisten the sugar);
- 1 tablespoon of apple cider vinegar (in some recipes add regular tablespoon or a pinch of citric acid).
You need to boil syrup from sugar and pour it into a form generously greased with vegetable oil. Then stick the sticks in and wait until everything hardens.

If you know other original DIY solutions, share them in the comments.
If you think that making a gift box is very difficult, then you are deeply mistaken. In order to make original gift packaging with your own hands, you just need to stock up on colored cardboard and patience. If you show at least a little imagination, you can please your family and friends with an originally wrapped gift.
Ideas, shapes and photos of beautiful DIY gift boxes
Gift box with openwork decor
 Gift box: heart
 Square gift box
  New Year's gift box
  Gift box: star
 If you want to show your friend or relative all your respect and love, then try making a gift box with your own hands. If possible, try to use all your imagination and create the most original packaging. If you wish, you can make the box round, triangular and diamond-shaped, or make a package visually similar to a flower, house, fruit or even a diamond.
Of course, the latter options will require a little more craftsmanship, but in the end you will get a unique item that definitely cannot be purchased in a store. The only thing you must remember is that such crafts love precision. In this case, when cutting out the template, you cannot afford to deviate from the line in one direction or the other.
You must cut all the lines as accurately as possible, taking care to create perfectly straight edges. If this stage of work is not carried out as it should be, then with a high probability we can say that in the end the box will not be entirely presentable.
How to make a cardboard box for a gift: template, pattern

 Step #1
 Step #2
 If you are new to this business, then you need to start your acquaintance with this type of needlework with the simplest things. Believe me, if you do everything correctly, even an ordinary square box will look attractive. Now we will present to your attention a master class with which you can make a rectangular gift box.
To make it, you only need glue, scissors and special cardboard. If you don't have one, don't be too upset. You can quite easily take even the one that children use in school lessons and make a frame for a craft from it. It’s just that in this case, after the box is ready, you will have to decorate it additionally. This can be done using the decoupage technique or using organza, tulle or satin ribbons.
How to make a small mini gift box from paper: template, pattern

 Scheme for work
 Gift box
 Ready box
 Template No. 1
 Template No. 2
 If you are planning to give a loved one a small gift, then you can make a small box for such a gift. It is best to make a similar craft, like the previous one, from thick paper. If you make it out of thin material, then there is a possibility that it will not hold the desired shape, or it will simply tear due to the mechanical impact that the gift will have on its walls.
Yes, and in this case it is extremely important to take the most responsible approach to fastening all the side parts. Since these crafts do not have secret locks, it will be better if you fix everything with glue or double-sided tape. If the first box seems too simple to you, then below we have placed two more quite interesting templates, by printing which you can easily make some pretty cute crafts.
How to make a scrapbooking box for a gift?

 Template No. 1
 Box of squares
 If you want to really surprise your loved one, then make a scrapbooking box for him. To make it, you will need both regular cardboard and special paper for scrapbooking. You will make a durable frame from cardboard, and use paper to give it a festive look. The best part is that in this case you will have a huge field for imagination. Since this box is supposed to be untied, you can decorate it both inside and outside.
Moreover, if you wish, you can even provide places for small gifts in those parts of the craft that will recline. For example, you can make places there for notes in which you write the nicest words. But keep in mind that in order for the congratulatory notes to fit well into the overall style of the gift box, they must be in the same color scheme as it.
How to make an origami gift box?

 Step #1
 Step #2
 Step #3
 Recently, the origami technique has become so popular that even gift boxes have been made with its help. In principle, you can make such a craft from any colored paper, but since you are still making a product for an important holiday, it will be better if you spend money on scrapbooking paper.
In this case, you will not need additional decoration of the inside of the product, as you will immediately make it as it should be. The only thing you have to take into account is that to create a box, the master class for which is posted above, you need to use two square sheets, one of which will be literally 11-12 millimeters smaller. If you do not take this nuance into account, then in the end you simply will not be able to combine the two parts into one craft.
How to make a gift box with a lid?

 Recommendations for making a round box
 A gift box with a lid is the ideal packaging for heavier gifts. If you make it a little larger than shown in the master class, you can supplement the main gift with sweets, boutonnieres made of fresh flowers and cards made by yourself. As you probably already understood, it is best to make such a box from thick cardboard.
If you have the opportunity, purchase it at a specialty store, or go to the nearest supermarket and pick up any paper box there. When you bring it home, lay it out horizontally and place it under something heavy. Leave it in this position for literally an hour, and then proceed to drawing the frame of the future craft. This little trick will help you smooth out any kinks that would probably get in your way when creating your masterpiece.
How to make a surprise gift box?

 Box in the shape of a piece of cake
  Template #1
  Template No. 2
 In principle, a surprise box can have a completely different shape, color and decor. In this case, everything will depend solely on what event you are going to. If you are going to an employee’s birthday, then it can be a completely standard square and rectangular box, inside of which, in addition to the present itself, a piece of paper with wishes will be placed (it should be as long as possible and folded into an accordion).
If you are going to a child's party, then make a gift box for him in the form of a piece of cake and be sure to place a couple of cartoon characters made of cardboard inside. And in order for them to really be a surprise for the baby, attach the figures to flexible springs that will push them out as soon as the lid is removed from the box.
How to make a gift box with wishes?

 Master class on making a pyramid
 Recommendations for making a pyramid
 If you want your gift box to be both packaging and a greeting card, then make it in the shape of a pyramid. In the photo above you can see templates that can be used to make a small pyramid. But if you try to enlarge the scale of the drawing, you will eventually be able to make a pyramid on which you can place wishes.
Remember, in order for such a surprise to look interesting, the scale of the picture must be increased at least twice. Only in this case will you have the opportunity to make pockets on the outside of the product, in which you can later put cute notes. Yes, and remember, these pockets do not have to be made of paper; you can quite easily use, for example, lace for this. Just when you attach them, use a stapler instead of glue.
How to make a transparent gift box?
 Rectangular gift box
  Tall gift box
  Triangular gift box
 Above, we have already shown you how to make a gift box from cardboard and plain paper, and now you will learn how to make a very cute transparent package. The best part is that you don’t have to buy material to make such a craft.
Since it is made from an ordinary plastic bottle, you only have to buy ribbons and gobbets for decoration. So, take a transparent plastic bottle and cut off the neck and bottom from it. As a result, you should be left with a perfect cylinder in your hands. Then take your scissors and carefully cut it exactly as shown in the picture.
After you're done with this, start bending the material so that you can clearly see all the edges of the future craft. If you can't do this with your hands, then use scissors for this. As soon as you realize that the plastic has become more obedient, you can safely assemble the box. For security, tie it with a satin ribbon.
How to make a box for a women's gift on March 8?
 Template #1
 Template No. 2
 Template No. 3
 It just so happened, but for some reason most women associate March 8 with delicate branches of mimosa and scarlet tulips. That is why when making a box for this holiday, you must remember that there must be flowers on its outside. Whether they are drawn or made using appliqué is up to you to decide. The main thing is that your packaging shows with all its appearance that spring is coming very soon.
If you don't want to spend extra time decorating the box, then invest in scrapbooking paper. If you are ready to work a little, then you can download some interesting template on the Internet, make flowers using it and cover the finished box with floral applique. Also, if you wish, you can simply paint it beautifully.
How to make a box for a men's gift on February 23?

 Template No. 1
 Template No. 2
 Template No. 3
 If there are real men in your family, then you simply must make February 23 a special day. The right gift wrapping will help you create a festive atmosphere. In principle, it can be done quite simply. You can make a box according to any template or master class that we introduced you to, only taking into account the fact that you are preparing a gift for a representative of the stronger sex.
That is, in this case it is best to forget about flowers, curls and all sorts of feminine things. It will be better if you make a gift box from paper with a camouflage print, or simply paint the finished product in different shades of green and brown. If you want to pack a present for an older man in this way, you can try decorating the box with a red star or any other attributes of the Soviet era.
You can also draw it, or print out the template and use the resulting blanks to make the desired applique. Well, if you are a lover of everything new, then try making a box in the shape of a men’s shirt. You can see how to do it in the picture, which is located a little higher.
How to make a gift box for lovers on February 14?

 Box for February 14
 Template No. 1
  Template No. 2
 Template No. 3
 Many people think that making a heart-shaped box is very difficult. In fact, such a product is made according to the same principle as all other packaging. All that will be required of you in this case is simply to find the correct template and use it to glue the box together. We decided to make the task easier for you and therefore offer you a choice of several interesting ideas for gift boxes for February 14th.
If you decide to make the largest and most voluminous one, remember that in this case you will also have to make a product consisting of two parts. One part will act as the gift box itself, and the other will be the lid. Therefore, when cutting out the frame of a future craft, be sure to double-check whether one of the parts is slightly larger in size.
As in the case of a rectangular product, this is necessary so that in the end you can easily put the upper part on the lower part. As for the color of the box, it doesn't have to be red, if you want you can make the heart pink, raspberry or even purple and white.
How to make a wedding gift box?
 Template #1
 Template No. 2
 Template No. 3
  Template No. 4
 Template No. 5
 It’s probably not even worth mentioning that a wedding gift box should be special. And the point here is not in the shape of the product, but in its decor. Therefore, feel free to choose the template according to which you would like to make such a craft, and then begin to think about what the finishing of the finished product will be like.
I would like to say right away that in order for you to end up with something truly festive, the decor should be multi-layered. That is, you can create volume using flowers, leaves or hearts glued to each other and complement all this beauty with elegant curls made of rhinestones and sequins.
It is best for beginning needlewomen to opt for square and rectangular crafts. Such products are not only made faster, but also easier to decorate. Since you will actually have a canvas in front of you, you can first lay out the future picture from the elements, see how all the details will look together, and only after that start fixing them.
How to make a birthday gift box?

 Template for making a cake
 Template #1
 Template No. 2
 Template No. 3
 Birthdays are one of those holidays that everyone looks forward to. It makes no difference how old the hero of the occasion is; on this day he still wants to feel most loved and dear. And what else can take us back to childhood and give us wonderful memories if not a gift packed in a box simulating a birthday cake. It’s easy to make such a craft, the main thing is to show a little patience.
Above you can see a template that you can use to make one piece of cake. If you see that in the end the gift wrap will be smaller in size than you need, then increase the scale to the desired size, just making sure that all proportions are respected in the process. Then make the required number of pieces, fold them into a circle and measure the diameter of the resulting figure.
But based on the data obtained, cut out a round stand on which you will place all the workpieces. If you wish, you can cover its edge with openwork snowflakes or lace. When the stand is ready, fill all the boxes with presents, form them into a cake and secure everything with a satin ribbon.
How to make a gift box for the New Year?
 Template #1
 Template No. 2
  Template No. 3
 Template No. 4
 Template No. 5
 As you probably already understood, if you wish, you can make a holiday box of any shape and color with your own hands. As for the New Year, in this case too you will have plenty to choose from. If you show a little patience and ingenuity, then with the help of our templates you can make a beautiful snowman, a fluffy Christmas tree, a house or Santa Claus.
If you print the templates on a color printer using photo paper, then all you have to do is cut out the parts of the future gift box and carefully glue them together. If you don't have the opportunity to print templates, you can always make gift wrapping from a paper bag and a winter applique, such as the head of Santa Claus, the Snow Maiden or a snowman.
In this case, the bag, depending on the chosen character, will need to be made red, white or blue, and then a head, for example, Santa Claus, will be glued to the very top of the bag. You will need to stack two of them and be sure to provide holes at the very top for ribbons, which you will later use to tie your gift.
How to make a box for a cash gift?

 Template #1
 Flowers for decoration
 Nowadays you won’t surprise anyone with a gift envelope for money, so most people try to present it in a more original way. The best option for such a case would be a cash gift box. You can make it using a fairly simple template. True, when making such a craft, you must remember that in this case you will be making a box, the inside of which will slide out.
Therefore, if you see that the sides of the product do not hold their shape well, then be sure to strengthen them. If you do this using cardboard, then one strip will be enough. If you use less dense paper, then first glue several pieces together, and only after that fix this element on your craft. And, of course, remember that until all the parts of the product are fastened together, it is not advisable to move the internal part.
If we talk about the finishing of such products, then everything depends solely on your imagination. You can decorate a cash gift box with whatever you have on hand, or try making flowers from scrapbooking paper. You can see how they can be made a little higher.
How to make a gift box for sweets?

 Recommendations for making a box


 Simple box for sweets
 In principle, the box for sweets can be anything. You can, for example, make a cake from boxes that imitate pieces of dessert (we described how to do this in the previous paragraph of our article) or make something simpler, for example, a round or rectangular box. Therefore, choose which shape you like and start making your holiday craft. If you don’t like such products, then try making boxes using the templates located a little higher.
But I would like to say right away that no matter what you choose, you need to pay special attention to the material from which you will make your craft. In this case, it is strictly forbidden to use thin standard paper as it is unlikely to be able to withstand the weight of the sweets. Therefore, it will be better if you spend money and find the most dense cardboard in a specialized store that will not require additional reinforcement.
Scrapbooking paper is also suitable for creating such a masterpiece, just try to find a material on which a child's drawing will be applied. These could be castles, princesses, cute animals, racing cars or even Legos. But even if you don’t manage to buy something like that, then just use your imagination and decorate the product with appliqué.
How to design and decorate a gift box with your own hands?
 Paper roses
 Lush flower
  Corrugated paper flowers applique for decorating gift boxes
 If you were attentive, you probably realized that you can decorate a gift box with any decor. Therefore, you can even use simple colored paper as a decorative material. So, draw a flower of the desired shape on it in different sizes. After this is done, all you have to do is carefully cut out the blanks and then layer them on top of each other in 3-4 layers.
At the same time, you must ensure that the petals of your flowers are not located opposite each other. It will be better if the petals of each new ball move a little. This way you can achieve the effect of fluffiness and visual realism of the flower. You can also paste over the finished box with hearts, stars, openwork snowflakes, small notes with wishes and various kinds of signs.
In addition, you can make bows of different shapes from paper and also place them on the craft. And, of course, don’t forget that paper can be easily decorated with crafts made from ribbons and fabric. You can see how they can be made in the master classes posted a little higher.
Video: How to make a gift box in 10 minutes?
Textile napkin

A couple of fresh, crispy baguettes and a jar of marmalade, wrapped in a festive napkin and complemented by a wooden juicer. This is one of thousands of edible gift options for cooking lovers and true aesthetes. Try to dream up a little on this topic: instead of marmalade, put a jar of pate in a napkin, and instead of baguettes, put homemade pancakes.
You can make cute tags for original gift packaging with your own hands by cutting out small squares from thick paper and trimming their edges with curly scissors.
Kraft paper and thread

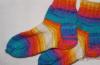
Agree, this is the best packaging for soft New Year's gifts: mittens, scarves and woolen socks. Fold two sheets of craft paper together and draw the shape of a star, sock, heart or Christmas tree on them. Cut out the shape, put the gift between the layers and machine sew it with a contrasting thread (red or gold), stepping back about 1-2 cm from the edge.
Paper scraps

Wrap the gift in white wrapping paper and place a small strip of decorative paper down the center over it. Decorate the packaging with a cord and attach a small detail that will complement the gift. Place a congratulations sticker on top. Great idea for wrapping New Year's gifts!
Potatoes and paints

Take a piece of fabric so that you can easily fit the gift into it. Cut a large potato in half and carefully cut out the letter shape with a knife. Blot excess moisture with a paper towel, and apply acrylic paint to the cut out letter. Then press the “seal” onto the fabric.
Old maps

Pages from an old atlas and road maps look very stylish as homemade gift wrapping. And instead of tying a bow on top, add a quirky touch to the package: spray paint a leaf on a houseplant with gold spray, use a bright button and lanyard, or make a flower out of scraps of fabric.
Newspapers and twine

Edible white paper is a great background for silhouettes with Christmas symbols. Print and cut out the stencils, transfer them to newspaper pages or brown kraft paper, and then cut out the silhouettes. Glue them to the box in several places and tie the gift with simple twine.
Pins and buckles

Another original idea for wrapping New Year's gifts. Beautiful belt buckles and hairpin details are ideal for decorating a gift box. The buckle will not only add a glamorous look to the gift, but will also secure the ribbon. So the next time you want to throw away your old belt, think about how a cute buckle can enhance your gift.
Elegant homemade products

Make your own wrapping paper using stamps and metallic inks available at hobby stores. Combine colors and patterns.
You might also be interested in:
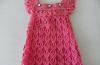
Children's dress "Angel Feather" crocheted. Master class from NINASOKOL - "COUNTRY OF MOMS"....
Sizes: 62-68 (74-80/86-92) 98-104 You will need: yarn (100% cotton; 125 m/50 g) -...

The coat has a straight and trapezoidal cut, without outstanding details and unnecessary decorative...

The armpit area is reliably hidden from prying eyes, but you just have to grab the upper...

Emolium is an effective and safe product that moisturizes and soothes the skin, helps...

