


A home robe is an important part of your daily wardrobe. It is worn with pleasure by children, women and men. It can be thin and sexy or warm and soft, it is convenient to wrap up in it after a bath or throw it over pajamas in the morning. There are many different models in stores, but if you have the time and desire, then you can sew a bathrobe yourself.
Where to start?
Sewing a homemade dressing gown with your own hands is not so difficult. This is something even a beginner can do. To perform the work, you must be able to use a sewing machine and have minimal seamstress skills.
In the process you will need:
- Textile;
- Tape measure;
- Scissors;
- remnant;
- Threads and a needle;
- Sewing machine;
- Iron.
When choosing a fabric, consider the purpose of the product. Kimono and summer robe are sewn from silk, chintz, bath and winter hoodies of their terry, flannel and woolen fabrics. Models can be chosen different, but the most simple in tailoring products with a smell.
To calculate the required amount of matter, you need to decide on the style. To sew a sleeveless robe in sizes 46–48 from a fabric 150 cm wide, you will need 1 length of the product + 2 cm for the hemming, at 80 cm you will need 2 lengths. But for a product with a long sleeve, more material is needed.
Cutting fabric
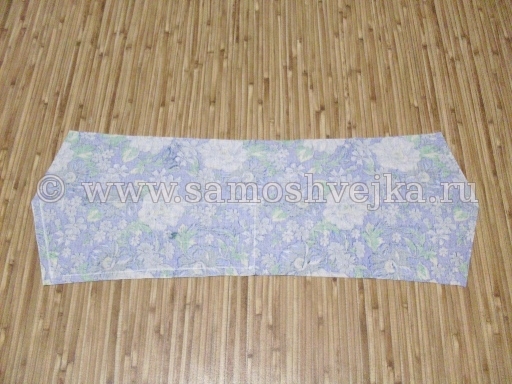
How to sew a bathrobe with a smell with your own hands? Before applying the markup, be sure to smooth the fabric so that there are no creases. Lay out the finished material on a flat surface. The wide fabric is folded in half along the longitudinal line with the front side inward, the narrow one - along the transverse line. Next, mark with a small piece or a piece of dry soap.
On a narrow fabric on the left side, retreating 1.5-2 cm, draw a straight line down - this will be a seam on the back, for a wide fabric this is not necessary. It is more convenient to build a bathrobe pattern from top to bottom.
From the left edge, go down 1 cm - this is the indent for the line, draw a straight line from this place to the right. At this horizontal mark, measure 9 cm from the fold to the edge, and go down 2 cm from the left corner and put a mark. Smoothly connect these two points. This is the back neckline.
Calculate the width of the robe using the formula: POB + 20 cm, where POB is the half-volume of the hips. Set aside the resulting value to the right of the fold. Draw a straight line from top to bottom at this point. Make a front cutout on it.
To do this, measure the distance from the shoulder to the waist. Set aside this value on the constructed line. On the upper horizontal line to the left of the edge, mark 9 cm, and put a dot. Now smoothly connect these two labels.

It remains to make armholes and cut out the details. Divide the top horizontal line in half. From this point down 26 cm, draw a straight line, it will be necessary to make an incision along it. With scissors, carefully cut out the details along the lines.
Dressing gown
Experts recommend sewing a summer robe with your own hands in the following sequence:
- The edges of the fabric are processed on an overlock. If it is not there, process them with a zigzag;
- Then you should sew the back;
- Fold the front and back face to face and, aligning the shoulders, make a basting, then stitch;
- Tuck the edges of the sleeves and the bottom, baste and try on, if everything is fine, feel free to scribble;
- With an oblique trim or finishing material, process the edge of the front and the neck;
- Sew a belt from the rest of the fabric.
A hand-sewn robe is ready! It remains to stroke it, remove the basting and you can put it on. Sewing a dressing gown for a child is also just right for this ... terry towels!
Baby bathrobe from towels
For a child, sewing is a little easier. First, the sizes are small, the fabric consumption is less. Secondly, the patterns are simple.
You can sew a children's dressing gown with your own hands from your old things or bath towels. To build a pattern, fold the cloth in half inside out and lay it out on a flat surface. Measure the width of the towel and divide this value in half to get the center line (axis of symmetry). To the left and to the right of it at the very top, measure 5 cm each - this is the width of the neck. On the back, go down 1 cm - this is the depth. Connect the dots smoothly.
On the axis of symmetry down, measure 15 cm and put a mark. Draw straight lines from the extreme points of the neck width to the mark on the center line. This will be the cutout on the chest.
Step back 20 cm from the fold line along the edges down, this will be the width of the sleeves. Children's hoodie can have arbitrary sizes. In order to calculate the width of the robe, you can use the formula: POB + 10 or 15 cm. Divide this value by 2 and set aside the resulting centimeters to the left and right of the center line.
From these points, draw parallel straight lines. Draw a line perpendicular to them, connecting the sleeve width marks to each other. At the intersection point on both sides (armpits), smoothly round off the corners. The pattern is ready. It remains to carefully cut and you can start basting.
To sew such a kimono robe with your own hands, first go through the sides, bottom hem, front trims and sleeve edges with a basting stitch. Having tried on a dressing gown for a child, sew all these places on a typewriter and pull out the extra threads. Finish the neck with a finishing tape. From the remnants of the fabric, make a belt. The product is ready!

If desired, the front can not cut the fabric completely. Simply cut a hole for the head and process it. You will need to put on a robe over your head. This option will be convenient for older children.
What to pay attention to?
If, when cutting the material, you see that the dressing gown turns out to be short or the sleeves are not long, then these details can be easily increased by additional stripes.
We sew a dressing gown for ourselves. Master Class. + How to draw a life-size pattern. Master Class.
Consider tailoring a dressing gown with a lowered armhole. The pattern is given for size 46,
length 102 cm - slightly covers the knee. You can sew a dressing gown from coarse calico or calico.
Fabric consumption - coarse calico 1.5 m wide - 1 length + pocket ~ 1.3 m;
chintz wide 0.8 m - 2 lengths + pocket ~ 2.3 m.
Roll consumption - use a purchased roll of a suitable color ~ 2.1 m (for a bathrobe
with a regular armhole - 2.3 m).
For fastening you will need a detachable zipper 70 cm.
Pattern. Scale 1:4When cutting, we add 1 cm to the seams along the shoulder and side seams and along the bottom.
We do not add on the neck and armholes, because we process them with a rudder.
We do not add for attaching lightning, because the lightning has its own width.Sewing plan.
1. We sew the shoulders, process, iron forward.
2. We iron the steering wheel in half lengthwise, leaving one side 1 mm narrower.
We process the neck, armholes and top of the pockets with a roller.
3. Iron the side and bottom edges of the pockets inside out by 1 cm, except for the edge that will be sewn into the side seam. We attach pockets where shown in the pattern, fixing the top corner well.
4. We sew the side seams, process, iron back (because of the pockets).
We fix the top of the side seams.
5. We process the edges where the lightning will be attached, and the bottom.
6. We iron the edges where the zipper will be attached, and the bottom of the robe by 1 cm
inside out.
7. We outline the zipper “to the edge” and also attach it, well fixing the line at the ends of the zipper. You can also sew the bottom of the robe with the same stitch.The diagram shows a pattern of a dressing gown with a regular armhole. The sewing order is the same.
Since this is a dressing gown - clothes that do not require a perfect fit, we sew without darts, and we can also increase the pattern using a simplified method.
Size 48 can be made from 46 - just add 1 cm to the side seams. Size 50 of 46 - you need to draw a vertical line so that it passes through the shoulder, cut the pattern and push it 2 cm apart, that is, both the front and the back are increased by 4 cm
For size 52 - move apart by 3 cm. For a larger size, a finer adjustment is needed.
http://milca.ru/robe.htmlHow to draw a pattern in natural size. Master Class .
When describing the models, patterns are given on a scale of 1 cl \u003d 4 cm and 1 cm \u003d 4 cm.
How to use a pattern on a scale of 1 cl \u003d 4 cm, consider the example of a pattern
bathrobe. First, we build a rectangle according to the largest vertical and horizontal dimensions. To do this, we count the number of cells in the desired direction and multiply it by 4 cm. In our case, the vertical size is 25.5 cells * 4 cm = 102 cm. The horizontal size is 9 cells * 4 cm = 36 cm. In order to enter pattern in this rectangle, sequentially draw the neck - a horizontal point 2 cells * 4
cm \u003d 8 cm (point A), the vertical point of the neck of the back - 0.75 cl * 4 cm \u003d 3 cm (point B), the vertical point of the neck of the front - 3.75 cl * 4 cm \u003d 15 cm (point C). We connect points A and B with a smooth line - there will be a back neck, points A and B - there will be a front neck. The number of cells can be counted either from the nearest point, or from the boundaries of the initially built rectangle - as you prefer.
We find the other points in the same way. Shoulder line - horizontal length
3 cells * 4 cm = 12 cm. Shoulder slope - 1 class * 4 cm = 4 cm (point D). Connect points A and D with a straight line.
Armhole - retreat from point G horizontally 2 cl * 4 cm = 8 cm and vertically down
4.5 cl * 4 cm = 18 cm, set point D. Connect points D and D, drawing an armhole with a smooth line.
From the lower right corner of the rectangle we set aside 2 cm upwards, set point E, connect points E and D - the line of the side, connect points E and E, drawing a smooth line down the robe.
Pocket - from point D down vertically we set aside 7 cl * 4 cm = 28 cm, put point F on the side line, from point F down 4 cl * 4 cm = 16 cm, put point Z on the side line, from point Z horizontally set aside 4 cells * 4 cm = 16 cm, put the point I.
We complete the pocket - we build a perpendicular 16 cm long from point I up, put point K, connect points K and G.
The pattern on a scale of 1 cl = 4 cm is completely drawn in full size.
Hello my dear!
I just want to write about what I constantly forget. Girls, everyone who wrote me letters asking for help in building any model in the last two months and did not receive an answer - write again! The fact is that I lost the file with the saved models, and looking for something in the mail is simply not realistic! There are a lot of letters ... I will definitely try to help you.
Another small digression. Probably, many people know that I am fond of not only modeling patterns, but also knitting. And recently I found crochet napkin pattern for beginners, where everything is detailed. Crochet a beautiful doily and decorate your coffee table with it. So the house will become a little more comfortable and dear 🙂
Now let's move on to a new topic that I have long wanted to cover on the blog. Patterns for women and men for everyday and festive occasions are in abundance, but there are practically no home clothes. But the house occupies a large part of our lives.
It is at home that we should not look somehow, but always neat and beautiful. Let it be loose trousers or a cozy bathrobe, but the original cut will make you not just a “housewife”, but a beautiful and desirable woman!
That is why, I will try to pay a little more attention to this topic than before, and find beautiful variations of clothes for the home. If you have any suggestions, I will always be glad to consider them 🙂 write to the mail, or fill out the feedback form.
Today we have simple robe pattern , which will serve as the basis for some of our models. Throughout the article, I will show what models can be sewn from this pattern - the main thing is fantasy!
The dressing gown looks very interesting due to the beautiful fabric and plain edging with lace, and the pattern is insanely simple! And in order not to torment you for a long time, I propose to proceed to its construction.
Construction of a bathrobe pattern
But before we start, let's discuss the features of the robe pattern:
- loose cut;
- maximum length - "to toe";
- a small flare from the hip;
- wide edging of the robe along the lines of the middle of the front, the bottom of the robe and the sleeve;
- lowered shoulder line;
- slight odor effect.
That's all there is to know about the model.
A simple robe pattern is built on the basis. By doing this, we make our lives much easier 🙂 that is, we don’t need to build the foundation again, because anyway it will have to be changed quite a lot. And then he took it and corrected it in the right place and everything is ready!
 But I want to note that the pattern of the bodice without darts with us goes in a slip, that is, without increments. Therefore, think about it, maybe it’s worth building a new pattern without darts, but with increments (1 degree)? I have one. That is what I base it on.
* Note for beginners: increases must be taken from. You can find out how and where and you can add from the same table! We saw an increase in the girth of the chest - then we add it to the volume of the chest. And it is important to remember that the increase is highly dependent on the formula in which it is substituted. For example, you want to set aside ½ of the hips. We find the increase: from 0 to 8 cm. The formula will be as follows: ½ * (hip circumference + increase) \u003d (hip circumference + increase) / 2.
The construction of a bathrobe pattern can be divided into the following steps:
- Move the two halves so that the extreme points of the hips (along the side seams) coincide. Complete the missing section along the armhole line. Delete unnecessary lines and build a new side seam line.
- The shoulder line must be made longer, so from the end point of the shoulder we set aside 2 cm upwards and connect it to the starting point of the shoulder, and on the continuation we set aside 6 cm. From the auxiliary point on the armhole to the left 3 cm. Down the line of the side seam 4 cm and connect everything points of the new armhole.
- At the waist from the side seam to the right and to the left, 3 cm each. Connect to the point of alignment of the hip line and the lower point of the armhole of the sleeve.
- From the waist down the back, set aside the standard value of 110 cm. However, it is not fixed. You can always (and should!) tweak it for yourself.
- Set aside 6 cm on the bottom line from the side seam in both directions and connect to the thigh point (on the side seam). We get a slightly flared cut.
- Now let's build the edging for the robe. From the waist to the right (the extreme point of the front) 10 cm. We connect it with the point of the beginning of the shoulder with a smooth line. The width of the edging along the shoulder line is reduced by about 2-4 cm. That is, we use a width of 6 to 8 cm. From the waist, simply lower the perpendicular to the bottom line. Edging along the bottom line - up 10 cm.
Thus, you will get a pattern for the base of the robe.
Now you need to build a sleeve pattern. How to build a sleeve, we have passed more than once. This is just the difference in some formulas. I won’t describe the algorithm here, just watch the video and repeat after me 🙂
How to make a robe pattern
Let's move on to watching a video clip with step-by-step instructions for building a robe pattern:
And if you want to download the lesson "How to make a dressing gown pattern", then feel free to
There is nothing better than while away the hot summer days at home or in the country in light clothes. Spacious, breathable, comfortable, it is a must have in every woman's wardrobe. The most common type of home women's clothing in the summer is everyone's favorite dressing gown. Such a new thing will be worn all summer, and sew a bathrobe with loop and button closureyou can do it yourself, spending only 2 hours of time.
How to cut a dressing gown
In order to cut a robe, you will need any experienced pattern of the base of the shelf, back and sleeve of a women's blouse, dress or jacket. It can be printed using a specialized disk with a cutting program or from a website on the Internet, or you can build it yourself.
You can use a nightgown pattern (48-52 rubles), see and model a dressing gown based on it.
The pre-ironed fabric should be folded in half with the right side inward, all the details of the cut should be laid out on it, if necessary, add the length, as well as allowances for the seams, and cut it out.
The robe of the simplest cut has the following cut details: 2 shelves, back, 2 sleeves, 2 pockets, collar. On the shelves there are one-piece strips for fastening.


How to sew a home dressing gown with a fastener for loops and buttons with your own hands, a master class
Sewing a bathrobe should begin with the preparation of shelves. One-piece planks need to be ironed first by 6 cm, and then, bending in half, iron this fold.

With such processing, the necessary rigidity of the planks is achieved by the thickness of an additional layer of fabric; there is no need to duplicate the plank.
The upper cut of the pocket must be ironed 4 cm, and then folded in half and iron the fold.

On each pocket, lay the finishing line along the folded hem, and also overcast and iron 1 cm towards the wrong side along 1 side cut, and at the same time the lower cuts. Pockets will be located on the right and left, so you need to overcast the right and left side sections.

The prepared pockets need to be stitched onto the shelves, applying the raw cuts to the side cuts of the parts. The top edge of the pocket should be in line with the hips, the pressed side should be parallel to the bead line. The loose side cut of the pocket may slightly go beyond the side cut of the shelf, it can be trimmed. In the corners of the pocket, it is necessary to stitch the fasteners to avoid tearing the pockets during the operation of the dressing gown.


The prepared shelves should be stitched with the back along the shoulder and side cuts, overcast the seam allowances and ironed towards the back.

Then the dressing gown should be swept away or chopped off with pins for priming. This operation is necessary so that all sections of the product are symmetrical, and the bottom line is smooth and beautiful.
The robe needs to be chopped off at the armholes, neck, side and bottom. With chalk, you need to draw a new bottom line, along which the product will be built.


After basing the thread, the basting or pins are removed.
Then you need to grind the corners of the slats along the bottom of the product, and overcast the bottom cut.


Prepared sleeves should be sewn into the armholes of the product. For convenience, you can pre-sweep them, combining the control signs on the sleeves and armholes. The seam allowances must be overcast and ironed towards the sleeve.


The next step is to prepare the collar. To do this, it must be duplicated, grind its ends. Ledges of corners carve close to the line.

Then the collar must be turned out and ironed.

The finished collar must be sewn into the neck of the product, overcast the seam allowance and iron on the product.

Then it is necessary to give a finishing line along the edge of the bar, at the same time lay it along the bottom of the product ironed by 1 cm.


After that, on the straps you need to sweep the loops, sew on the buttons. The finished robe should be ironed.

Did you like the master class? Then go to our section and choose the next idea for sewing!
- an irreplaceable thing that is present in the wardrobe of almost every woman. Of course, there is a category of people who categorically do not recognize this type of home clothing, considering it rustic and unattractive. However, most simply cannot do without it - for example, it is very convenient to get out of the bath or shower in the evening, and also go to the toilet or the kitchen in the morning to have breakfast.
In addition, the stereotype about the unattractiveness of this type of home wear has long lost its relevance - now you can buy anything in the store - from soft fluffy terry bannik to super-sexy silk and lace negligee. The choice is yours. But if none of the options you saw suited you, you can completely sew a homemade dressing gown with your own hands. We bring to your attention a few simple ideas on how to sew a bathrobe with your own hands.
How to sew a dressing gown without a pattern?
This master class is suitable for those who are just starting to master the art of seamstress and have only minimal skills. In order to sew such a robe, you do not need to draw a pattern - everything is done literally "by eye". In addition, this is a great way to use up an unnecessary piece of fabric, better than a baize or flannel, which could be lying around with you from time immemorial, inherited from your mother or grandmother.
So, we need:
- textile;
- scissors;
- tape measure;
- threads;
- sewing machine;
- iron.

Progress:


We sew a beautiful bathrobe with our own hands from towels for a child
This is a great way to "attach" annoying bath towels. Your baby will surely like this dressing gown, because it will turn out soft and comfortable. This guide assumes a 3-4 year old robe.
You will also be interested in:

Sewing machines can seem intimidatingly complex to those who don't know how to...

Of course, household appliances greatly facilitate the life of a woman, but so that the machine does not ...

Tatyana Boyarkina Organization of summer recreational activities in a preschool...

"The best thing to do with psychics is to drive with a filthy broom!". Ural...

Divorce is always stress, emotions, tears. The very word "former" is given in the soul with pain, ...

